Sauce AI for Test Authoring
This feature is available as a paid add on for Enterprise users. Contact us to learn more!
Sauce AI for Test Authoring is a new way to create, edit, manage, and run test scripts at scale, all without writing a single line of code. This tool enables you to write your test goal in the form of natural-language prompts, connect to your web or mobile application via a real device, virtual device, or browser, and let a large language model generate structured, editable, and runnable test flows for you.
Sauce AI for Test Authoring is an intelligent agent for testing built into the Sauce Labs platform that solves the constraint of needing specialized coding knowledge.
How it works:
- The LLM interprets your goals based on natural language and converts them into executable test steps, which are then captured, reviewed, and translated into test code.
- You can then save those generated test scripts and run them at scale using low-code automation.
- The test results are visible as automated test runs on Sauce Labs.
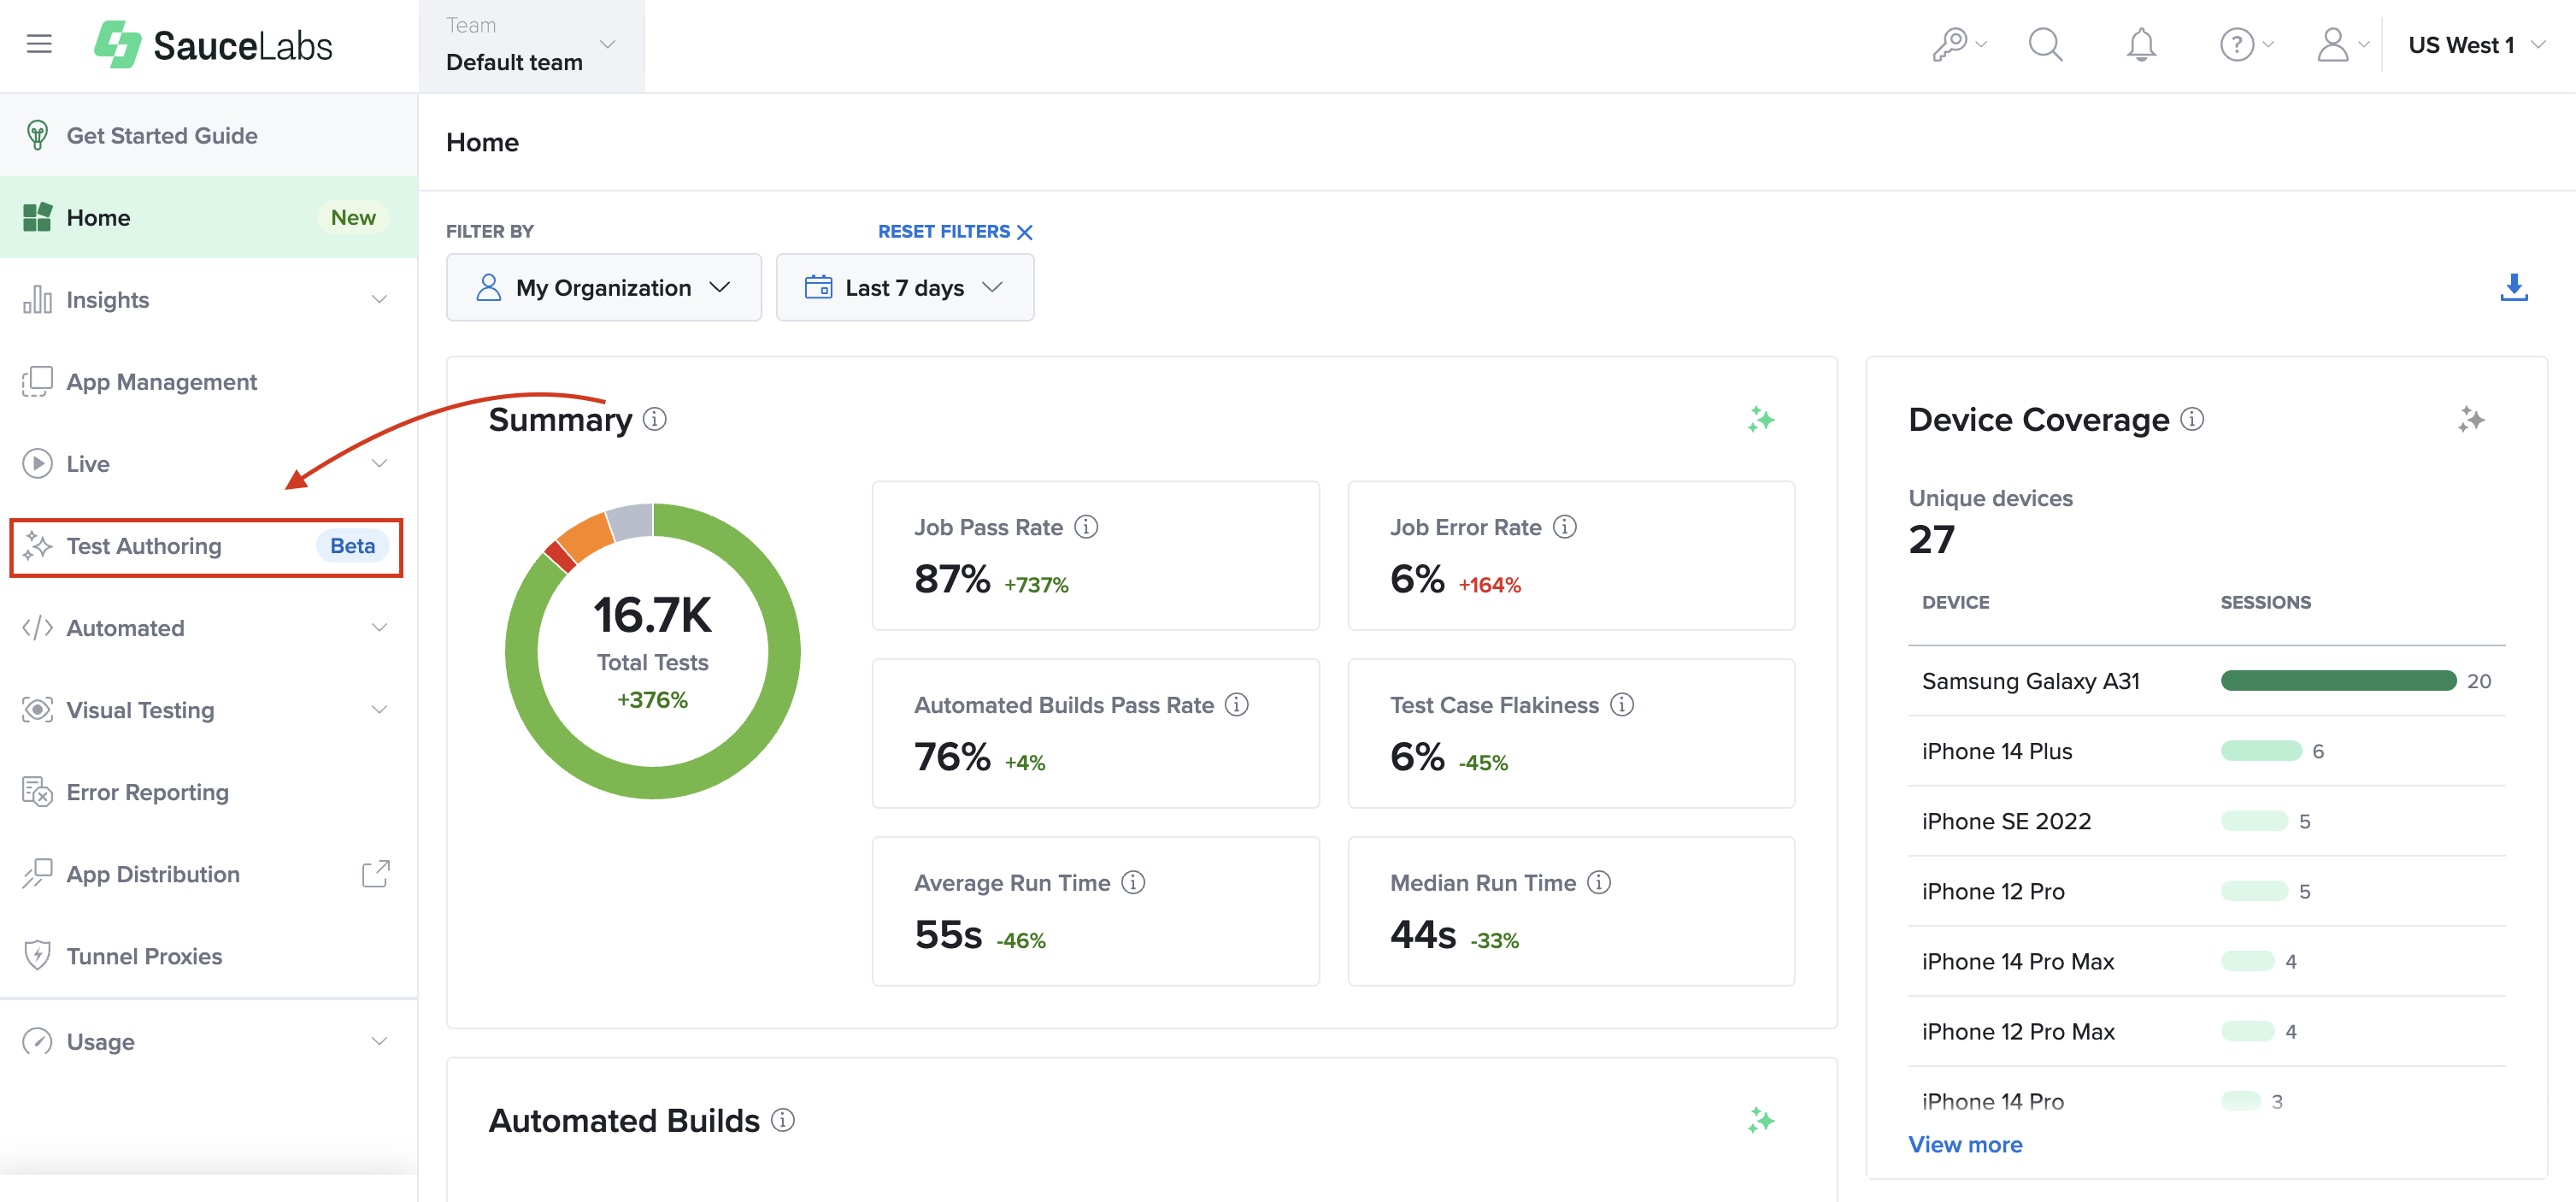
Sauce AI for Test Authoring lives inside the Sauce Labs platform as an add-on offering where generated test scripts are stored. You can access it from its own page by clicking Test Authoring in the left navigation.
Prerequisites for Use
- You need to have a Sauce Labs Enterprise account to access the tool.
- The tool requires the availability of real or virtual device concurrency to generate test cases.
- To create native mobile app test cases, the application builds need to be uploaded into App Management.
Test Case Generation
To create the test script, follow the steps below:
-
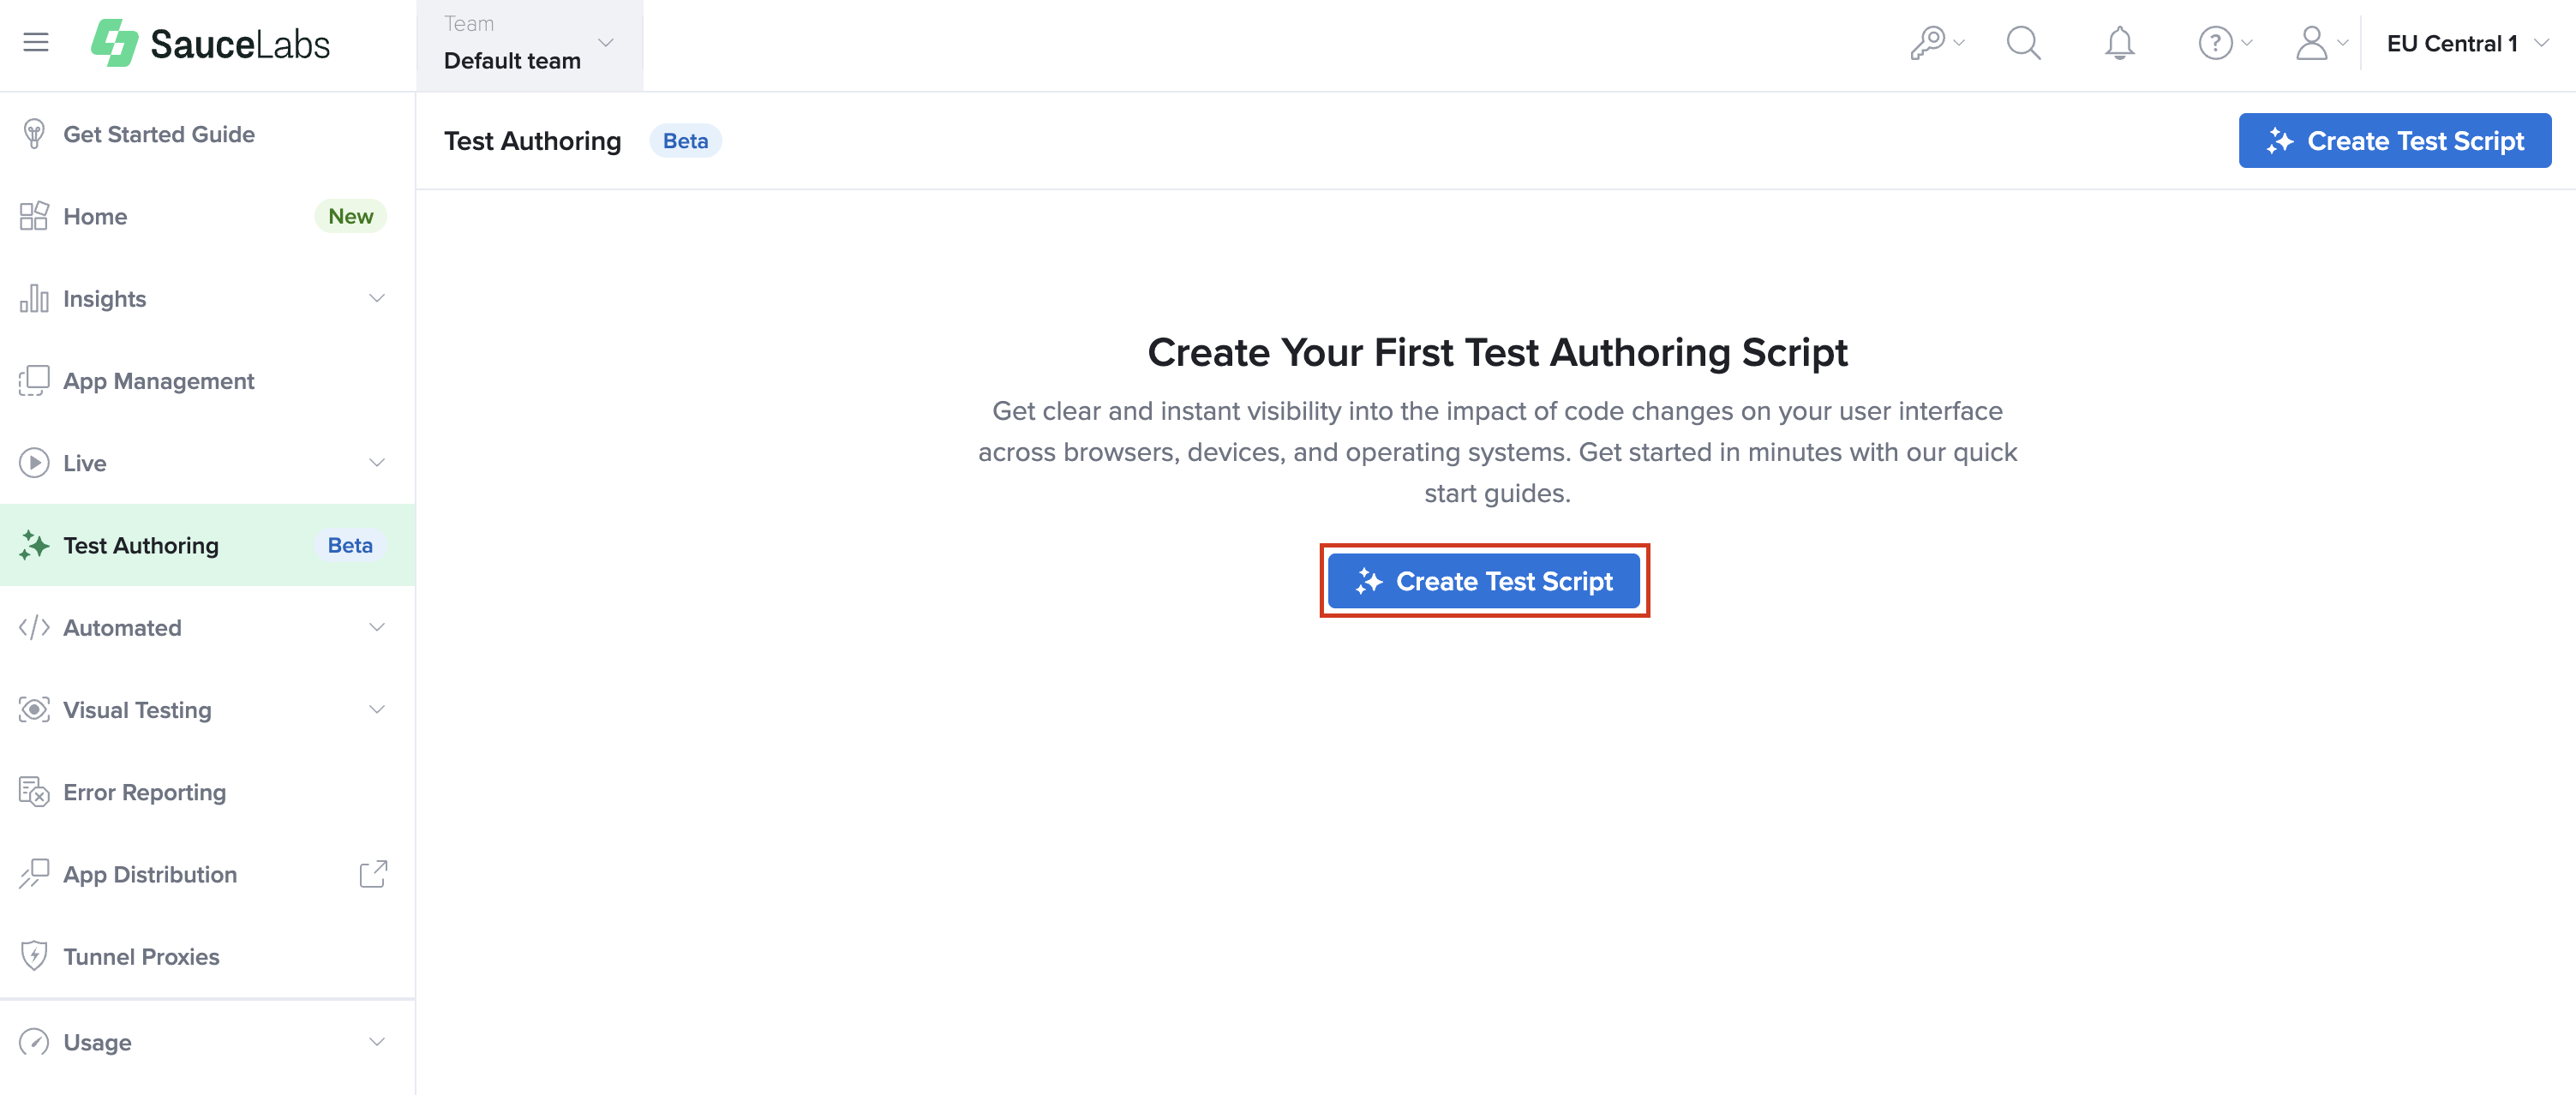
Click on Create Test Script to start generating a test script.
-
Select the type of test you want to perform: Web or Mobile app:
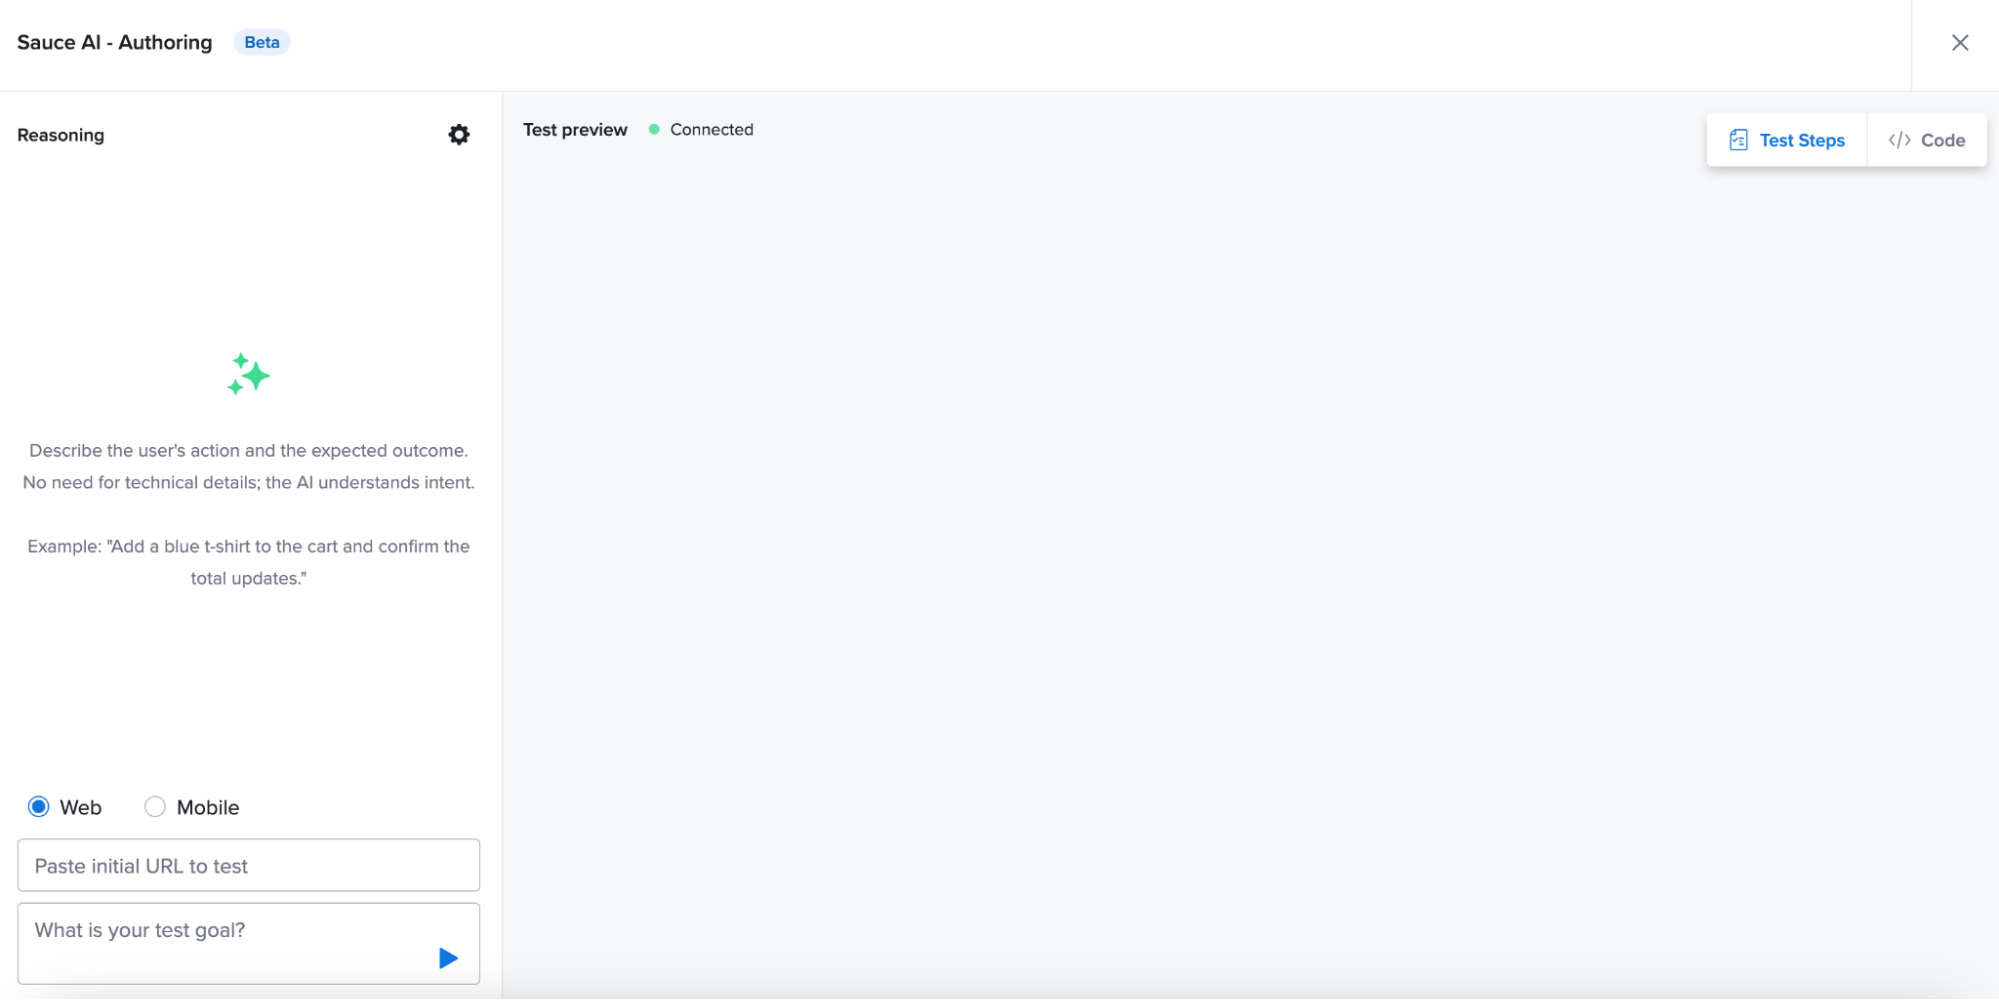
For web tests, you enter the full URL of the application under test.
For mobile, you select an app from your uploaded assets in App Management. Native mobile support is enabled for both Android and iOS. This means you can create mobile-specific tests using APK, IPA or ZIP files that have been uploaded through the App Management interface. The mobile app dropdown will show the latest uploaded files with a specific filename.
-
Optionally, you can set additional settings for test generation before starting the prompt. Click on the Cog icon to fill in required settings for generation.
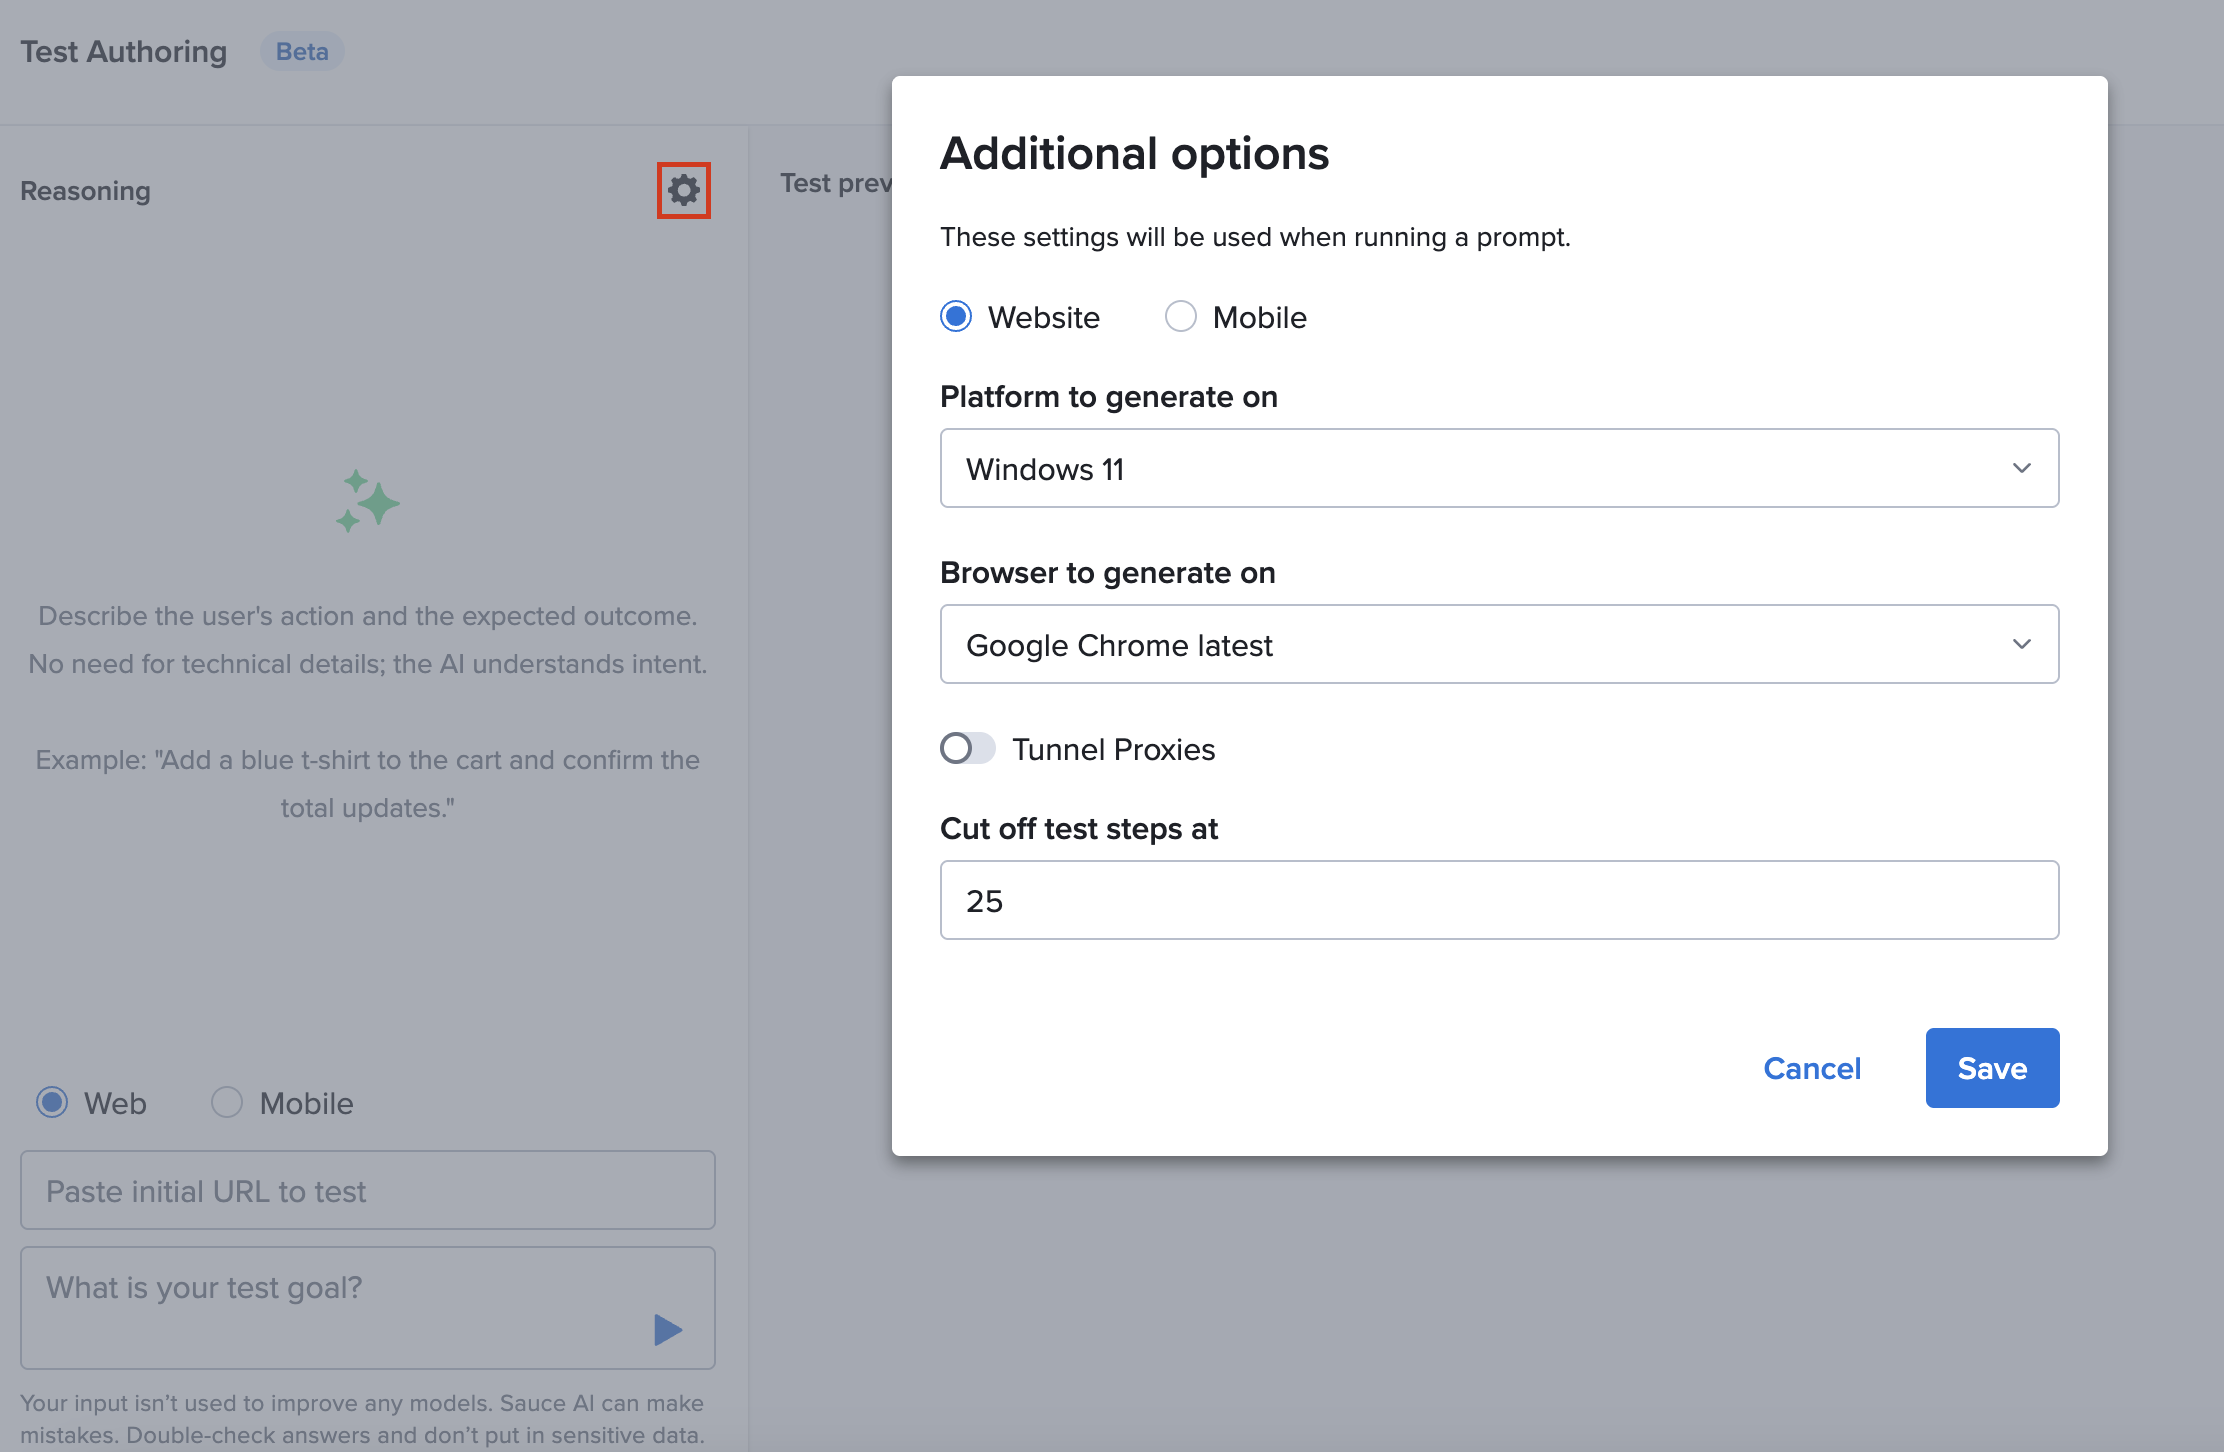
You can select the following options here:
- Select the specific OS and device/browser to use for test generation.
- Set the tunnel if you are testing in gated environments.
- Adjust the step cut-off to limit the number of steps the test should have (maximum is 50 steps).
The platform remembers the last-used configurations for convenience. If you don't set those, then Sauce Labs will use predetermined defaults that are available for the type of app you are testing.
-
Write and run the prompt. Once you've provided the application context, you can write a prompt to describe the test intent, either in plain language (e.g., “log into the app and verify the dashboard appears”) or in structured formats like Gherkin-style steps. Both are supported. Check out guidelines for prompting here.
You can submit the prompt by clicking the Submit icon, and a live session will be launched. The LLM connects to the target device or browser and interprets your prompt as a set of interactive test actions. The system supports the click, input, and scroll interactions, while others such as right click, drag, or long press are going to be added at a later stage. These actions are executed in real time, and their outcomes are captured step by step for you to review.
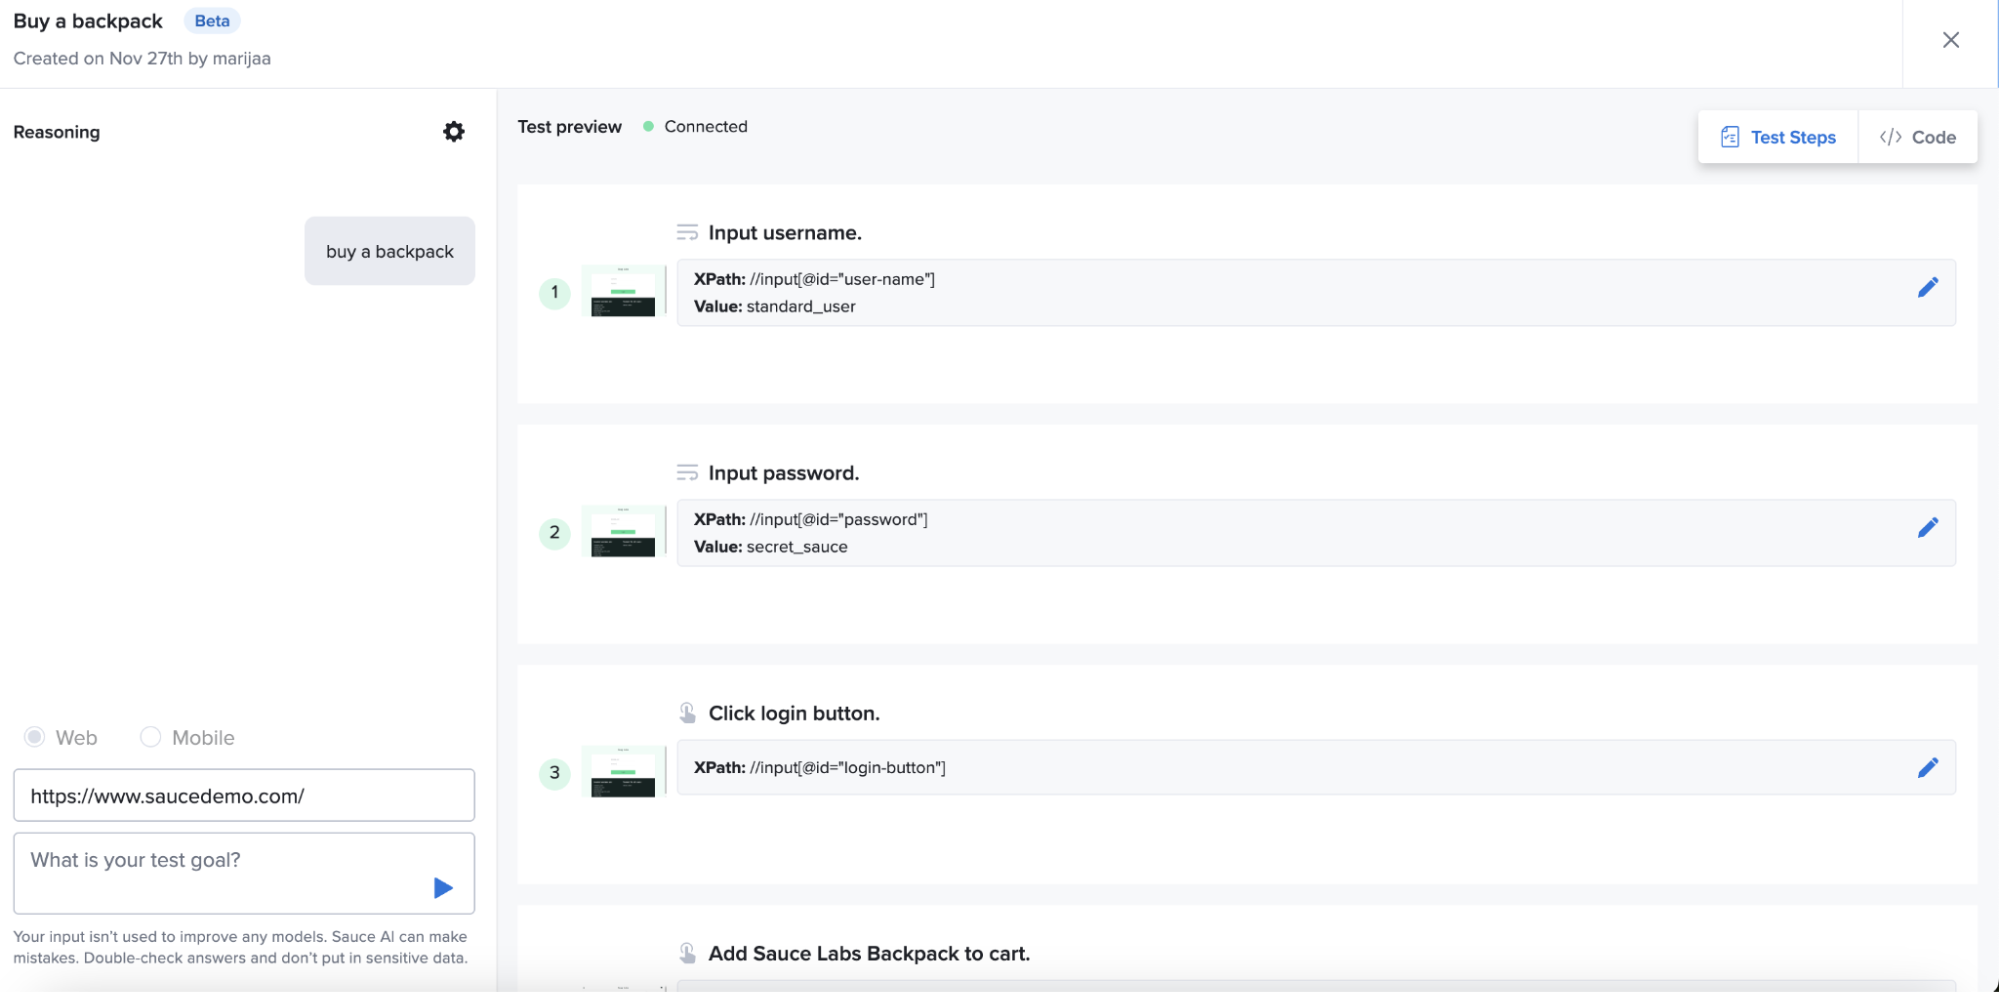
Initially, what you see is a natural language breakdown of what was done: what pages were visited, what buttons were clicked, what inputs were typed. The tool captures the input values and unique locators of the elements interacted with. When the test generation session finishes, the entire test flow is displayed for review.
Test Case Editing and Saving
After running a prompt, you're automatically moved into edit mode, where the test steps are available for review and customization. Here, the generated steps are displayed in a human-readable format, and each action is accompanied by detailed metadata: Step intent, XPath selectors, input values, step screenshots. You can adjust test parameters, or refine your existing steps by prompting for edits.
Prompt-Based Editing
When you edit the prompts, you can request a specific change to be made or an additional flow to be added (e.g., "Change step 3 to select 'size M'", or "After adding an item to cart, verify the success message is displayed."). In this case, the system will present to you the updated test intent as a combination of your previous and new prompt, and ask for your review. You will have an option to Refine the prompt further or to let the system Proceed with generating test steps based on it's proposal. To ensure high-quality, reliable automation, every change is validated in a live browser environment before being finalized.
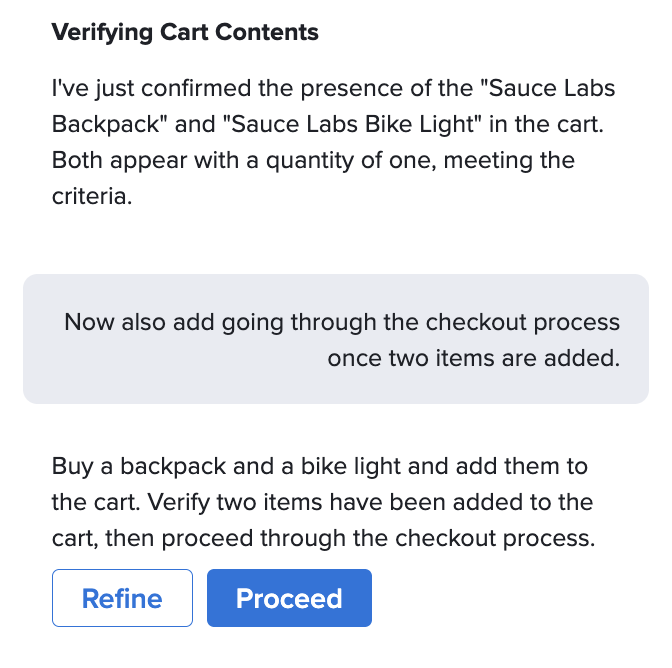
The following diagram illustrates how to refine a test using a follow-up prompt to add a new action.

Once you are happy with the result, you can Save Test Case at the bottom of the page. This will open a modal dialog where you can name the test case and add it into a test suite.
Getting the Script Code
Additionally, you can generate the test code and use it in your own testing environment by clicking on Get Code. The generated test is not locked to a single framework. You can choose from multiple supported languages and testing frameworks.
| Language | Web | Mobile iOS | Mobile Android |
|---|---|---|---|
| JavaScript | WebdriverIO, WDI5, Playwright | Appium | Appium |
| TypeScript | WebdriverIO, WDI5, Playwright | Appium | Appium |
| Python | Selenium | Appium | Appium |
| Java | Selenium | Appium | Appium, Espresso |
| C# | Selenium | Appium | Appium |
| Swift | — | XCUITest | — |
| Kotlin | — | — | Espresso |
The generated test script code includes the capabilities required to run on Sauce Labs, along with the test steps, making it easy to transfer into your own CI/CD pipeline or local repo. You can copy the code by clicking the Copy button on the top right.

Managing and Modifying Test Cases
Saved test cases are listed in the main Test Authoring view, where you can search and filter, rename, delete, or open scripts to edit them.
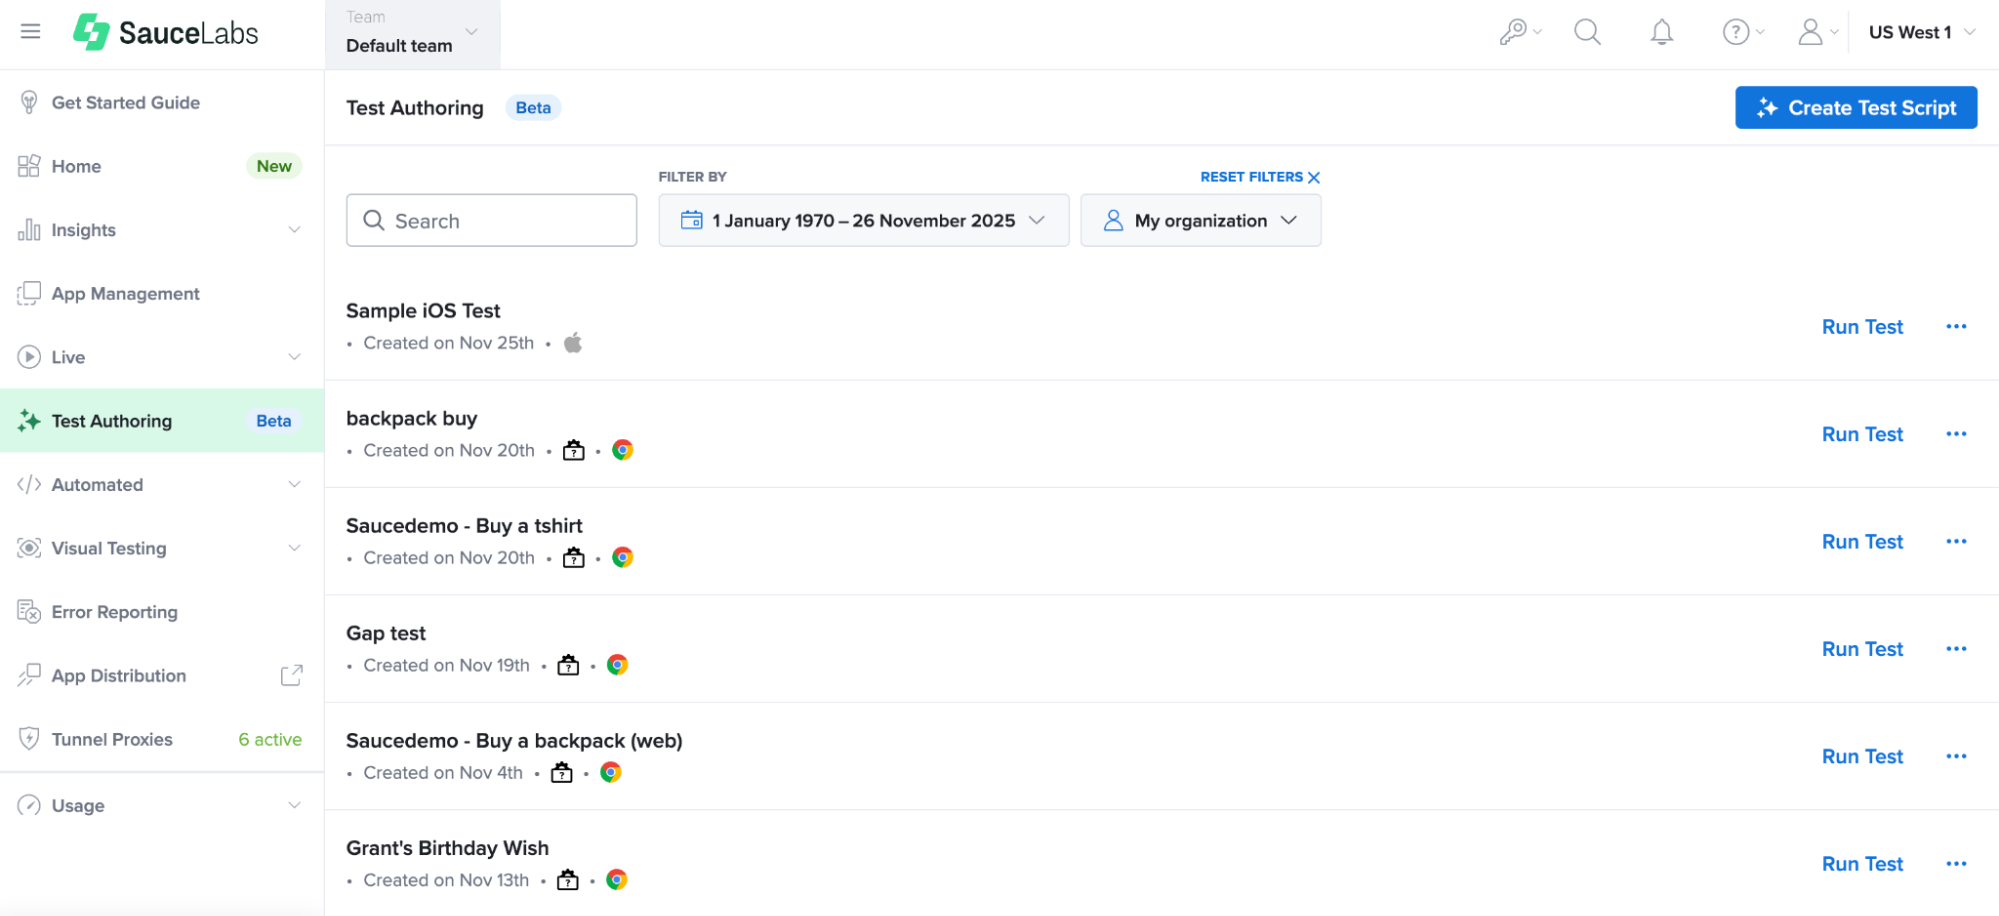
Renaming is done directly from the list by clicking the “…” icon. Device types, apps, and prompt details can all be changed later, making it easy to adapt tests for different platforms or conditions.
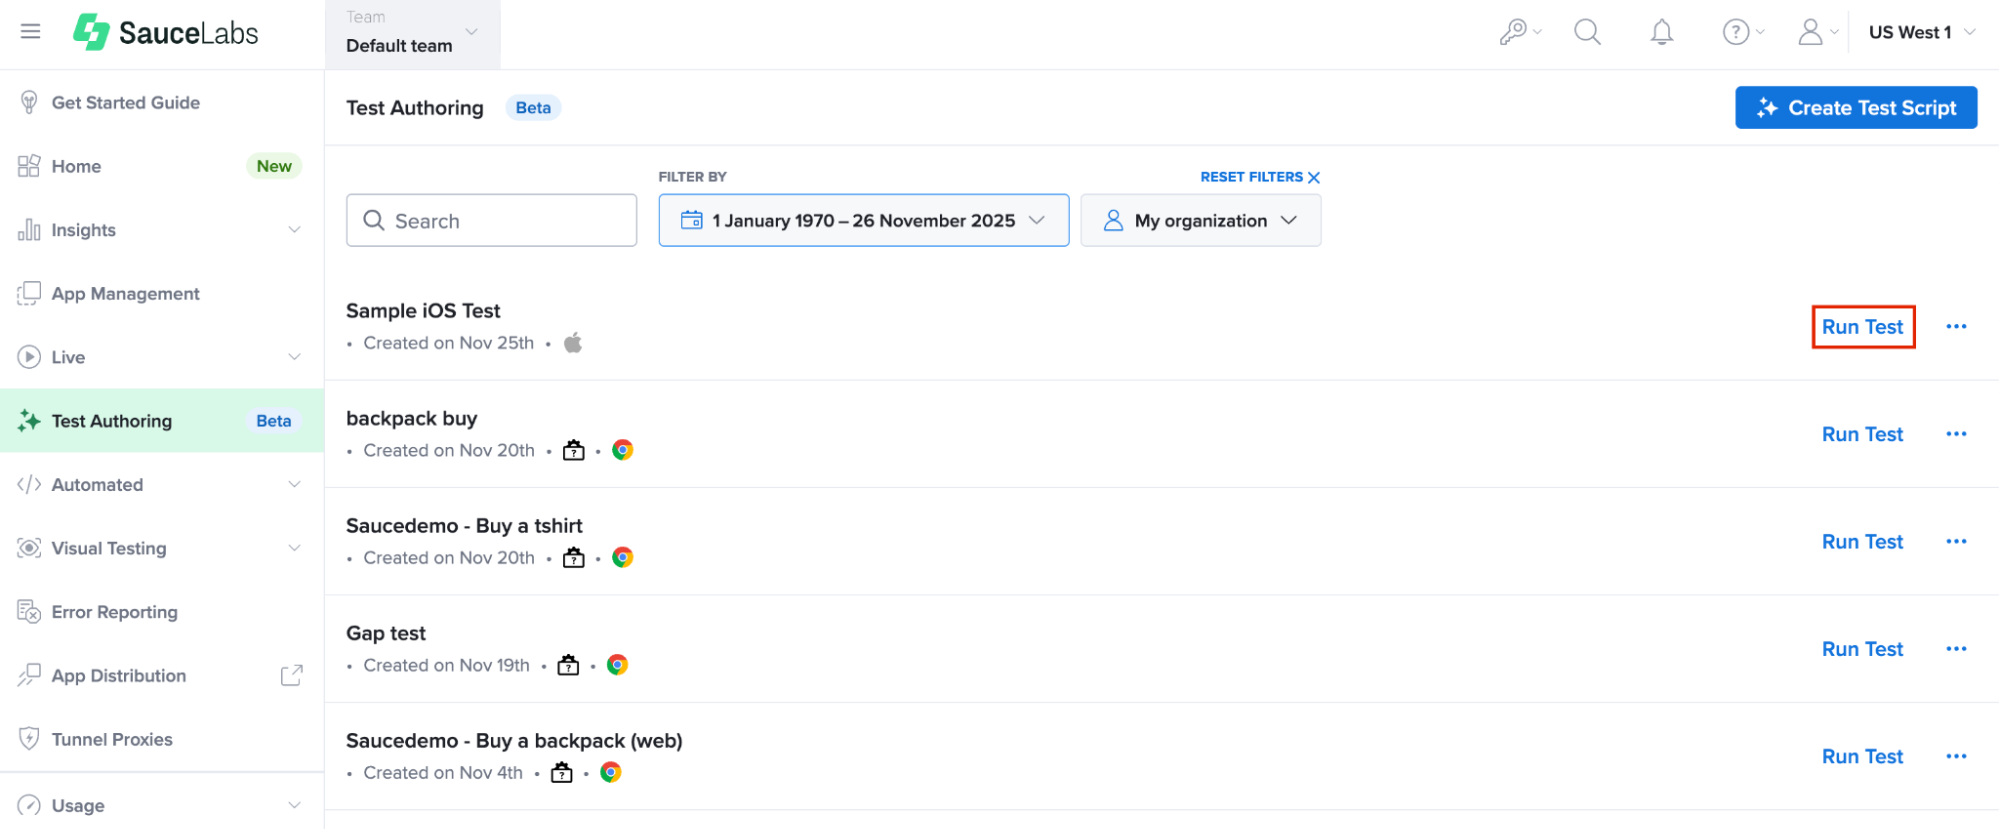
Running Tests
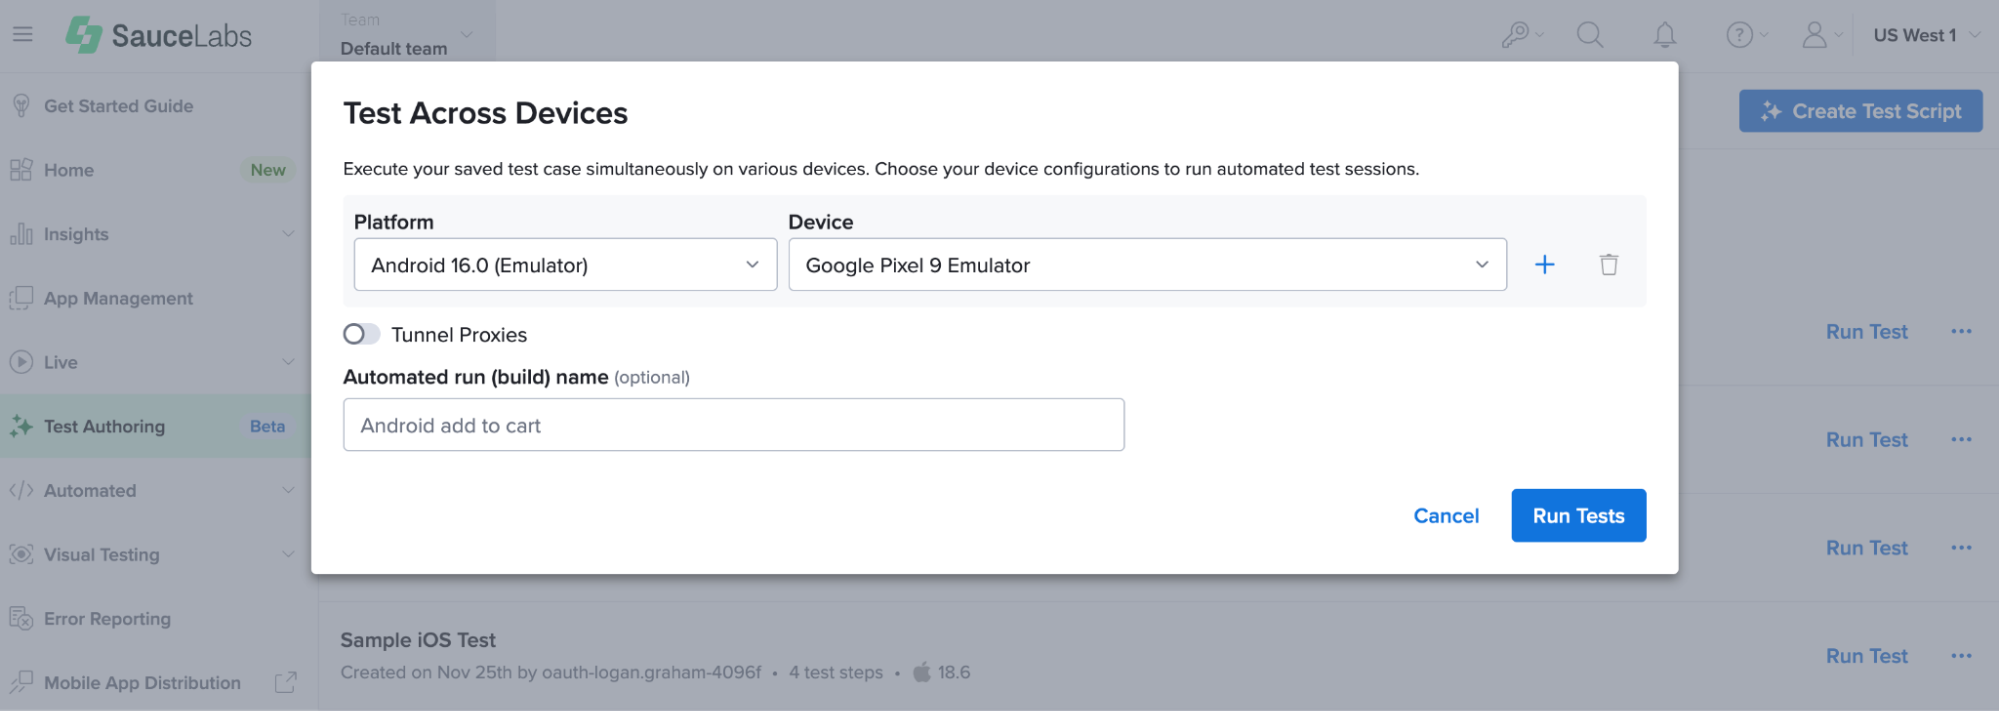
Once a test case is finalized and saved, execution is just a click away. Sauce Labs automatically wraps the code in a runnable configuration based on your credentials and an active data center and allows you to execute tests on the platform. Clicking the Run Test option from the test case list opens a modal dialog where you can:
- Select multiple OS/device/browser configurations to run tests against. By default, Sauce Labs will display the device combination used for test script generation, and will narrow down compatible devices based on the type of the application used for testing. There is no limit for specifying the configurations, you only need to make sure you have enough concurrency for running tests.
- Set the tunnel as an optional value. If there is an organization-level enforcement of the tunnel use, this will be set for your tests as a default.
- Assign the automated build name as an optional value. If the build name is not specified, Sauce Labs will generate a default one based on the test case name.
Test Suites
To scale your testing from individual scripts to full regression coverage, Sauce AI allows you to organize your authored test cases into Test Suites.
Creating Test Suites
You can create a test suite by clicking the Create Test Suite button on the top right of the Test Cases and Suites view.

Use the dedicated UI to select and group individual test cases into a single Test Suite entity.
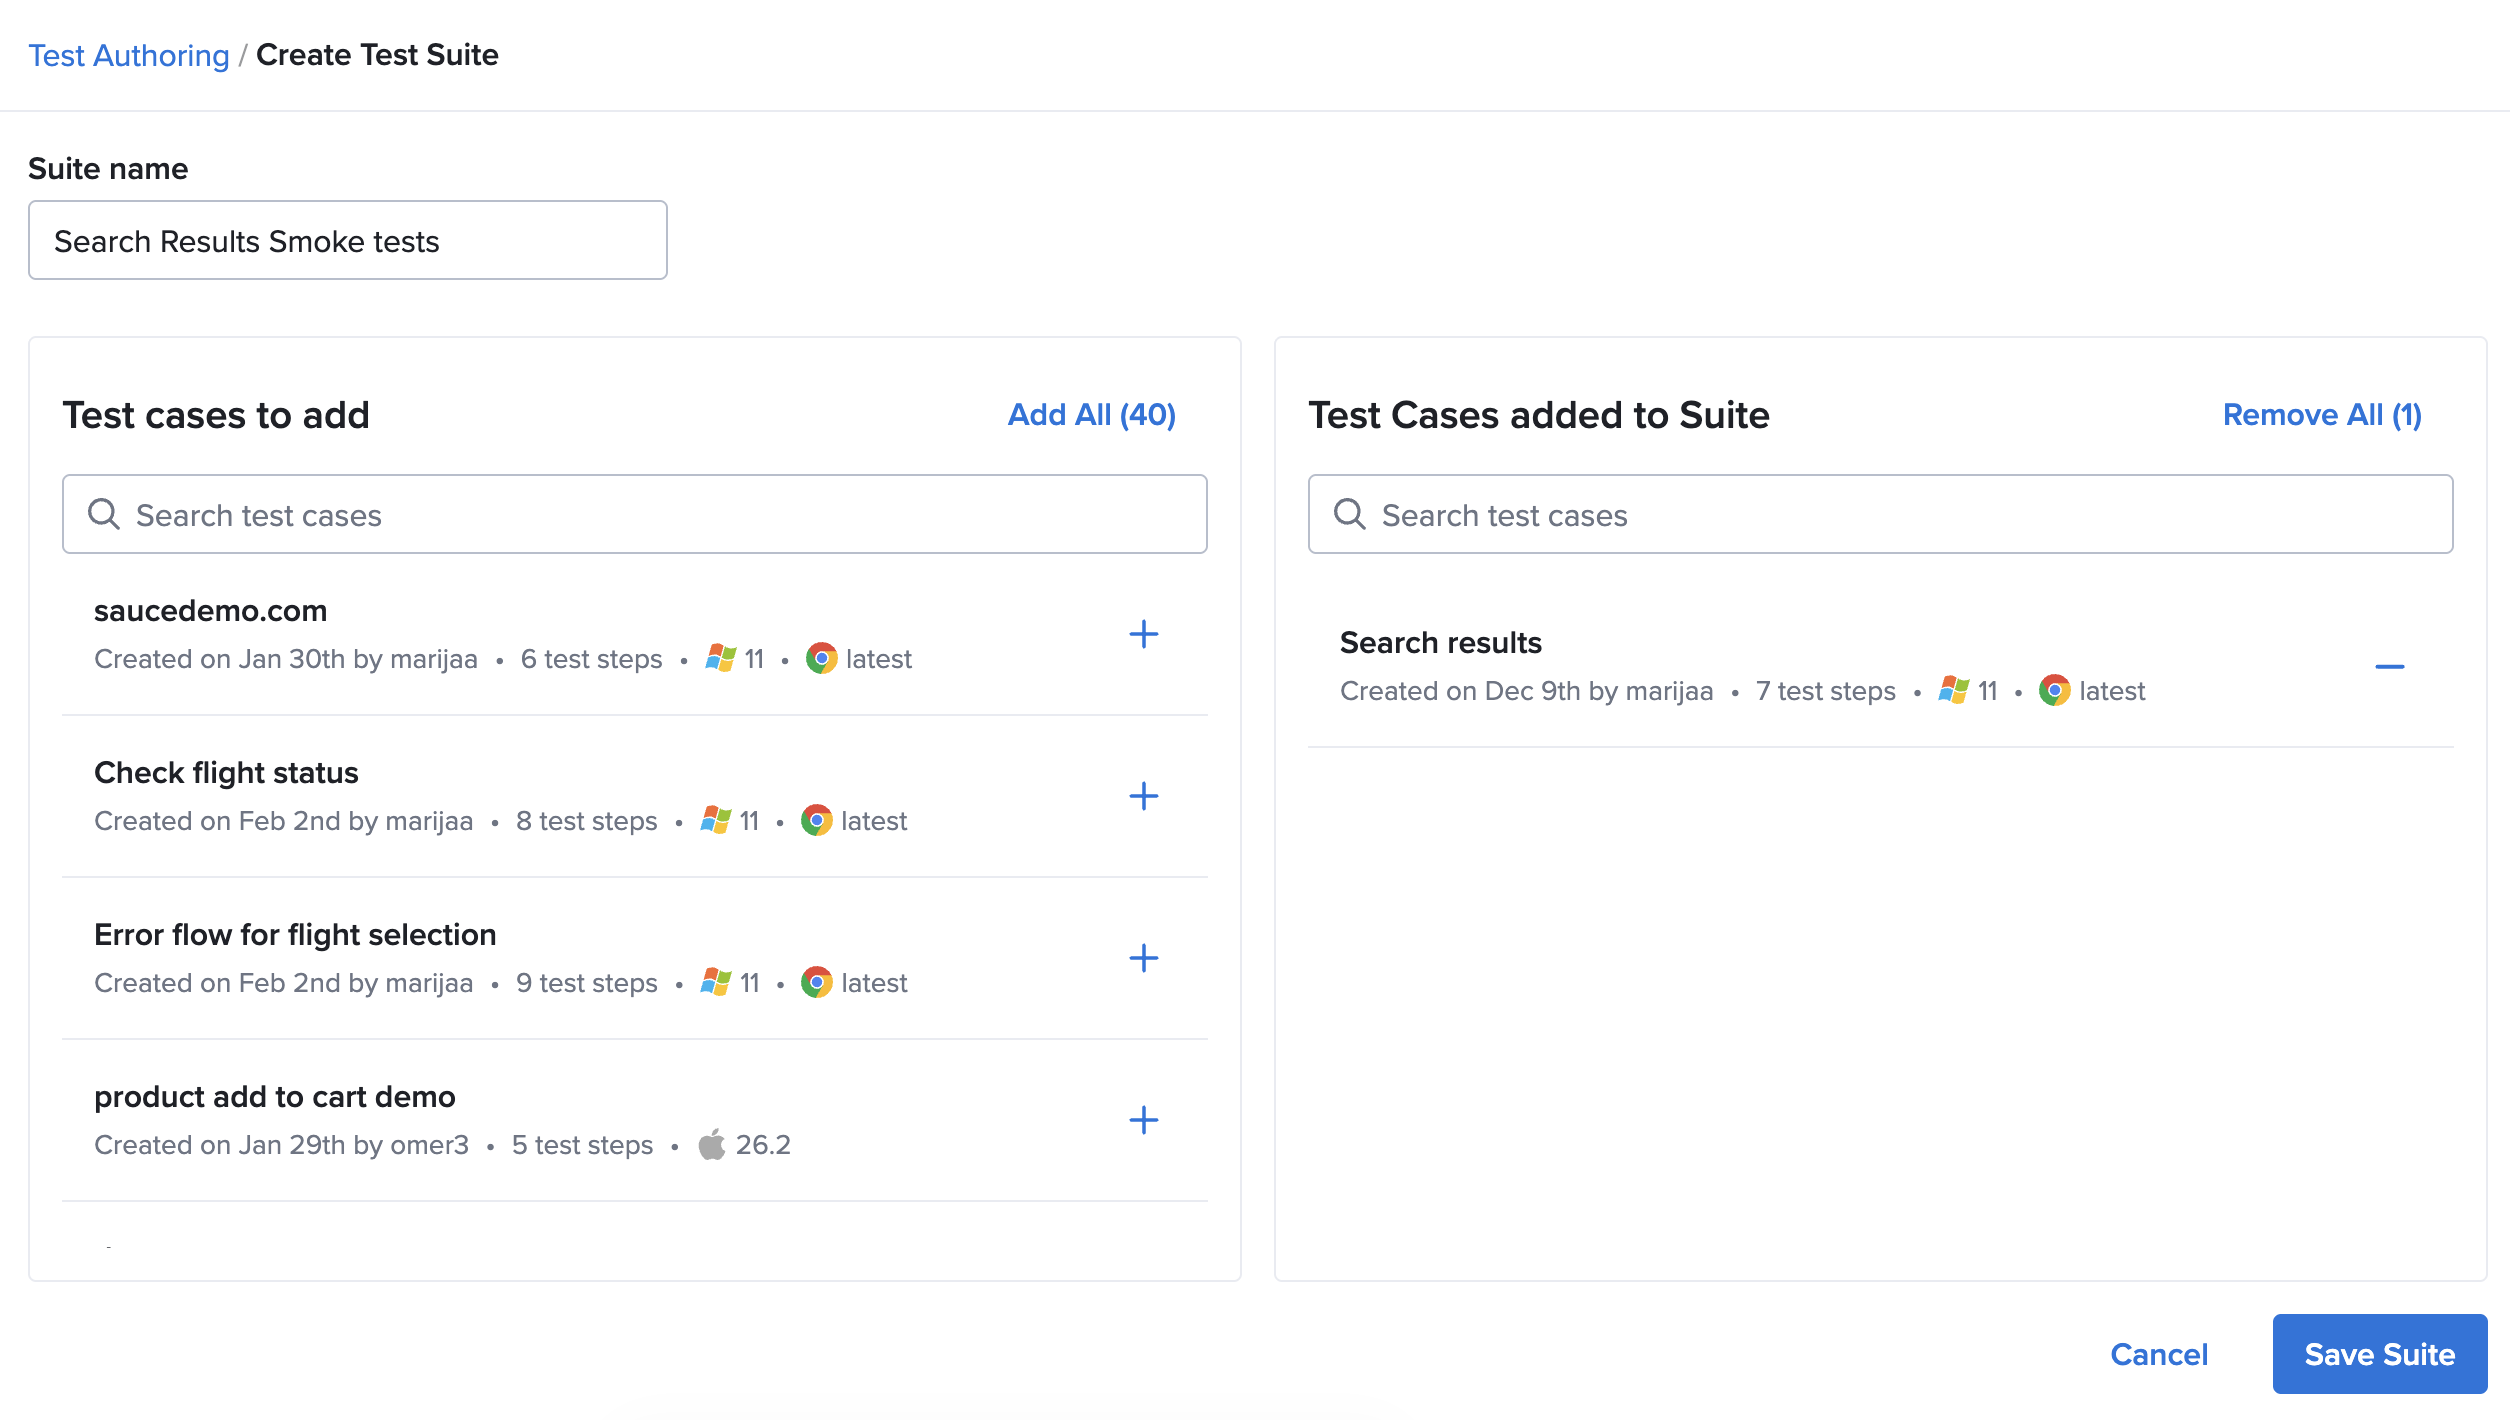
The following options are available when creating a Test Suite:
- Assign a name to your suite. It does not have to be a unique name.
- Search for test cases to add or remove from your test suite.
- Select test cases to add to your test suite by clicking the Plus icon button next to each test case, or selecting the Add All option. You can mix different operating systems and devices.
- Click Save Suite to save your selection.
A single test case can be added to only one test suite.
Viewing and Editing Test Suites
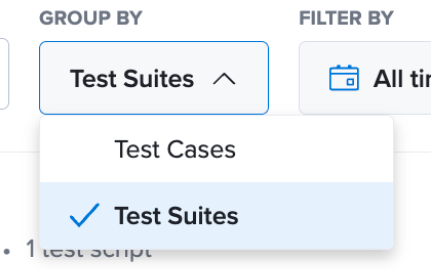
Saved test cases are listed as a default of the Test Cases and Suites view. You can change that view by choosing Group by: Test Suites, which will display the test cases grouped into test suites. The test cases that don't belong to any test suite will be listed at the end of the view. This preference persists at the user level.
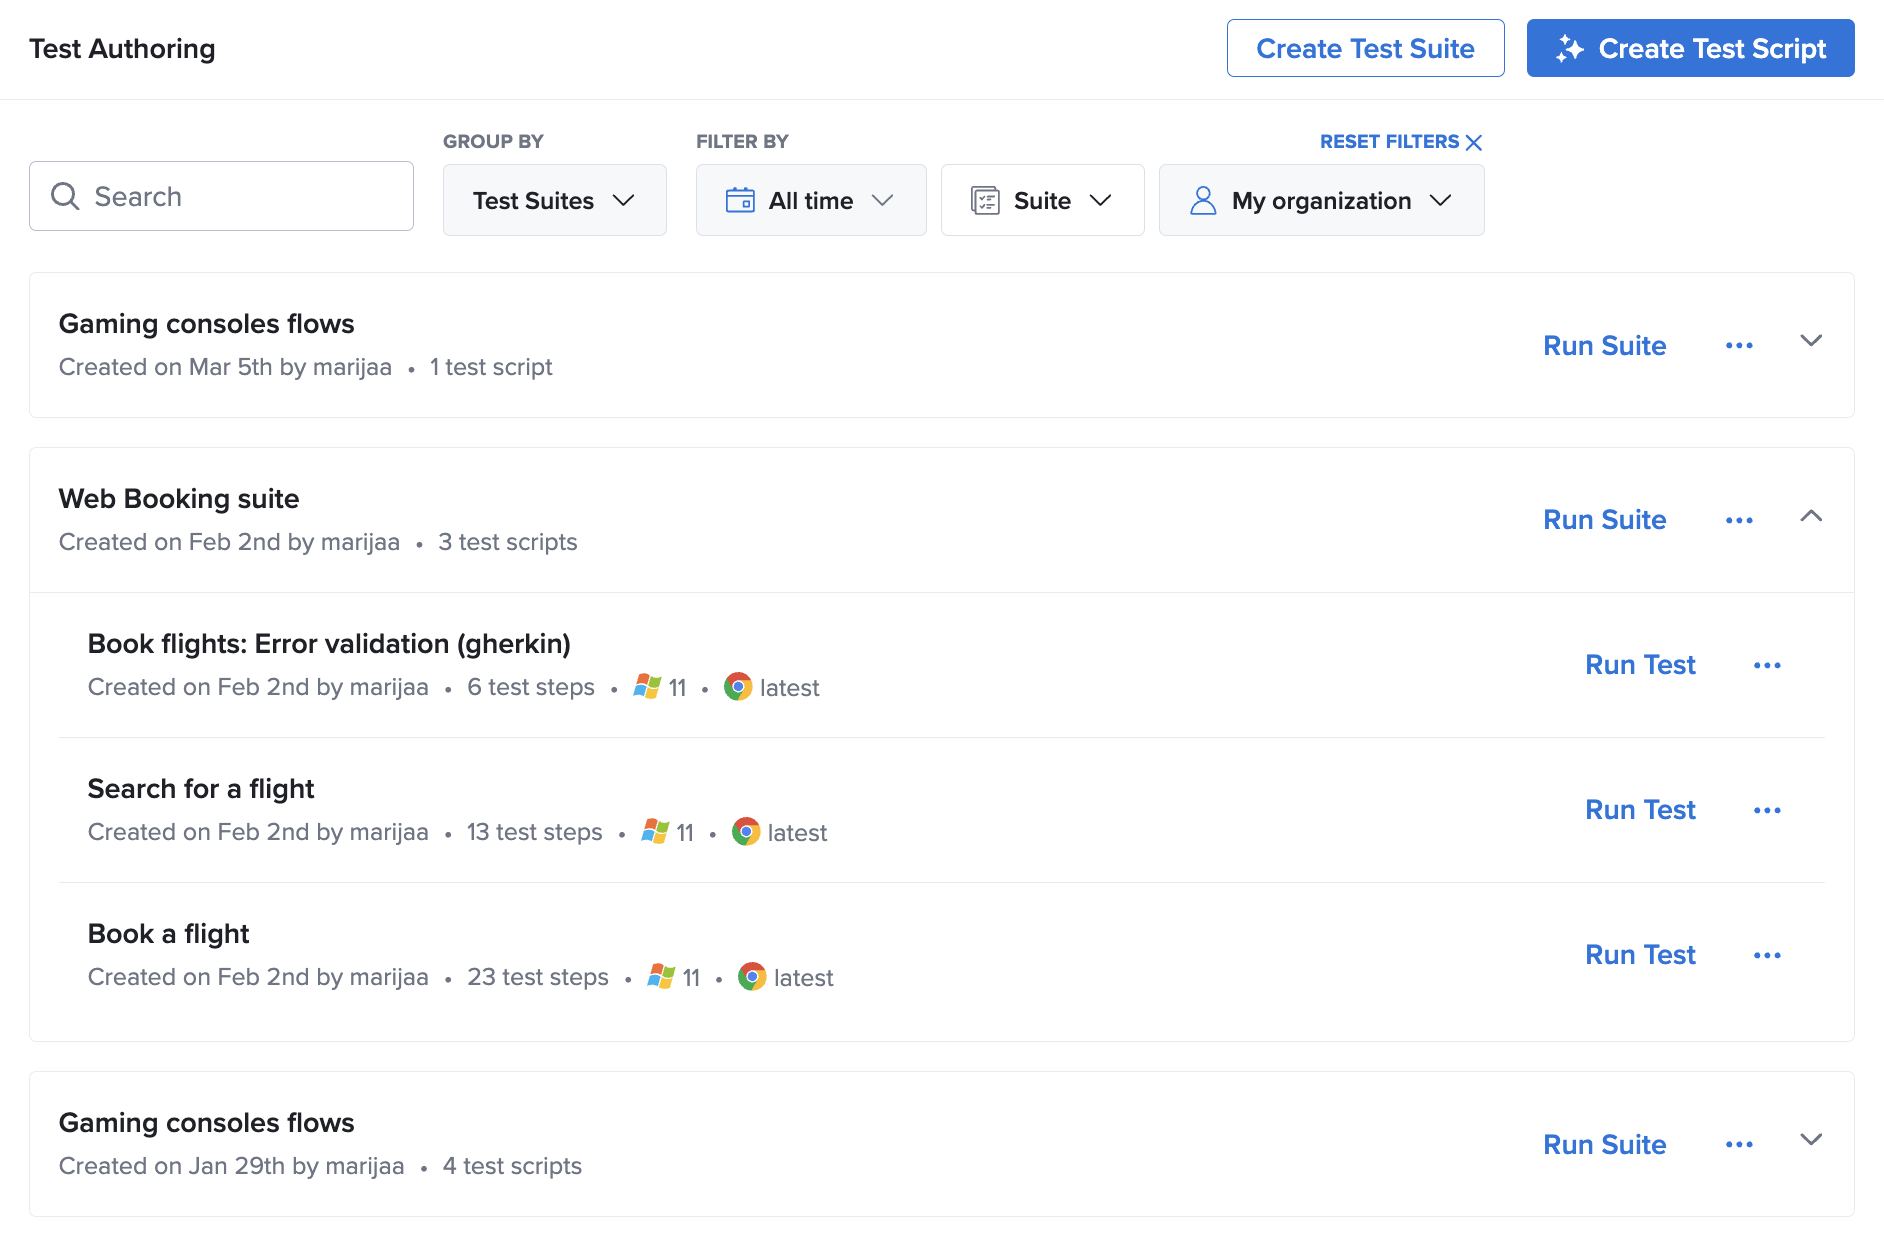
Test suites have the following options accessible directly from the list view:
-
Run Suite: Option to execute all test cases from within the test suite at once.
noteThe device configuration settings will be inherited from each individual test case and don't need to be set on the suite level. This allows you to group any kinds of test cases together under one test run. Optionally, you can set the test run name which will group test results under Automated Builds view.
-
Edit: Add or remove test cases from an existing suite. This will open the same UI that is used to create new test suites.
-
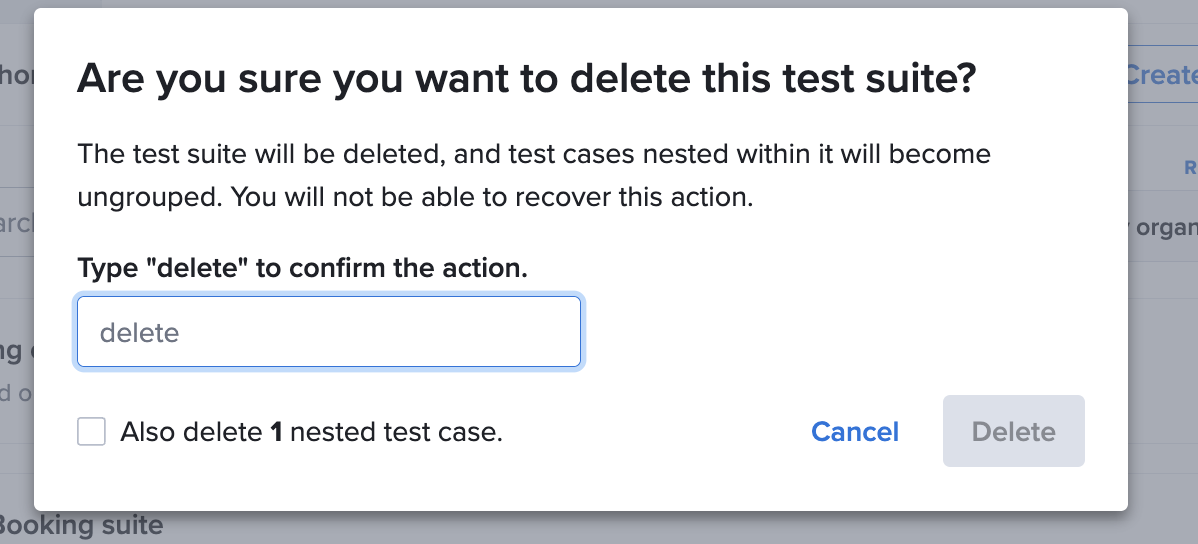
Delete: Remove suites as needed. If a suite is deleted, the test cases remain in your account; only the organizational grouping is removed.
noteWhen deleting a test suite, you have the option to remove just the test suite as a grouping mechanism and leave the test cases intact, or to also delete all test cases within a test suite.
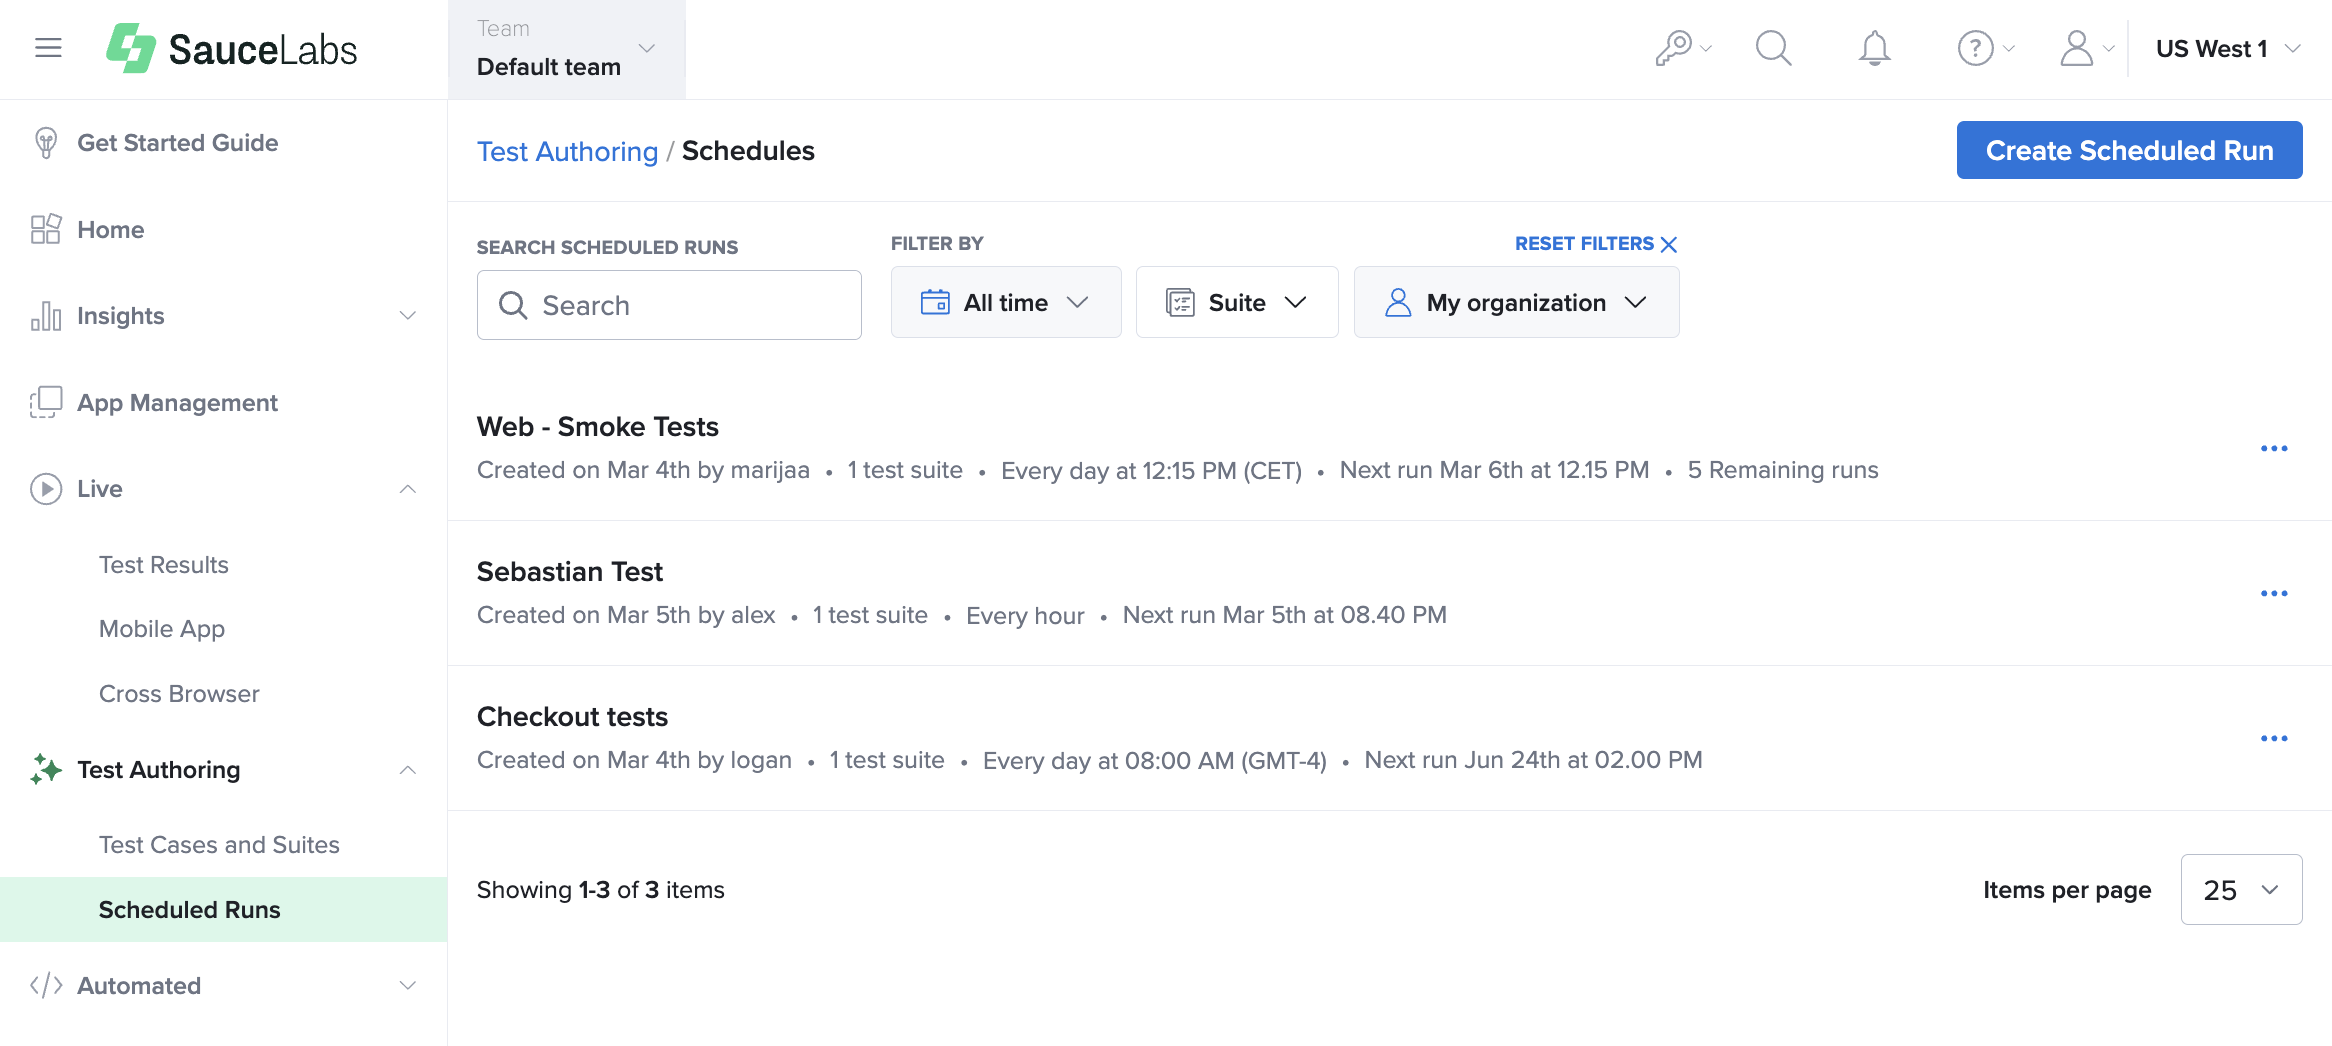
Scheduling Test Runs
To ensure consistent quality without manual triggers, you can schedule your test suites to run at a regular cadence directly from the Sauce Labs platform. You can access the Scheduled Runs view from within Test Authoring navigation.
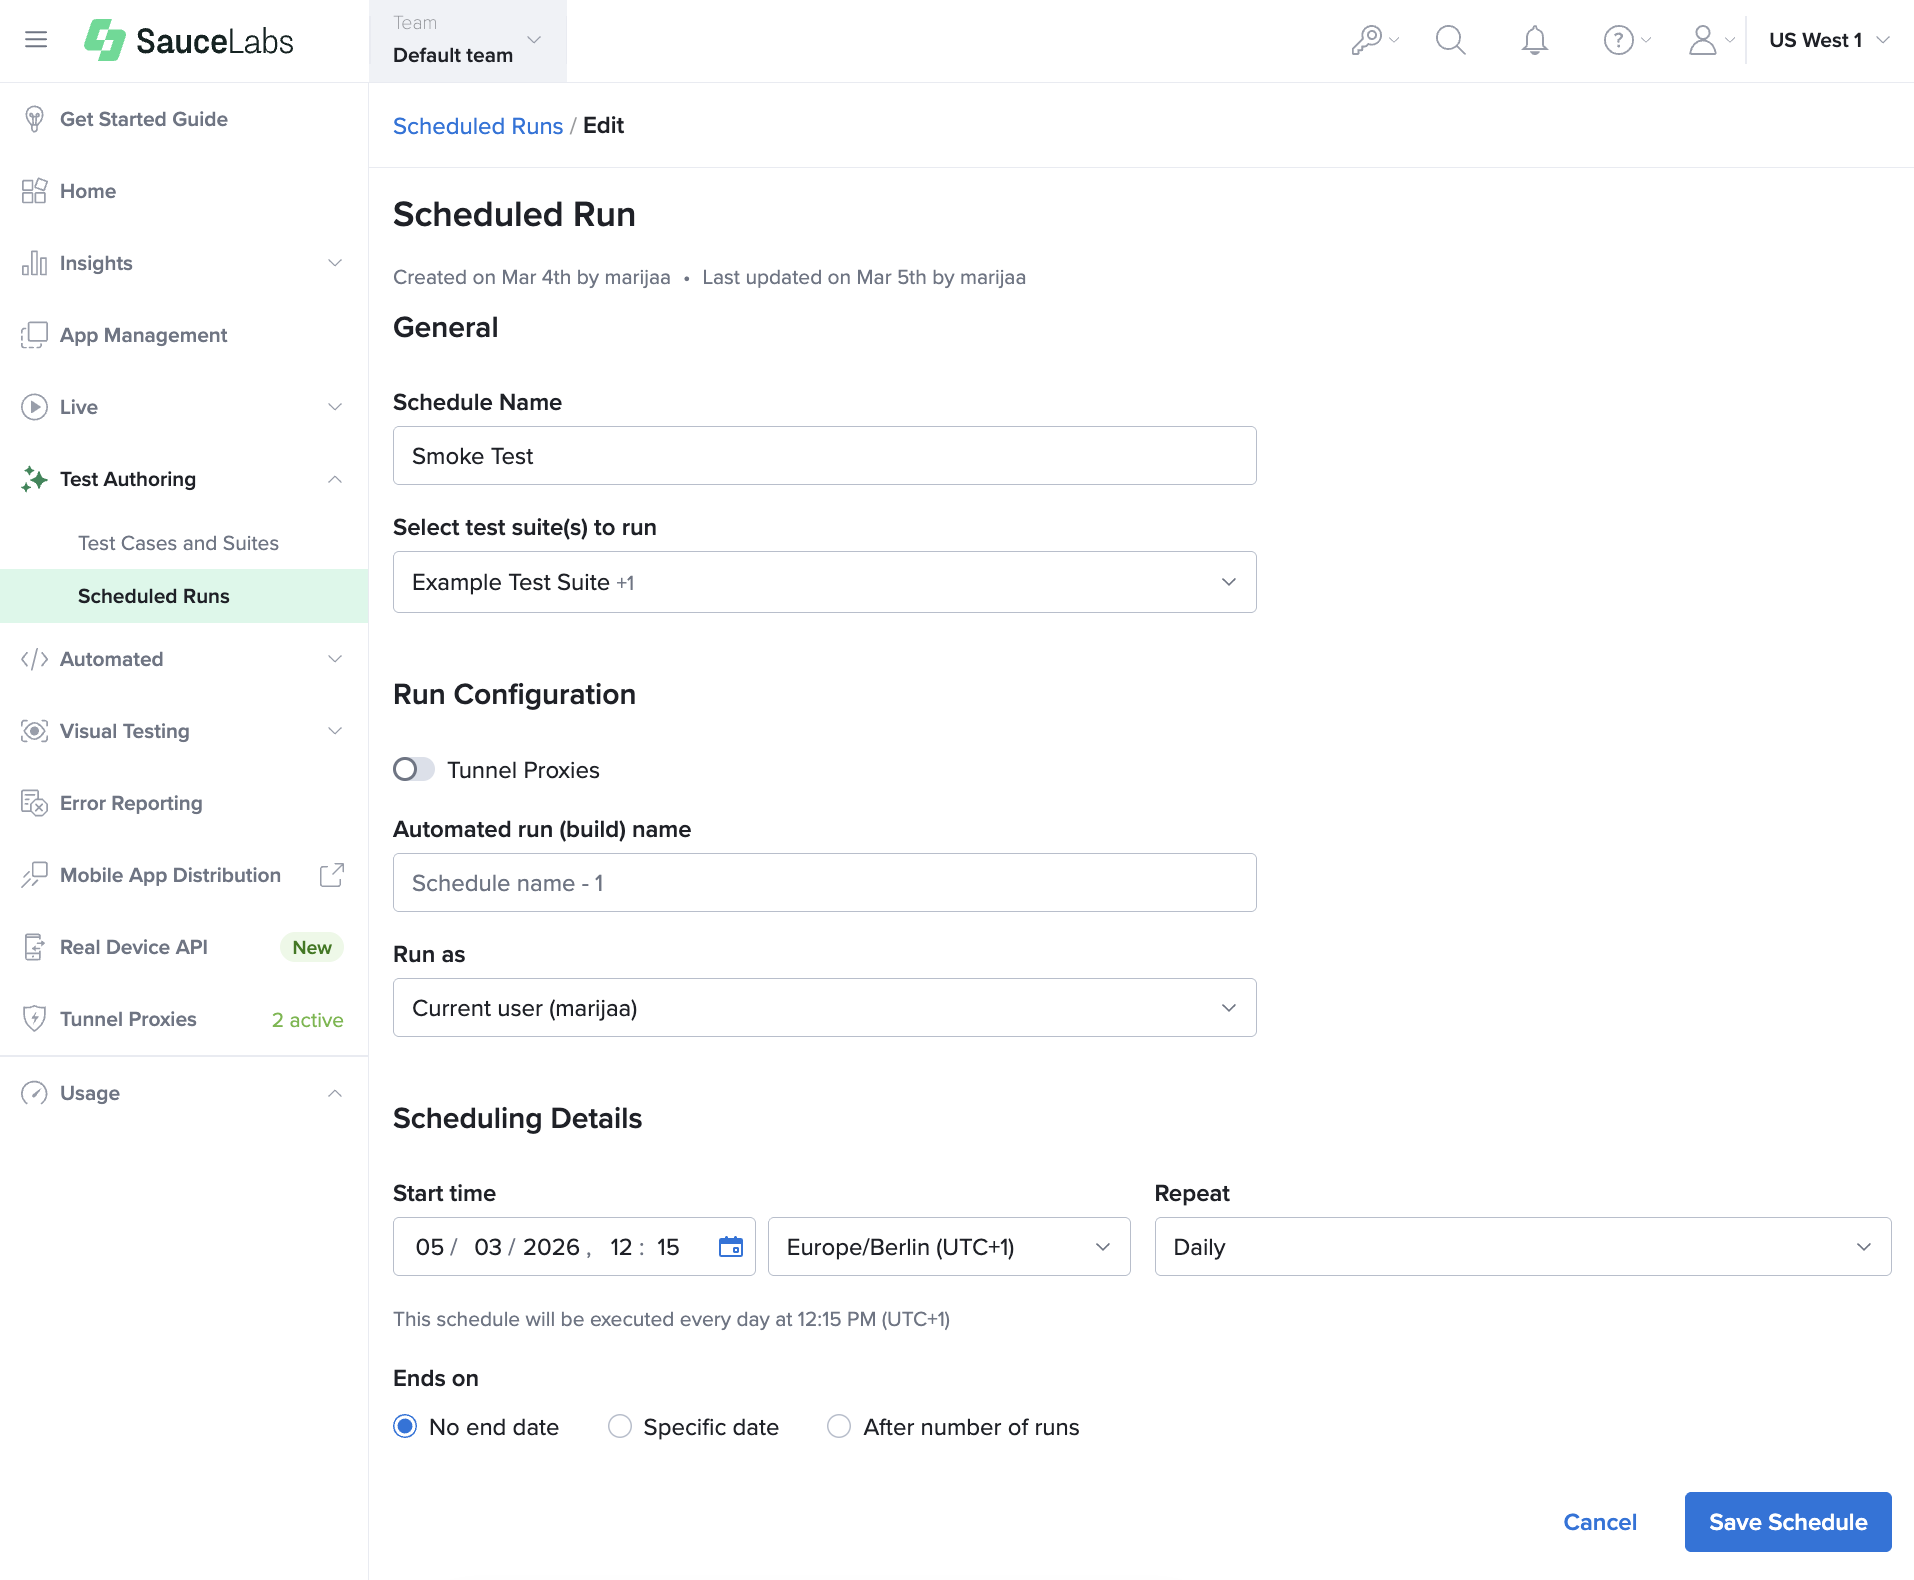
Setting Up and Editing a Schedule
You can create a scheduled run for one or more test suites. When configuring a schedule, you can specify:
- Schedule name: A descriptive name for your schedule.
- Test Suites: A multiselect option to select from existing test suites.
- Tunnel proxy override: By default the tunnel settings from single test cases will be respected, but if you need to specify a different tunnel for all tests in all suites that are part of the schedule, you can specify one tunnel for all.
- Automated run (build) name: Optional field, which if not specified, will by default inherit the schedule name.
- Run as: Designate a specific user or a service account to be the Job Owner for the builds triggered by the schedule.
- Cadence: Set the start date/time and the repeat frequency (Hourly, Daily, Weekly, Weekdays, Monthly).
- Duration: Define when the schedule expires (never, a specific date, or after a certain number of runs).
Managing Scheduled Jobs
A dedicated space on the UI allows you to manage all active schedules.
- States: Schedules can be Active, Running, Paused (manual or system-triggered due to errors), or Deleted.
- Editing: You can update the timeframe, run configuration, or test suite selection within an existing schedule at any time.
- Alerting: If a schedule fails to run (e.g., the Job Owner is deactivated), you will receive an error notification in the schedules list. If a schedule completes due to the set end date or a number of runs, it will show as Paused.
Viewing Test Results
All test executions triggered from Test Authoring are bundled under a named automated build on Sauce Labs, allowing for better tracking through the Insights dashboard.
Each device configuration that you add to your test case creates a separate automated test session. Once a test case is executed, the test results are aggregated under the Automated Test Results and Builds page. Test results comprise the standard Sauce Labs test artifacts such as screenshots, logs, video replays, and metadata.