Jira Server
This documentation provides step-by-step instructions on how to integrate Sauce Mobile App Distribution Connect with Jira Server for bug tracking. By following these guidelines, you can seamlessly connect Sauce Mobile App Distribution to your on-premise Jira Server either using basic authentication (user/password token) or OAuth.
To connect Sauce Mobile App Distribution to Jira Server that is installed on-prem, start by installing Sauce Mobile App Distribution Connect.
Using the Configuration Wizard
Start the wizard by typing the following command in your terminal or command prompt:
$ testfairy-connect configure
The Configuration Wizard will prompt you with the following questions:
-
What is your Sauce Mobile App Distribution API Key? Enter your
Upload API keyhere; you can access it via the Settings Page. -
What kind of issue tracking system will you use with Sauce Mobile App Distribution Connect? Choose
JIRA. -
What is your Jira URL (for example, https://example.atlassian.net)? Provide the URL address of your Jira server. Remember to include the
http://orhttps://prefix. -
How shall Sauce Mobile App Distribution Connect authenticate to JIRA? Choose
basic. -
What is the type of Jira issues to be created using Sauce Mobile App Distribution Connect? Choose the appropriate issue type used in your JIRA. JIRA uses
Bugby default, but it varies on project type. Other examples areDefectorTask. -
Jira username: Enter your JIRA login username.
-
Jira password: And your JIRA login password
-
Sometimes, depending on your user definitions in Jira, you may need to use an API token as your password. You can create one here.
-
Please enter HTTP proxy server address; leave empty if none: Send it here if you require an HTTP proxy to access this Jira server. For example,
http://user@10.0.0.1:8080.
Once you have provided all the necessary information, the configuration wizard will display a success message: Successfully connected to the issue tracker.
You have now successfully configured Sauce Mobile App Distribution Connect with Jira using basic authentication. Next, you can start the agent from the command line.
Configure Jira with OAuth
Access Token & Secret Generation:
-
Obtain a key pair:
openssl genrsa -out jira_rsa 2048
openssl rsa -in jira_rsa -pubout > jira_rsa.pub -
Configure Jira the Application Link for Sauce Mobile App Distribution Connect integration.
-
In your browser, go to your Jira Admin page, like
http://localhost:2990/jira/plugins/servlet/applinks/listApplicationLinks. -
Enter
URLor any string to use for Application Link identification.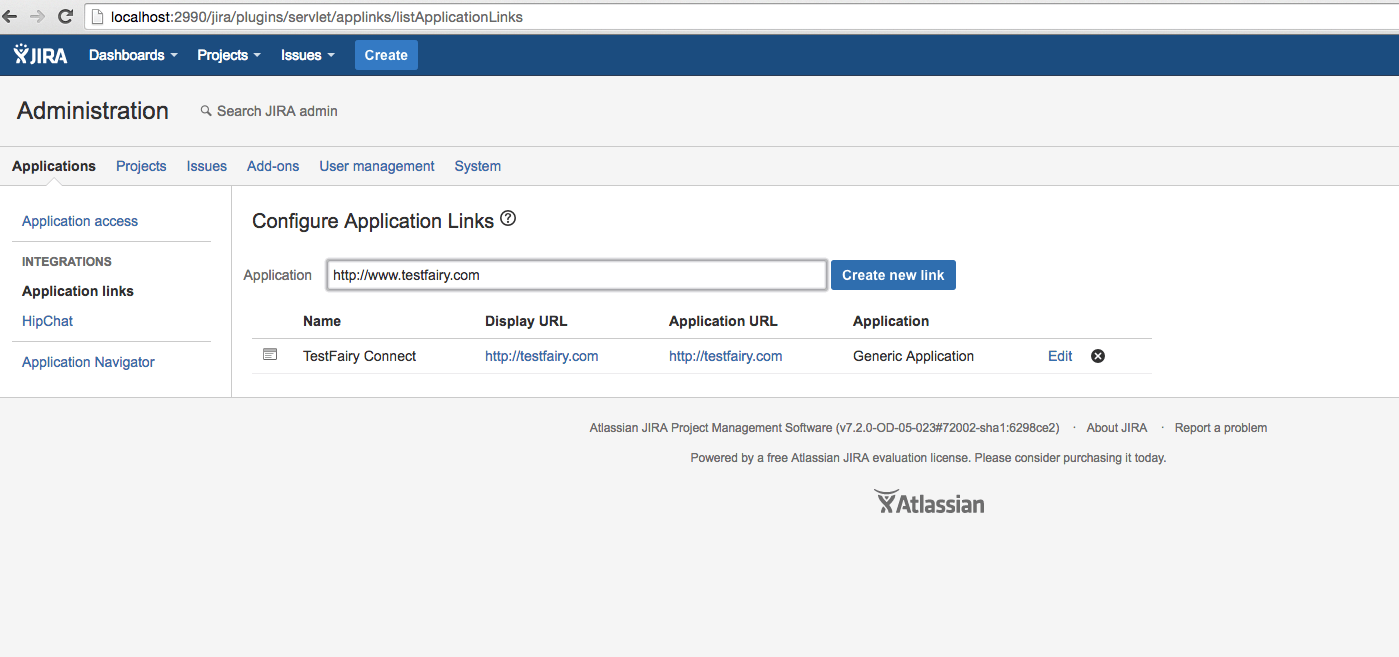
-
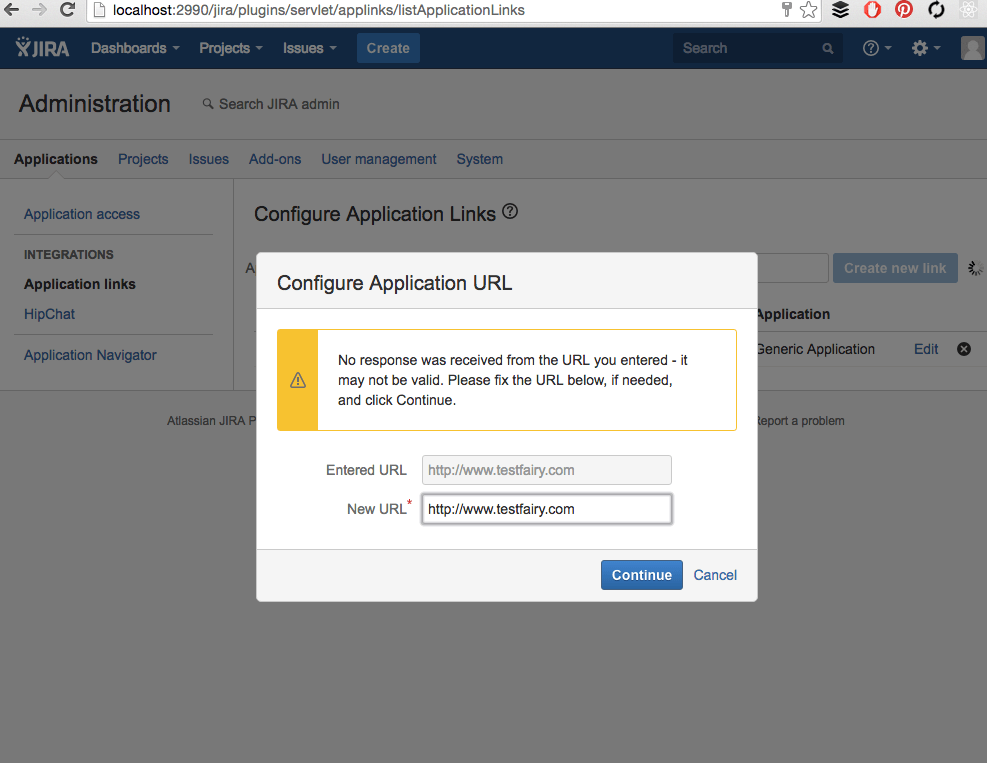
In the next screen, click Continue.
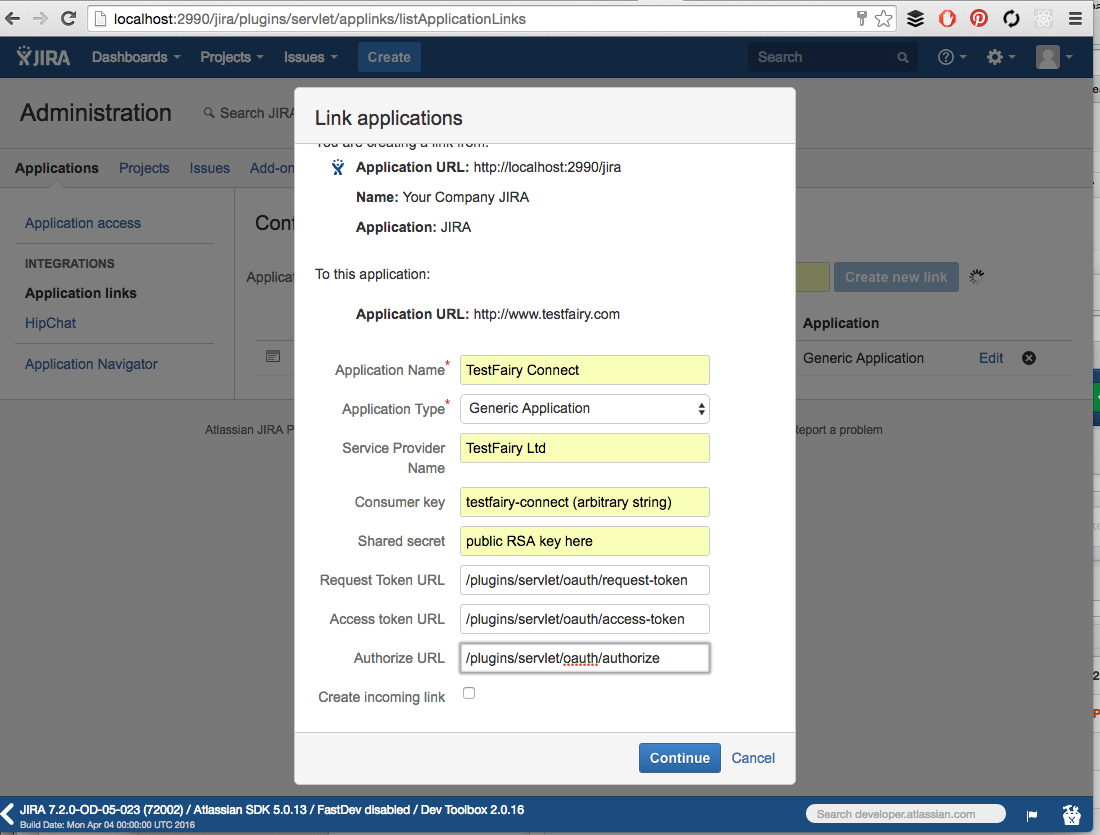
- Application Name:
TestFairy - Application Type:
Generic Application - Service Provider Name:
TestFairy - Consumer Key:
testfairy-connect - Shared Secret:
[paste public key contents here] - Request Token URL:
/plugins/servlet/oauth/request-token - Request Token URL:
/plugins/servlet/oauth/access-token - Request Token URL:
/plugins/servlet/oauth/authorize
- Application Name:
-
-
Run the token generation script. Right-click to copy the .js file path.
wget [paste file path here]
npm install oauth
node oauth.js -
Update your
config.jsonwithaccess_tokenandaccess_token_secret. -
(optional) Install the Sauce Mobile App Distribution Chrome Extension.
The Sauce Mobile App Distribution Chrome Extension is available at here. With this Chrome extension, every Jira issue that has a link to a Sauce Mobile App Distribution session will contain the proper Sauce Mobile App Distribution session, timeline, logs, and crash reports embedded in the Jira issue.