Test Suites
Test Suites Tab
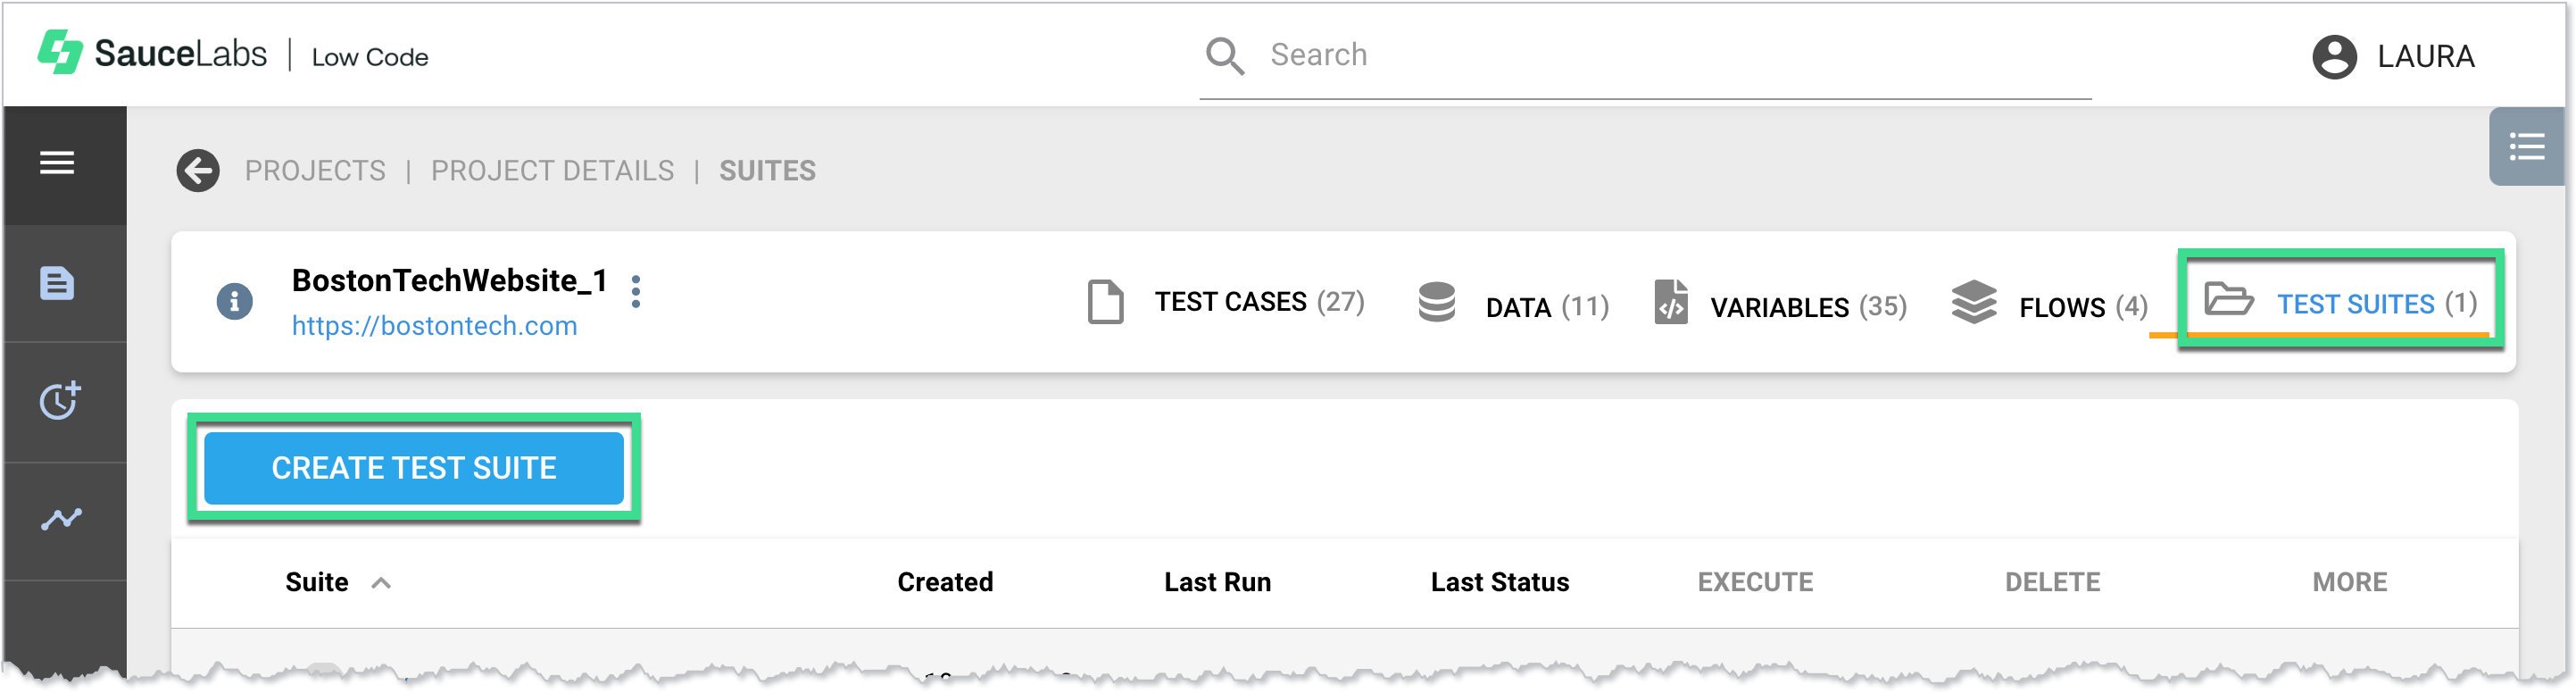
A test suite is a collection of test cases in a project. The Test Suites tab displays the test suites in a project, in table form. From this screen you can also create a new test suite, and clone, download, and disable existing test suites.
Test Suites Tab Columns
| Column | Description | |
| Suite | The test suites associated with the project. Click a test suite name to open the Update Suite window, where you can view and modify details about the test suite. Click the up or down arrow next to the column name to sort the table alphabetically by test suite name. | |
| Created | The date the test suite was created. Click the up or down arrow next to the column name to sort the table by created date. | |
| Last Run | The date the test suite was last run. Click the up or down arrow next to the column name to sort the table by last run date. | |
| Last Status | The last status of the test suite. Click the up or down arrow next to the column name to sort the table by last status. | |
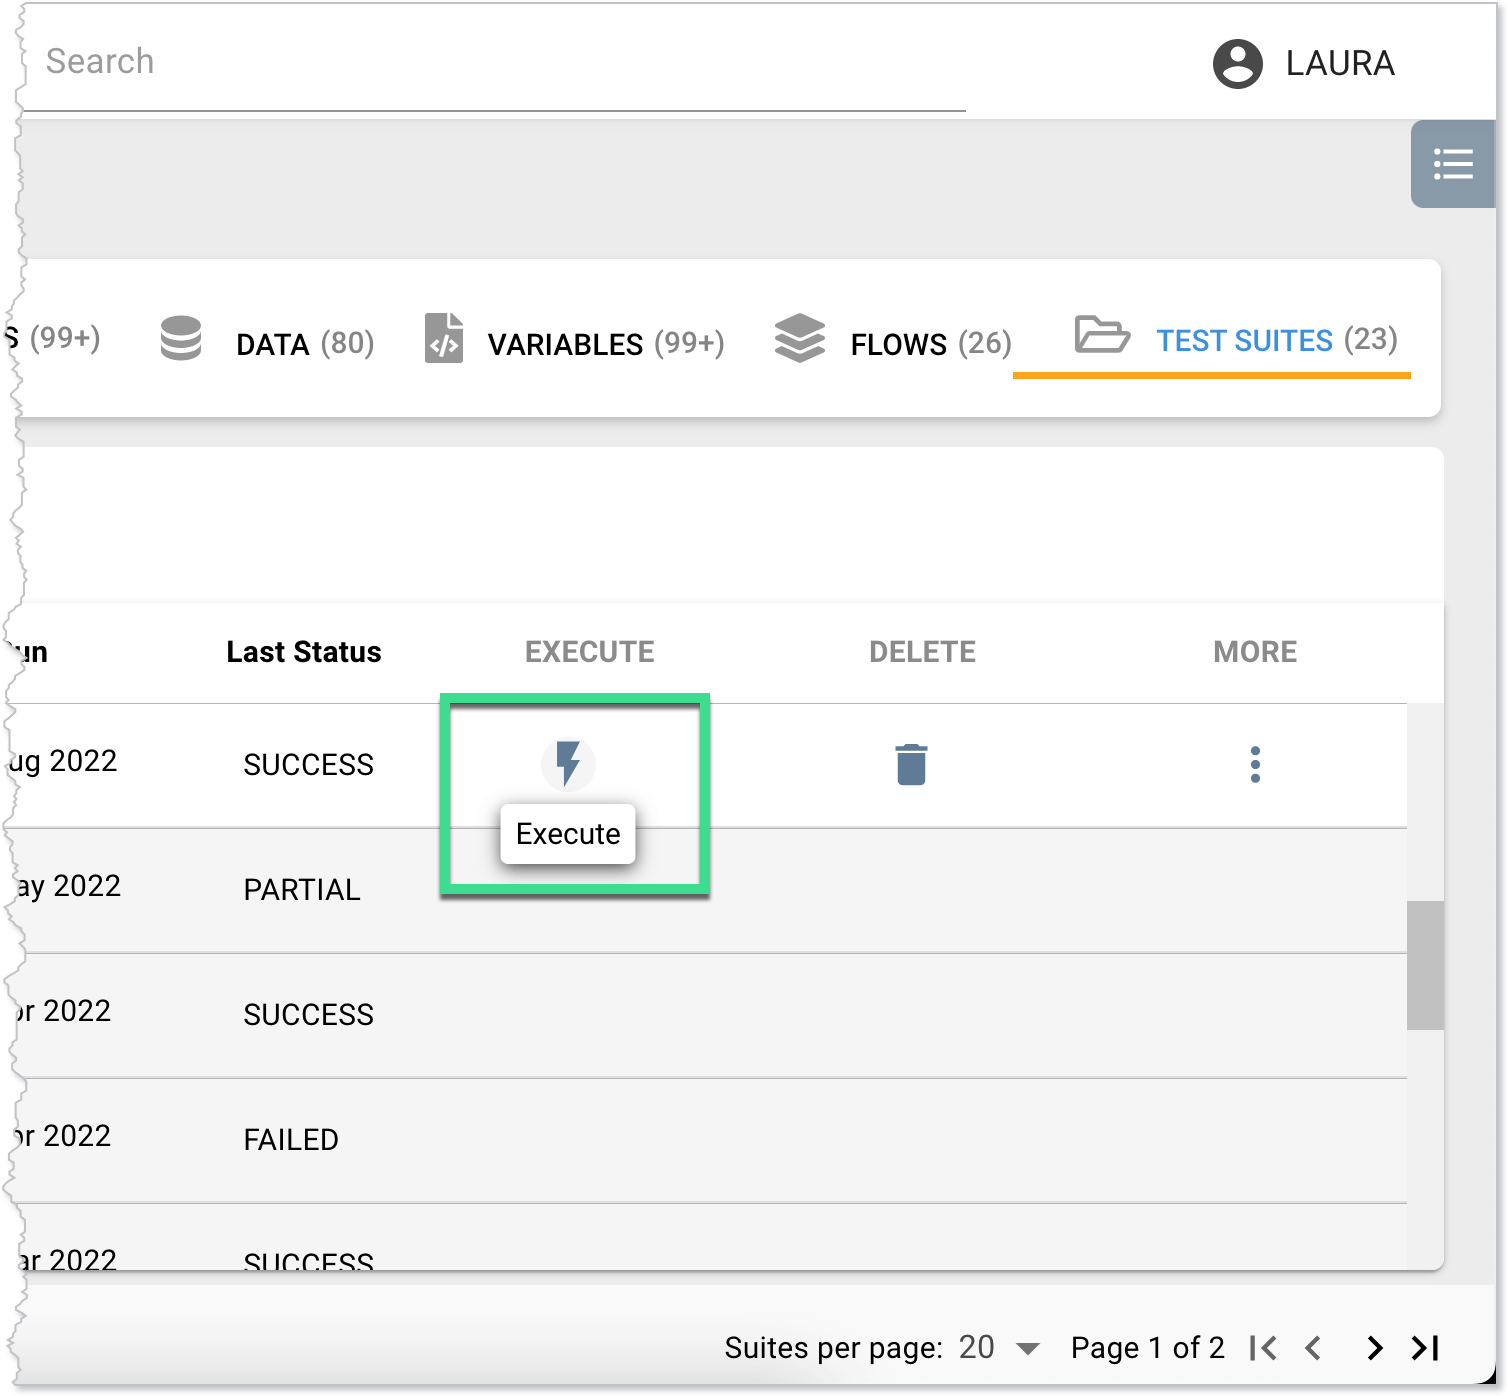
| Execute | Hover in the Execute column and then click the Execute button. | |
| Delete | Hover in the Delete column and then click the Delete button. | |
Creating a Test Suite
To create a test suite:
- On the Test Suites tab, click the CREATE TEST SUITE button.
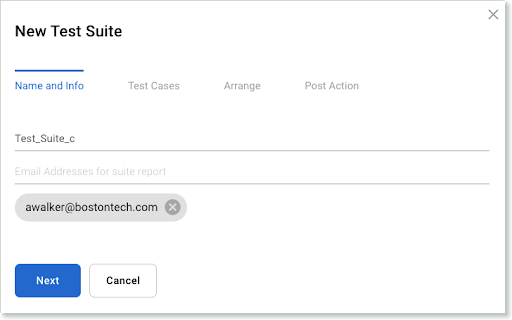
- In the New Test Suite window, on the Name and Info tab, enter a name for the test suite and an email to send reports to. Click Next.
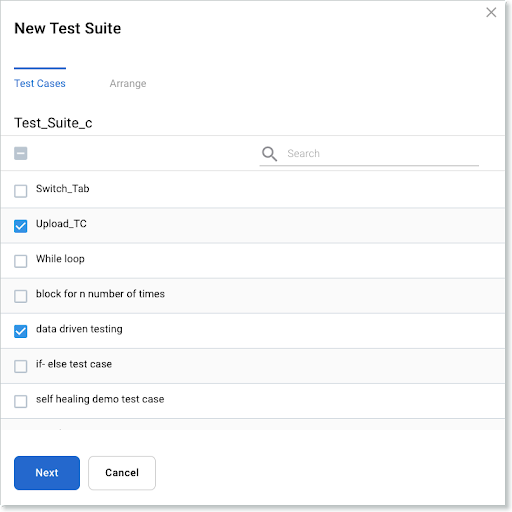
- On the Test Cases tab, select the test cases to include in the test suite. Click Next.
- On the Arrange tab, drag to reorder the test cases in the test suite. Click Next.

For information about the Post Action tab, see Post Processing.
- Click Finish.
Post Processing
You can set a test suite or suites to be triggered after the completion of the parent test suite. Post processing suites can be from the same project or from different projects. Suites can be made to trigger based on different conditions. They can be also triggered at desired time intervals by using the Delay feature.
| Component | Description | |
| Case | The name given to the test case. Click the up or down arrow next to the column name to sort the table by case name. | |
| Project | The project the test case is associated with. Click the up or down arrow next to the column name to sort the table by project name. | |
| Created | The date the test case was created. Click the up or down arrow next to the column name to sort the table by created date. | |
| Last Generated | The date the test case was last generated. Click the up or down arrow next to the column name to sort the table by the last generated date. | |
| Last Status | The most recent status of the test case. Click the up or down arrow next to the column name to sort the table by last status. | |
| Actions | Update Test Case | Update the test case details. See Adding a Test Case for more information. |
| Move Test Case | Move the test case to a different project. See Project Details for more information. | |
| View Tags | View the tags added to the test case. | |
| Disable Test Case | Disable the test case. You can also disable a test case by selecting its check box and then clicking the Disable Test Case button. | |
| Go To Step Editor | Opens the step editor for the test case. See Using the Step Editor for more information. | |
Test Suites Page
On the Test Suites page you can view, update, execute, clone, or delete a test suite. In addition, you can view the test cases associated with the suite, as well as quickly access the step editor.
Test Suites Page Components
| Component | Description | |
| Suite | The name given to the test suite. Click the up or down arrow next to the column name to sort the table by suite name. | |
| Created | The date the test suite was created. Click the up or down arrow next to the column name to sort the table by created date. | |
| Last Run | The date the test suite was last run. Click the up or down arrow next to the column name to sort the table by last run date. | |
| Last Status | The most recent status of the test suite. Click the up or down arrow next to the column name to sort the table by last status. | |
| More |
| |
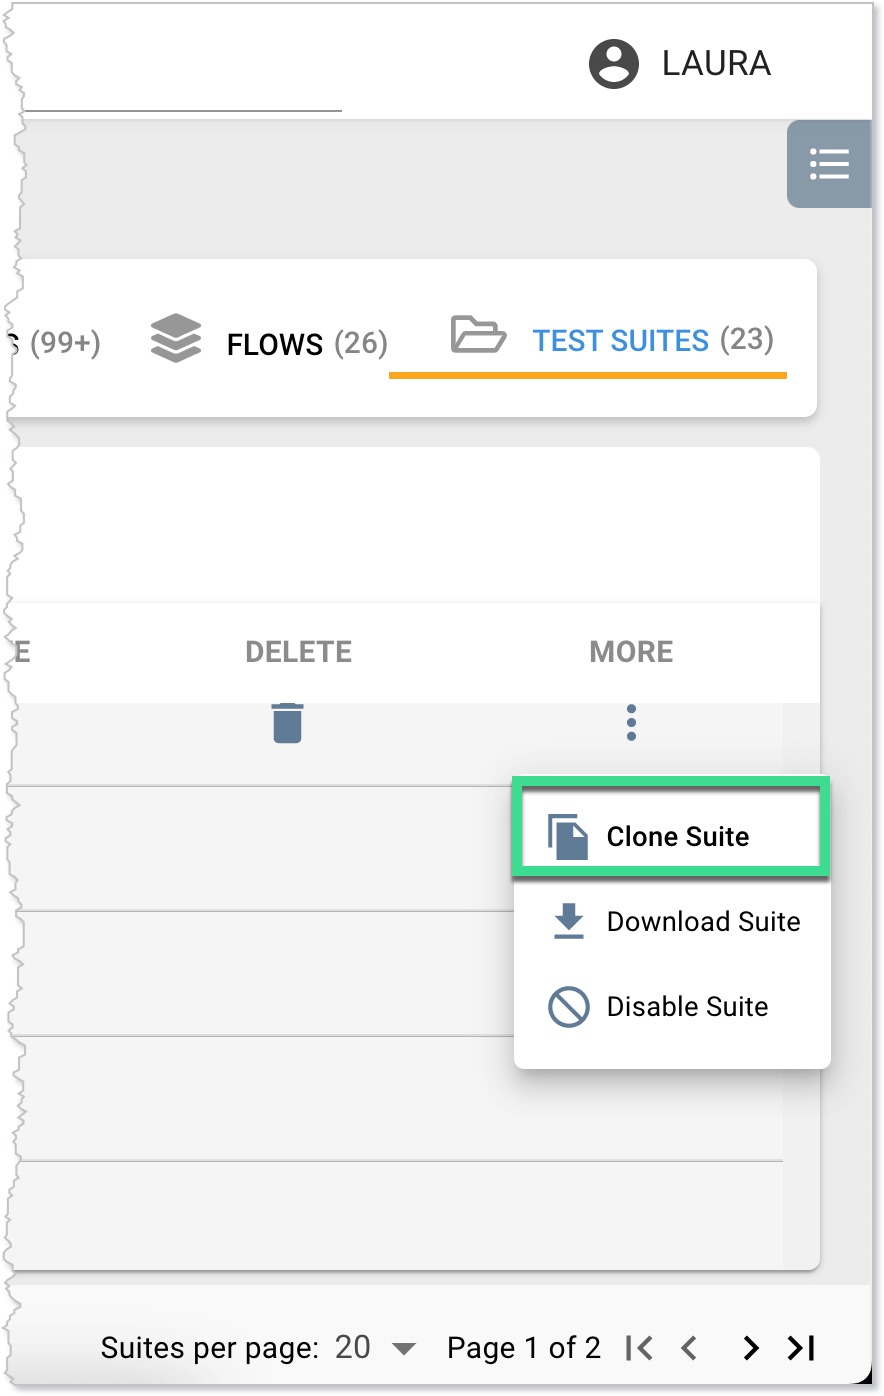
Cloning a Test Suite
To clone a test suite:
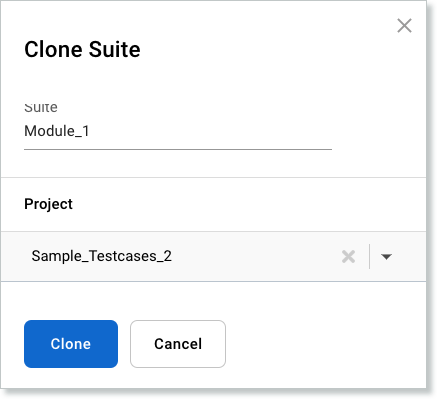
- On the Test Suites tab, click the more options button and then click Clone Suite.
- In the Clone Suite window, enter a name for the cloned suite, and select a project to add it to. Click Clone.
Executing a Test Suite
To execute a test suite:
- On the Test Suites tab, next to the test suite, click Execute.