Schedule a Test
Legacy Documentation
You're viewing legacy documentation for API Fortress (deployed via an on-premises container). To view documentation for the new SaaS version of API Fortress — now known as Sauce Labs API Testing and Monitoring (with Sauce Connect tunnels) — see API Testing on the Sauce Labs Cloud.
Introduction
In API Fortress, it is simple to schedule a test to run as often as you’d like, from any location you choose (based on account type), and with granular control as to when it runs. Let’s take a look at how it works.
Step 1: Publish the Working Copy
API Fortress has a unique working copy/published copy system. This system allows you to edit a test without affecting the live, currently active version. You can learn more about it here.
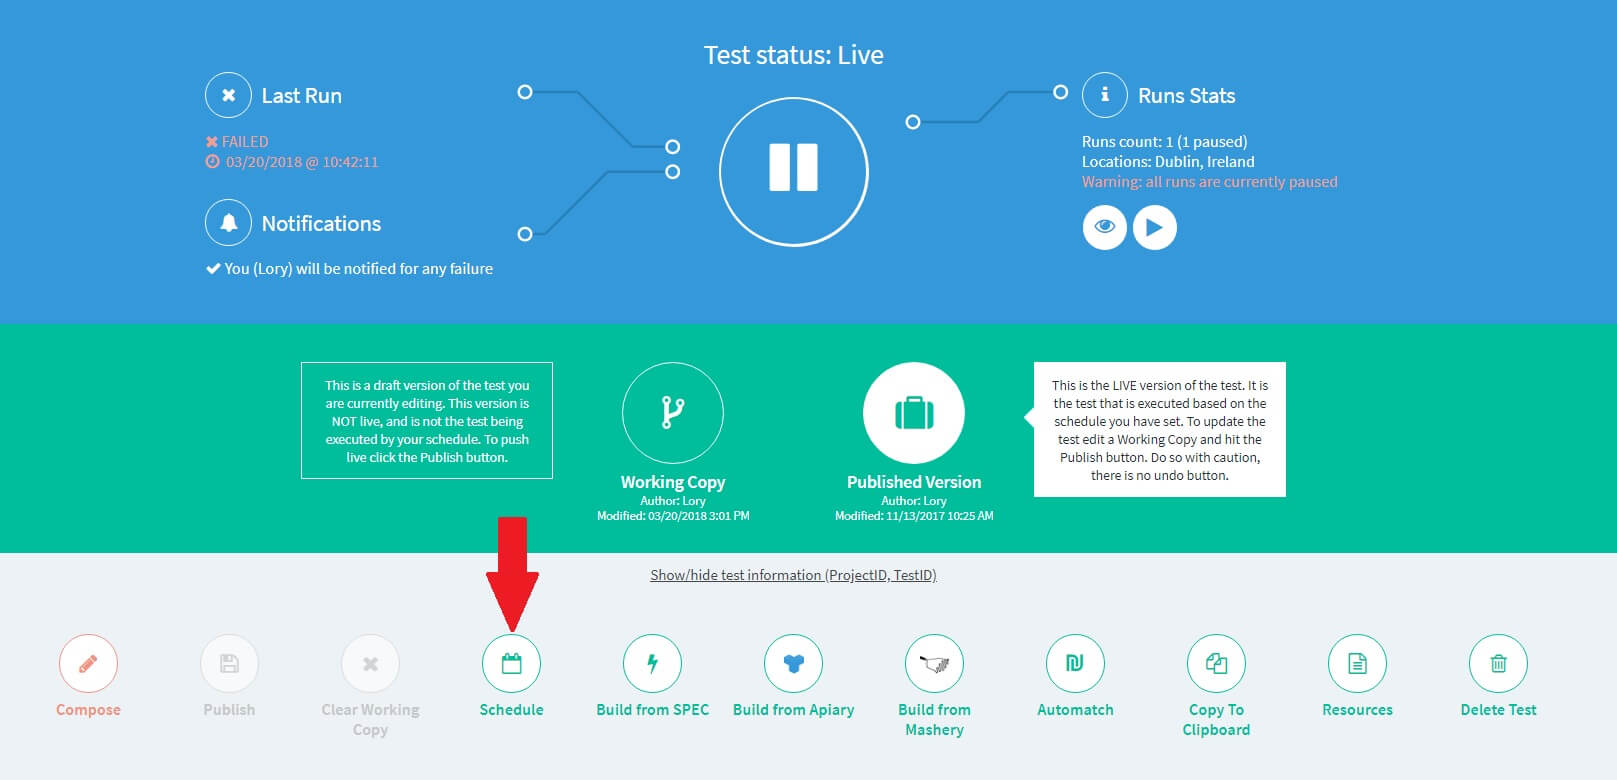
Step 1 is to publish your working copy. After you finish editing your Working Copy, click the "Publish" button (highlighted below). An individual test should also execute its own I/O operations (GET, POST, PUT, DELETE).

Step 2: Schedule
You can access the Scheduler from the Test Control Panel:
Or from the Test List page:

Step 3: Create a New Schedule
Click + Create New Run on the left side of the screen to create a new scheduled run of your test.

Step 4: Fill Out the Fields
Name – This is how you will identify your scheduled test in the future. We recommend sticking to the “Test Name – Schedule” convention. For example, a good name would be: “Test 1 – Every 10 Minutes.”
Pause Toggle - This will prevent the run from triggering if clicked.
**Try Second Execution Toggle ** - When this checkbox is selected, another execution will run after 2m 30s if the initial execution fails.
Downloader – This dropdown allows you to choose which datacenter the request will be made from. You can select one or more than one.
Dedicated engine (self-hosted/on-premises only): If you are using the Self-Hosted/On-Premises version of API Fortress, you can select a dedicated engine to run the test from.
Time configuration – This allows you to select when your tests will run. The time configuration system works via intersection.
- Minutes: Sets the minutes of the hour that a test will run. The minimum interval is every 5 minutes. The interval type you can choose from depends on the account type.
- Hours: The hours of the day that the test is going to run.
- Days: The days of the month the test is going to run.
- Months: The months of the year the test is going to run.
Example: If we set minutes: 5, 15 and days: 1, 5. The test will run every hour at minute 5 and 15, only if the day is either the 1st or 5th.
Variable Override – This section allows you to override any variable that is defined in the Global or Data Set sections of the test. One example is to create a new run that executes in the morning and late afternoon where the variable you override is the domain. This means that twice a day the staging environment would be tested.
At the top of the page:

Test (drop down): This is a list of all available tests for scheduling (all of the tests that are published). You can switch from one test schedule to another without exiting the scheduler page. The first item is the Global Scheduler option. See below for more details.
Pause All/Run All: These buttons allow you to pause all or run all the scheduled runs with a single click.
Delete Run: Removes a run from the scheduler.
Save Run: While API Fortress will automatically save working copies, we recommend that you click Save to manually save the run.
Global Scheduler
By selecting the Global option from the Test dropdown you can schedule a unified run for all, or some of the tests available in the project.
Unlike the scheduler for a single test, the Global Scheduler includes an additional section where you can select the tests you want to schedule together.
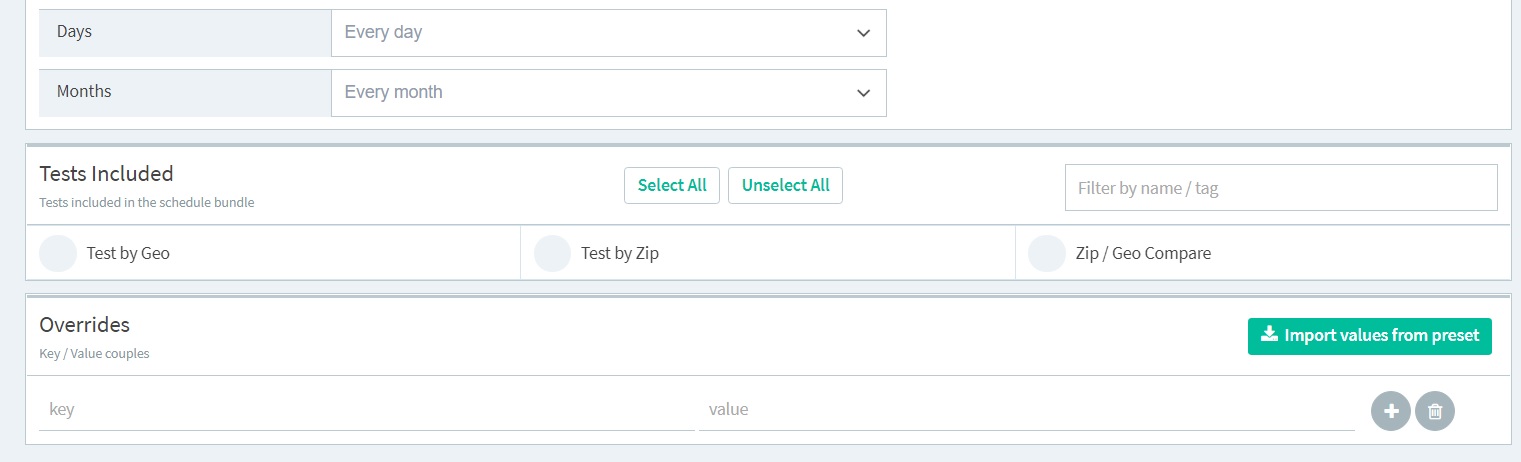
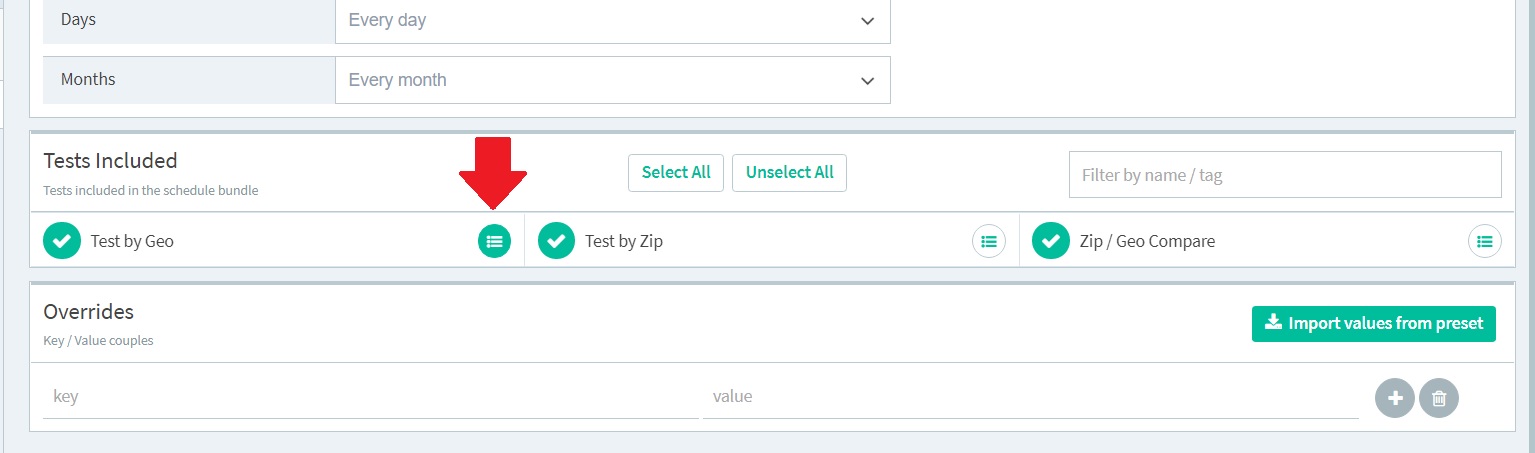
The key/value pairs inserted in the overrides section at the bottom of the page will be used for all of the selected tests. If you need to add values for an individual test out of the collectively scheduled tests, you must add them for the single test. To do so, you have to first save the scheduled run.
Once you save the schedule, the icon highlighted below appears next to each individual test—you can add override values by clicking on this icon.