Okta
- Login to OKTA, click on Admin and pick Add Applications from the right sidebar.
- Type "TestFairy" into the search form
- Click Add on the TestFairy app.
- Next, type in the team's name in TestFairy (it is also the subdomain's name).
- Please contact Sauce Labs Support to provision a custom subdomain
- Next, select authorized users. When done, click Next.
- OKTA-side configuration is done. Now click Done.
- In the Sign On menu, click on View Setup Instructions.
- Copy
ID Provided Metadatafrom section 4 into your clipboard. - Now login to https://app.testfairy.com, and open the Preferences.
- In the Security menu item SAML/Single Sign-on section, paste the copied
ID Provided Metadatainto the text area. - TestFairy-side configuration is done. Now, log out, and if SSO is configured into your account, the login page is replaced with Login with OKTA.
(Optional) Automatically Importing Groups From OKTA
When managing large teams with OKTA, it is most likely that people are already associated with groups.
For example, say Alice is associated with the following groups in OKTA: ["QA", "QA San Francisco"]. With auto-import of groups, Alice is automatically associated with the following groups in Sauce Labs Mobile App Distribution the next time she signs in: "okta", "okta-qa", and "okta-qa-san-francisco". Once removed from the group "QA", Alice is automatically removed from the "okta-qa" group in Sauce Labs Mobile App Distribution, the next time she signs in.
To import groups each time a user signs into Sauce Labs Mobile App Distribution:
- Open the Sauce Labs Mobile App Distribution app in your OKTA account, select Sign On, and click Edit.
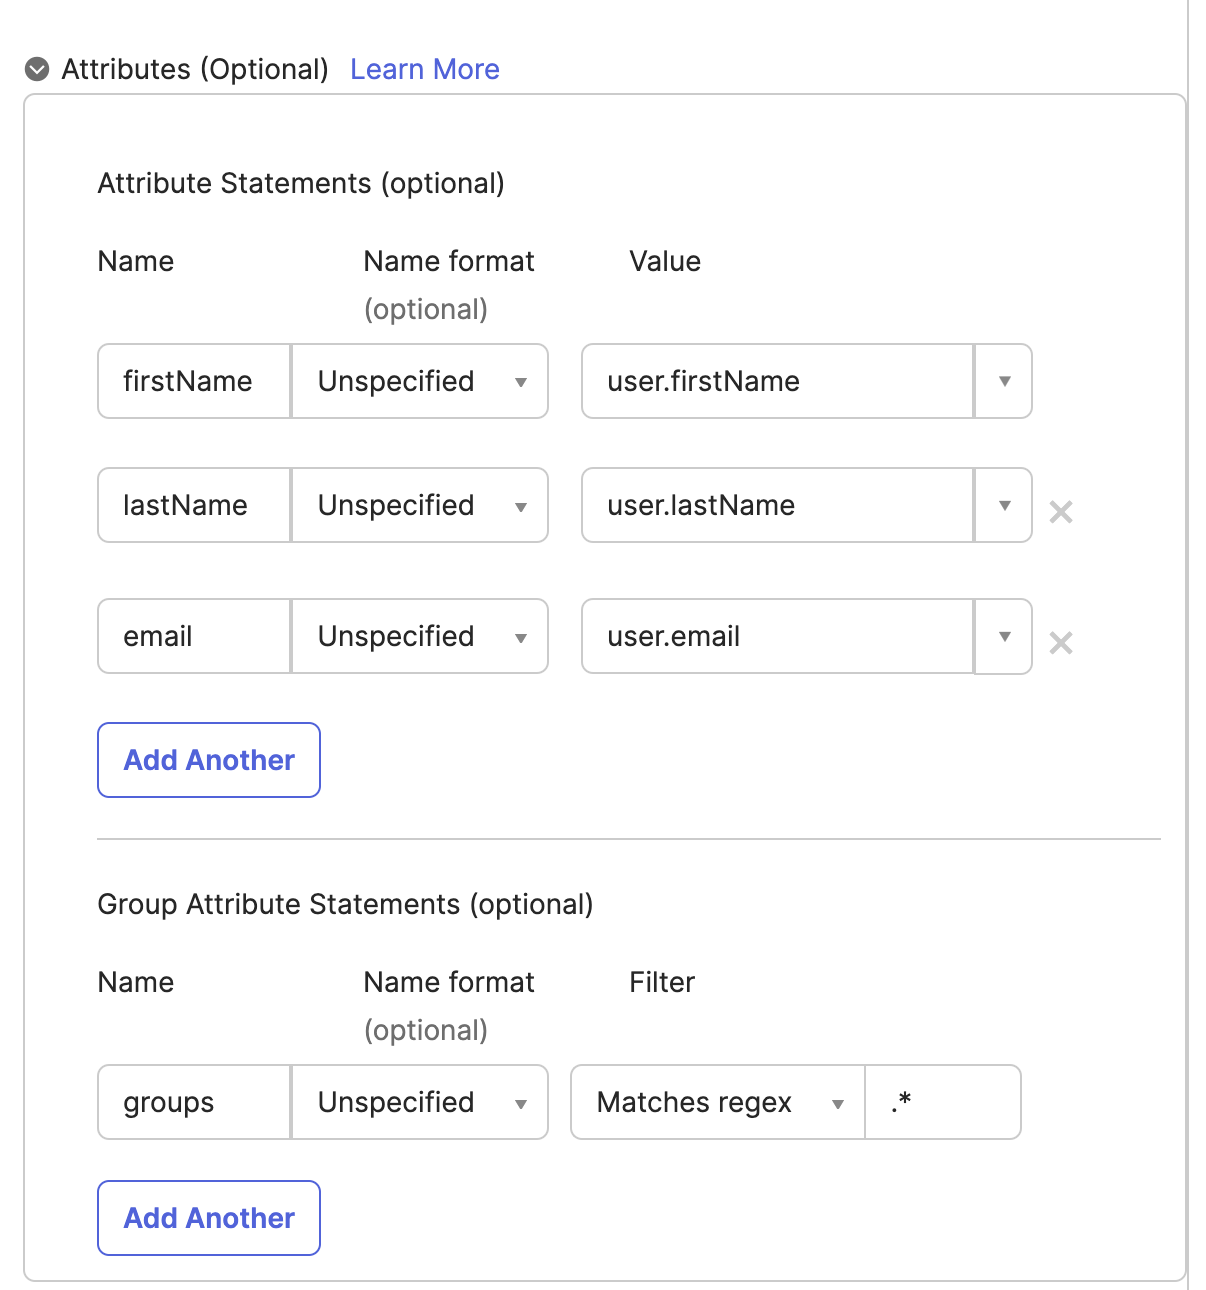
- Click on Attributes.
- Under Group Attribute Statements, add a rule with the name: "groups" (in lowercase) and filter "Matches regex" with value
.*. (dot asterisk). - Note: We recommend adding at least one Attribute Statement (e.g., email), as shown below. Failing to do so may prevent SAML from including group data in the response.