Live Mobile App Testing
With Sauce Labs, you can test your mobile apps on a variety of Android and iOS/iPadOS devices. If you do not have an app, consider using the Sauce Labs demo app for validating your account functionality as well as your tests.
What You'll Need
- A Sauce Labs account (Log in or sign up for a free trial license).
- Your mobile app file uploaded to our App Storage. If you don't have one on hand, consider using our Demo Apps:
App and Device Settings
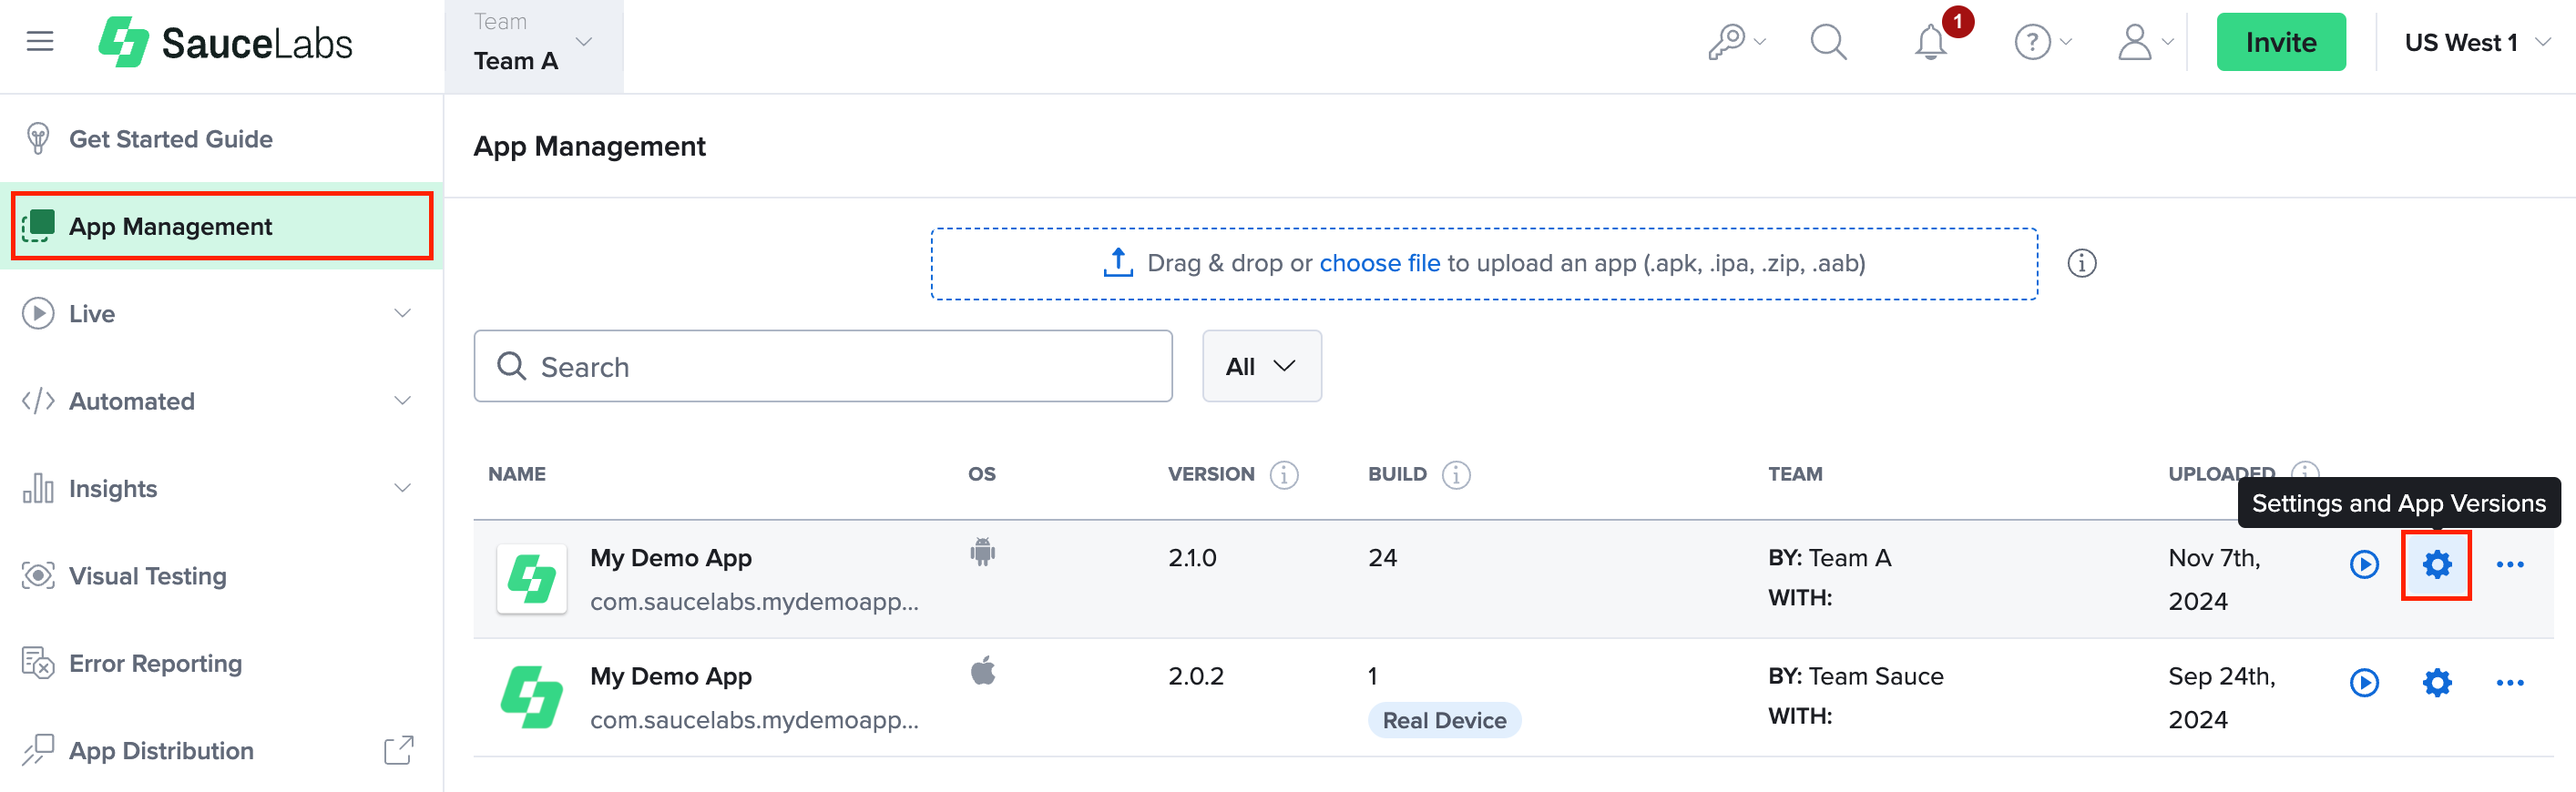
To view uploaded app builds or change the app settings, on the App Management page, hover over the app and then click Settings and App Versions.
Real Device Settings
The Real Device Settings are only applicable for real device testing. Any changes you make to the app and device settings will affect all uploaded versions of the app.
Only organization and team admins have permission to modify these settings. If an organization admin wants to grant a member permission to modify these settings, they can promote the member to Team Admin. For further assistance, reach out to your Customer Success Manager or Sauce Labs Support.
Navigate to the Settings tab to view the app and device settings.
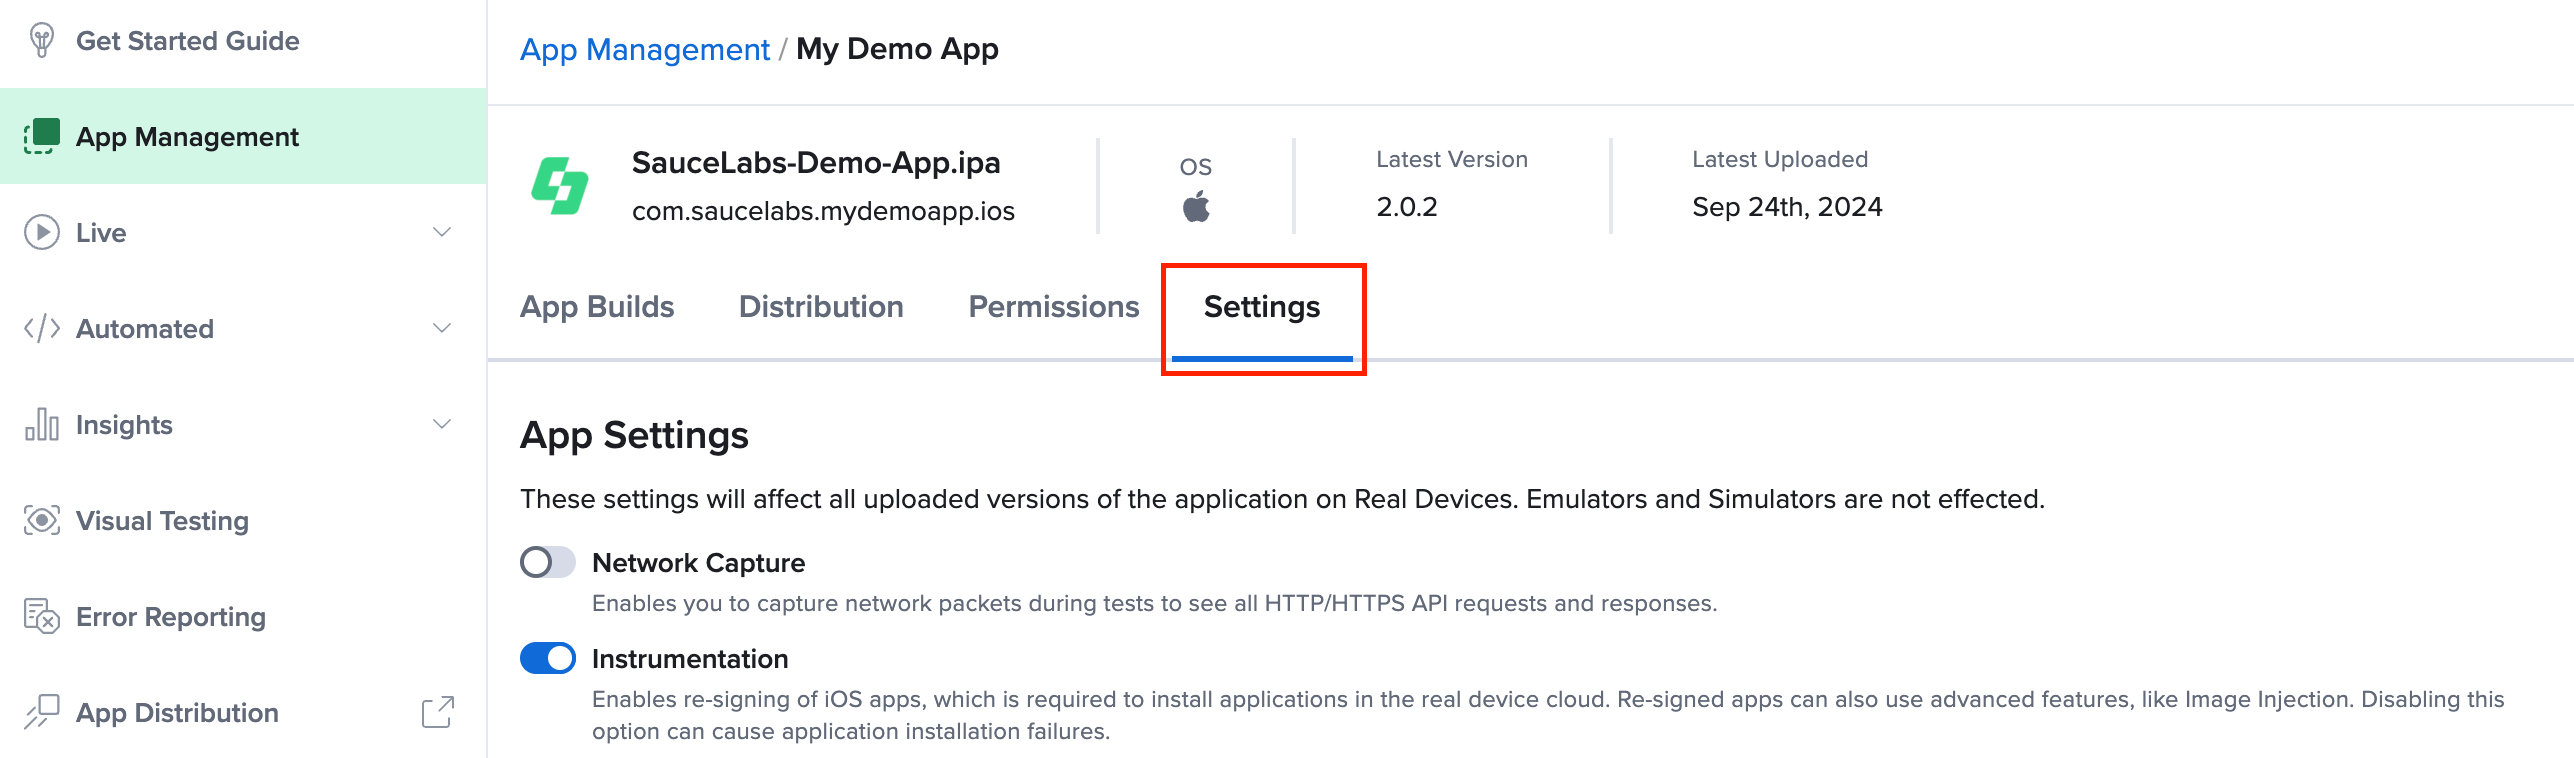
A range of settings can be configured to serve as the default for manual test runs (automated tests are running based on the settings defined directly in the test script).
App Settings
| Setting | Description |
|---|---|
| Instrumentation | Enable/disable app instrumentation. Enabling allows you to use advanced features when testing your app in the real device cloud, like Image Injection and Bypass Screenshot Restriction. |
| Network Capture | Enable/disable Network Capture. Enabling allows you to capture network packets during tests to see all HTTP/HTTPs API requests and responses. For Android a minor modification in the manifest is necessary to make your app trust our proxy certificate. We'll do this for you automatically on the fly, right before we install the app to the target device. |
| Device Vitals | Enable/disable Device Vitals. Enabling allows you to capture the app's performance during the test session. This exposes various metrics, including CPU performance, memory performance, and UI responsiveness (Android only). |
| Crash/Error Reporting | Enables/disables Crash/Error Reporting. Enabling allows you to detect and record fatal errors (crashes) that occur during the test session. |
| Image Injection | Enable/disable Image Injection. Image Injection allows you to mimic camera behavior when testing apps by letting you upload an image and present it to the app as if it were read by the device camera. |
| Bypass Screenshot Restriction Android Only | Enable/disable Bypass Screenshot Restriction. If you're testing Android mobile apps on Sauce Labs and see a black screen in your live testing session, you might need to enable the Bypass Screenshot Restriction. This allows Sauce Labs to work around a setting on those apps that prevents screenshots or videos from being taken. However, there are other details to keep in mind. To effectively test apps that have this setting, see Bypass Screenshot Restriction. |
| System Alerts Display iOS Only | Enable/disable a system alerts delay. Enabling delays alerts, such as asking for permission to access the camera, to prevent app crashes at startup. |
| Biometrics Interception | Enable/disable Biometrics Interception. Enabling allows you to choose authentication options if your mobile app requires a biometric authentication, such as fingerprint or face recognition on Android, and Face ID or Touch ID on iOS. This setting is disabled by default for iOS apps. |
| Group Folder Redirect iOS Only | Enable/disable a group directory redirect. Enabling allows you to use your app's private app container directory instead of the shared app group container directory. When your app gets resigned, the shared directory is not accessible. |
Device Settings
| Setting | Description |
|---|---|
| Device Language | Use the dropdown list to select the device language. The language selector will tell your application that the device's locale and region are set to the selected parameter. You won't need to manually change the OS's language during a session inside iOS/Android settings. For more information about the locale setting, see the documentation for iOS and Android. |
| Device Orientation | Use the dropdown list to set the device orientation (Landscape or Portrait). |
| Proxy | Enable/disable the use of a proxy. Enter the Hostname and Port and then click Update. |
| Device Passcode | Enable/disable the device passcode for your apps. If your app requires a device passcode/screenlock to launch, you can enable this setting to run your tests on a passcode-protected device. On Android we are setting 000000, on iOS 089675 as passcode. This feature is available during Live Testing sessions, see it below in the Live Testing interface section. |
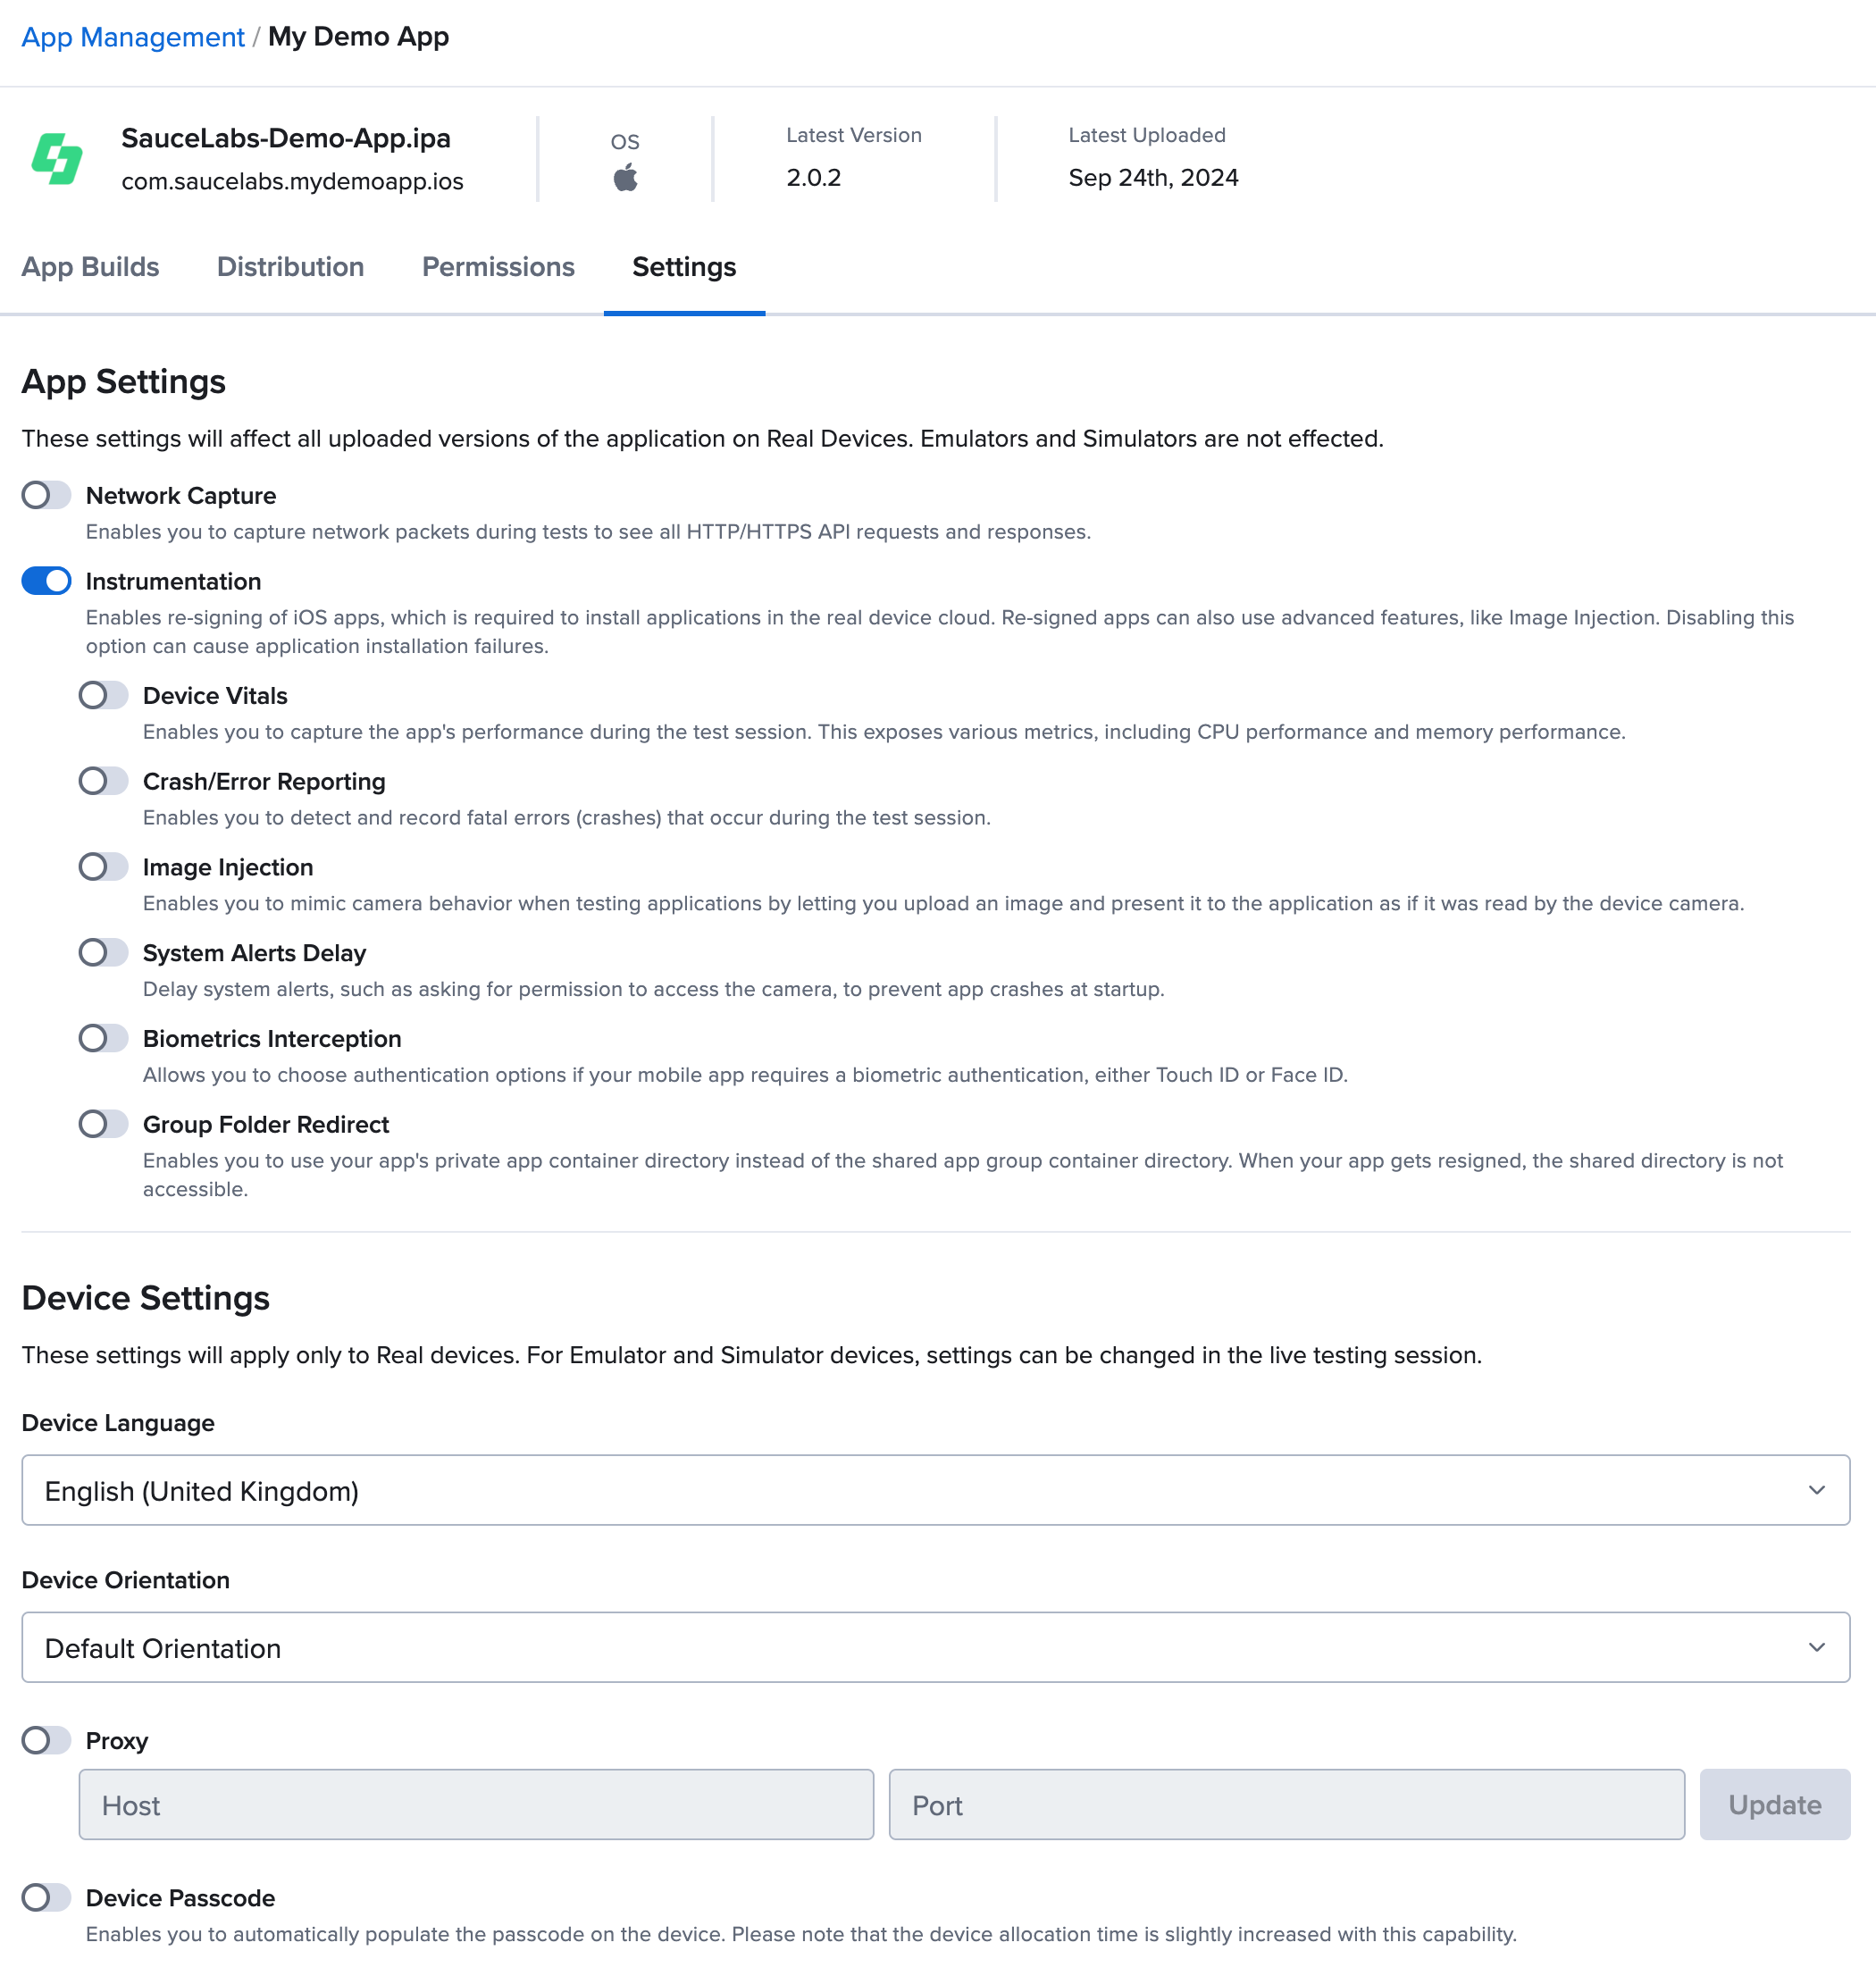
Example Settings - iOS
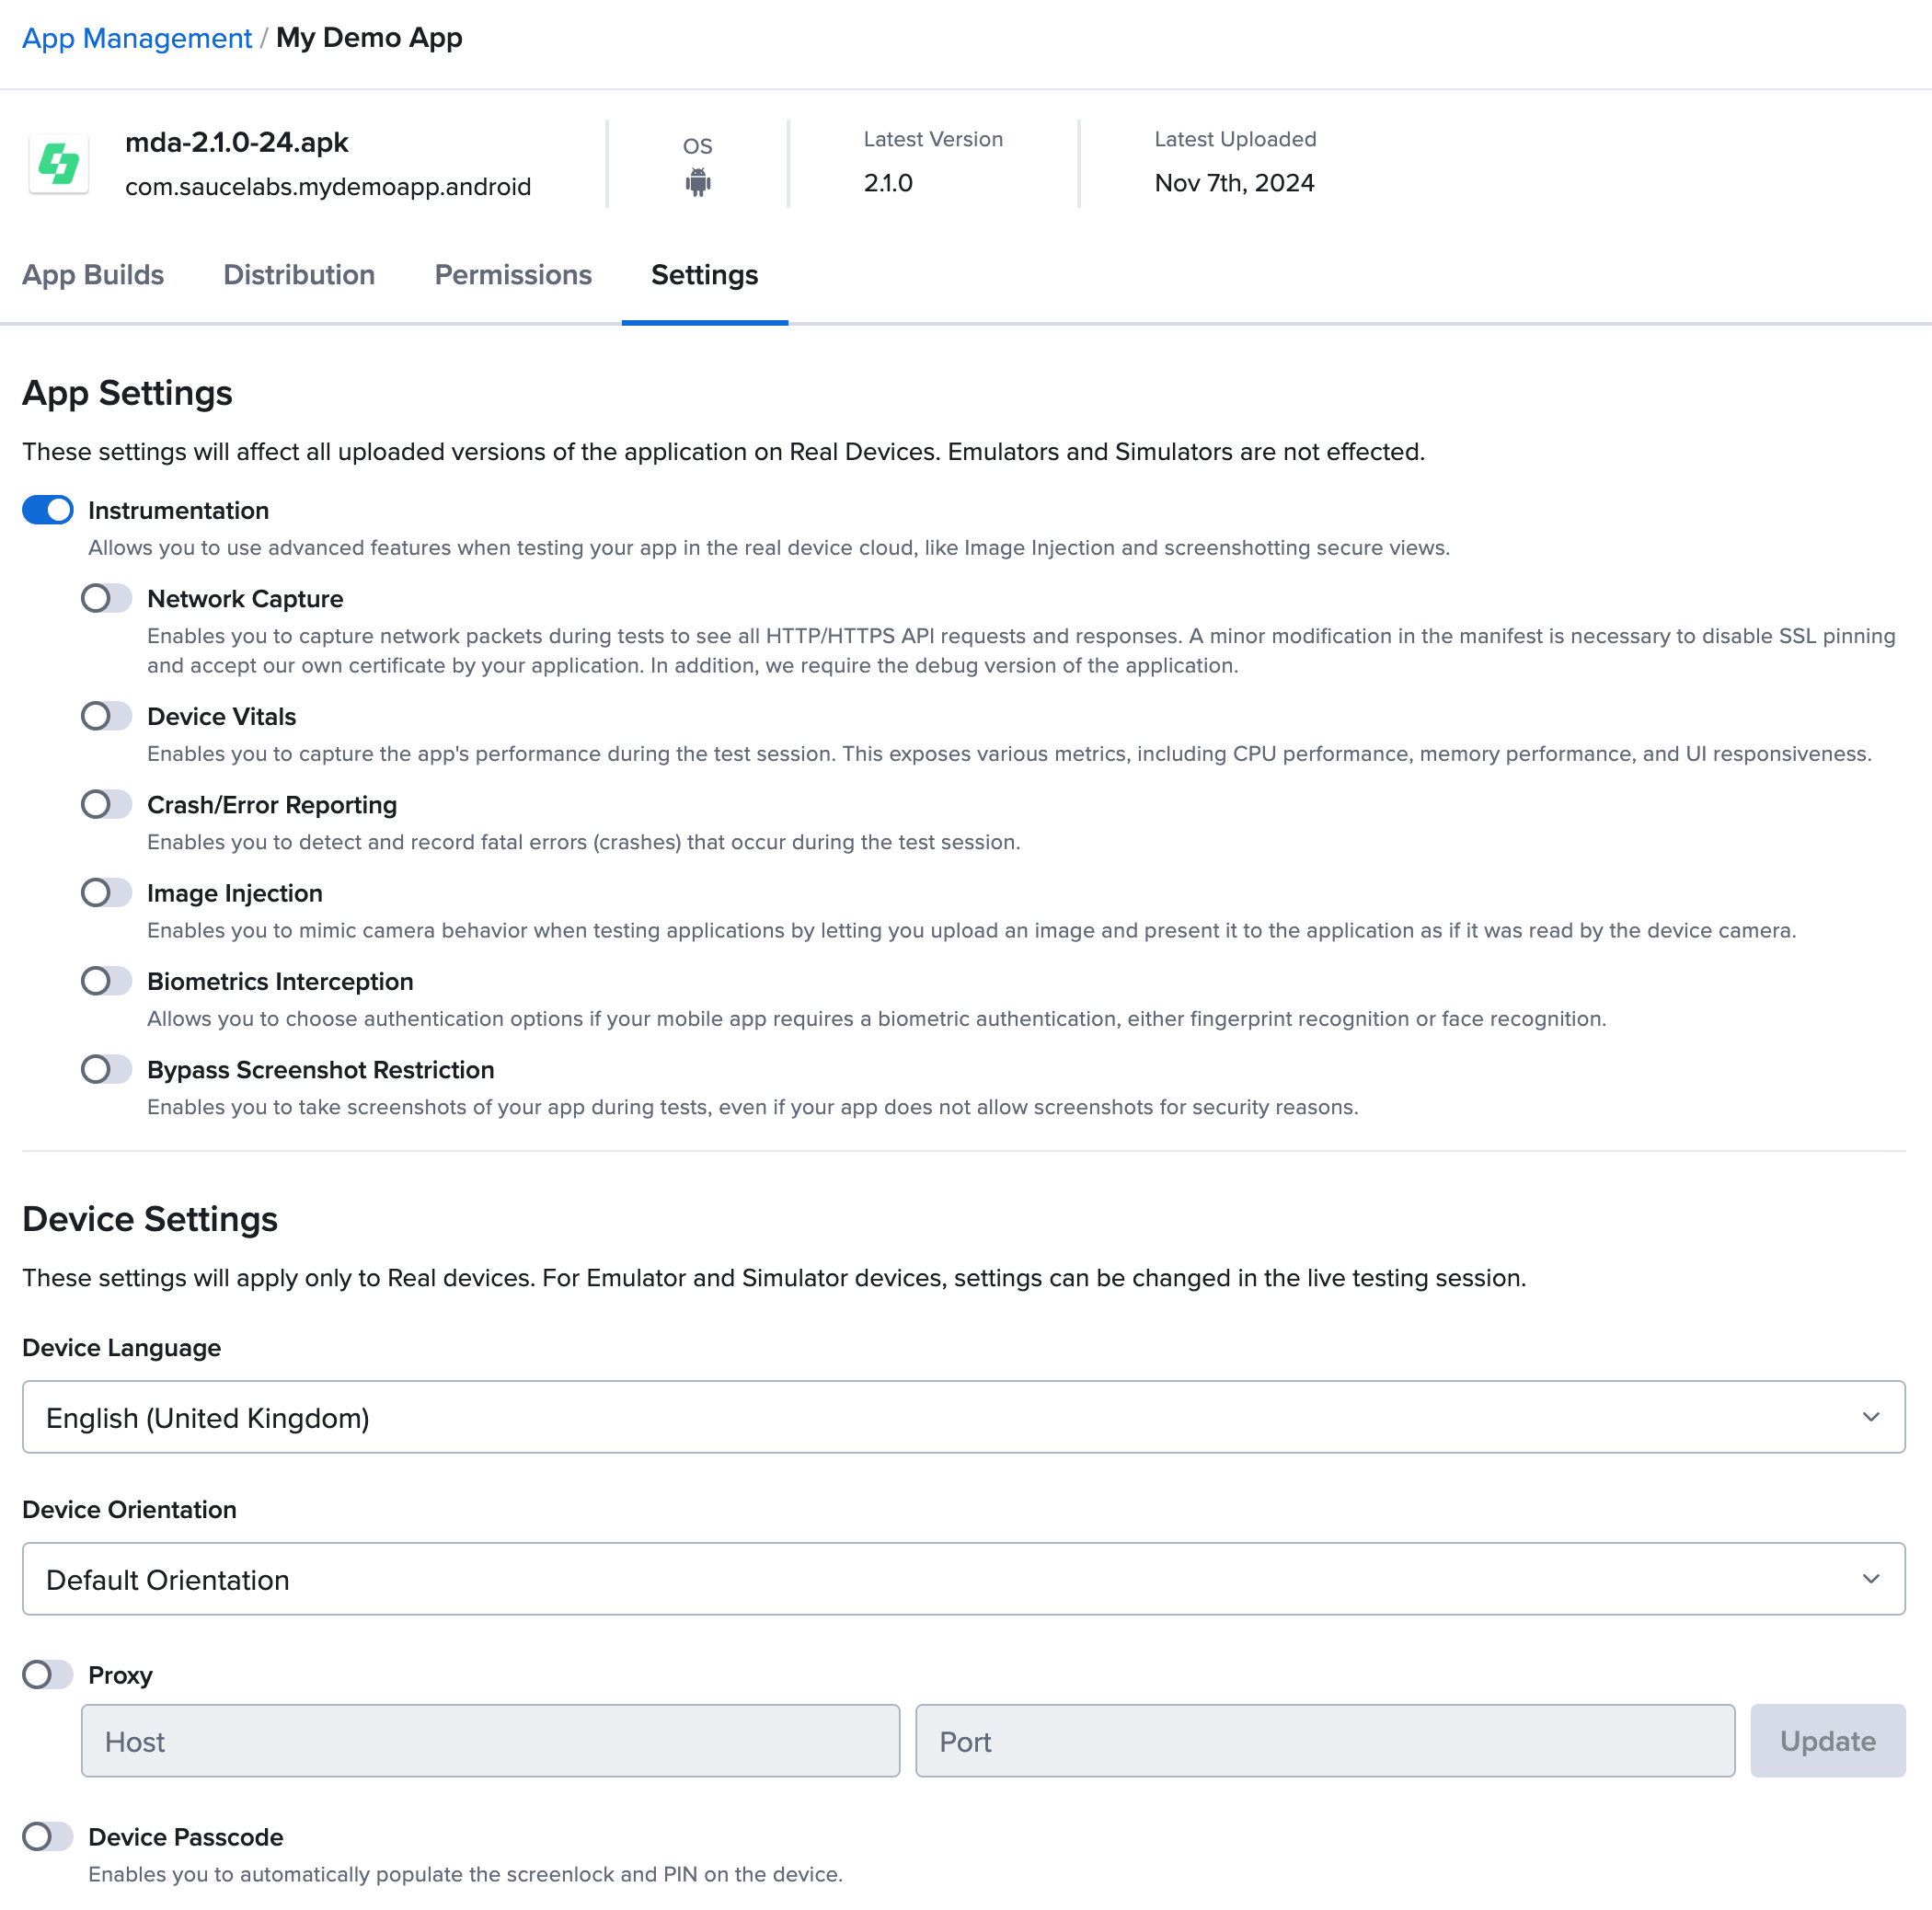
Example Settings - Android
Selecting an App
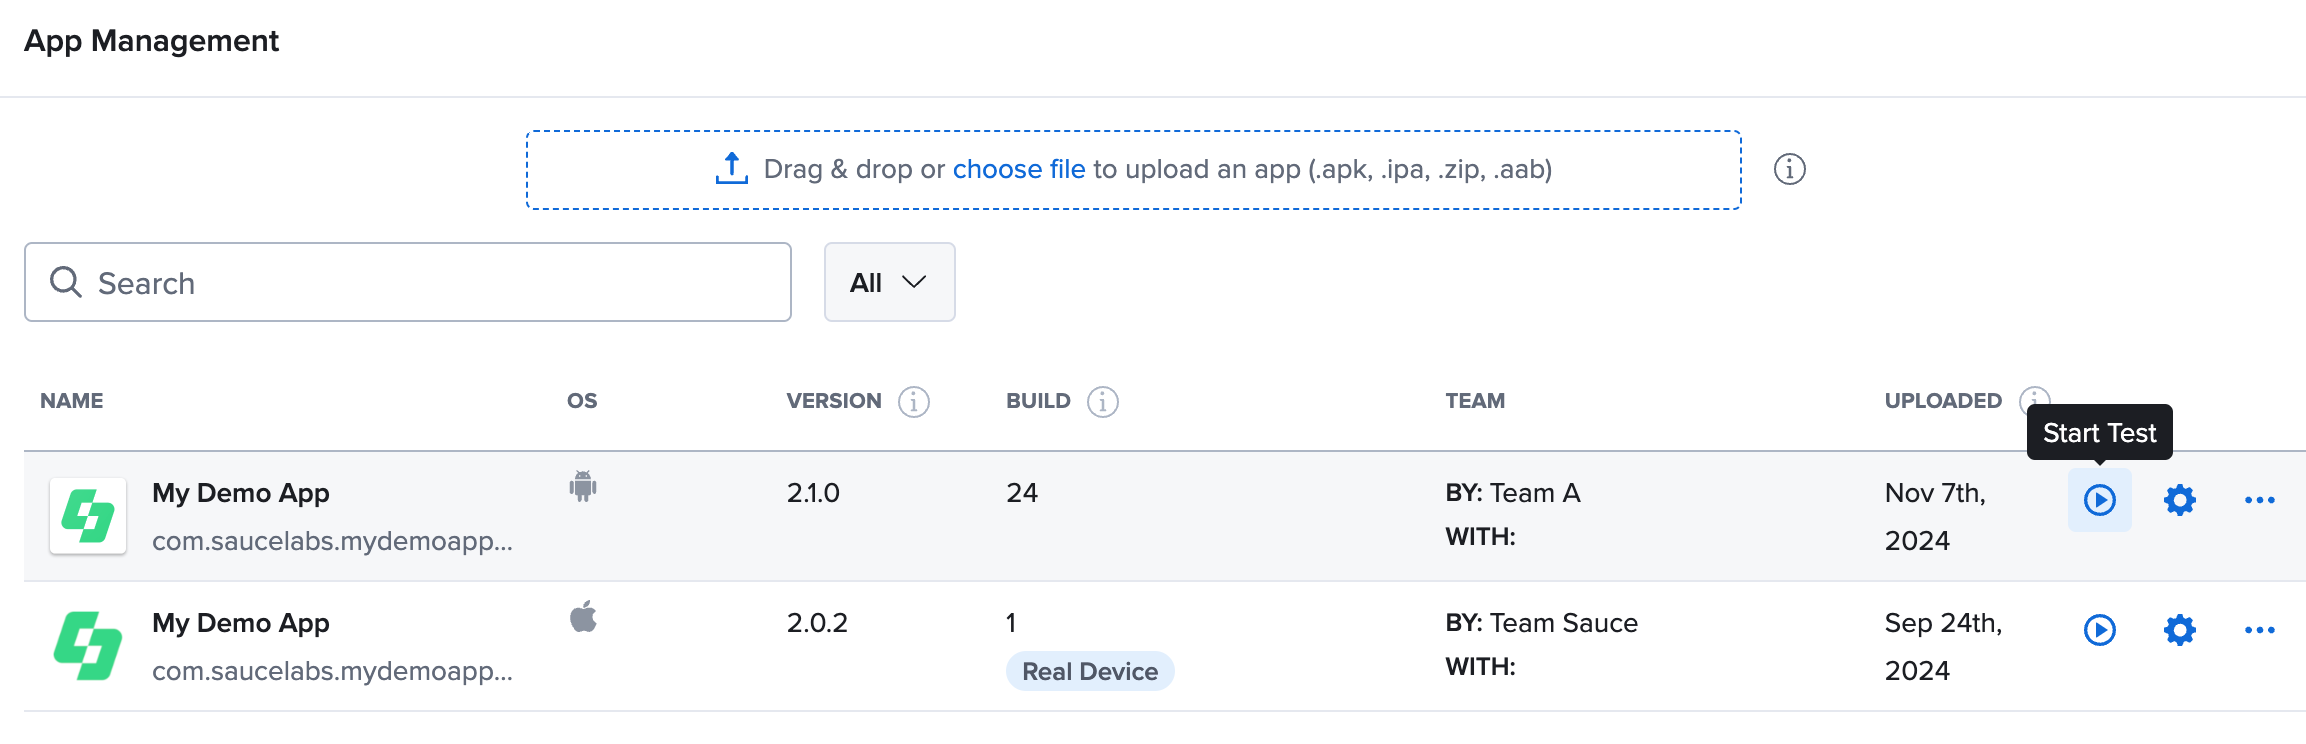
From App Management
On the main App Management page, you can select an app to test by clicking Start Test in the row of the desired app group. The app build chosen will be the most recently uploaded build in that group. The device selection page will open, with the option to test on a real device or a virtual device.
From App Management - App Builds
In the App Builds tab of a selected app group, you can start a test by clicking Start Test in the row of the specific app build you wish to test. This is helpful for conducting A/B testing or for documenting and validating feature parity across different versions of the same app.

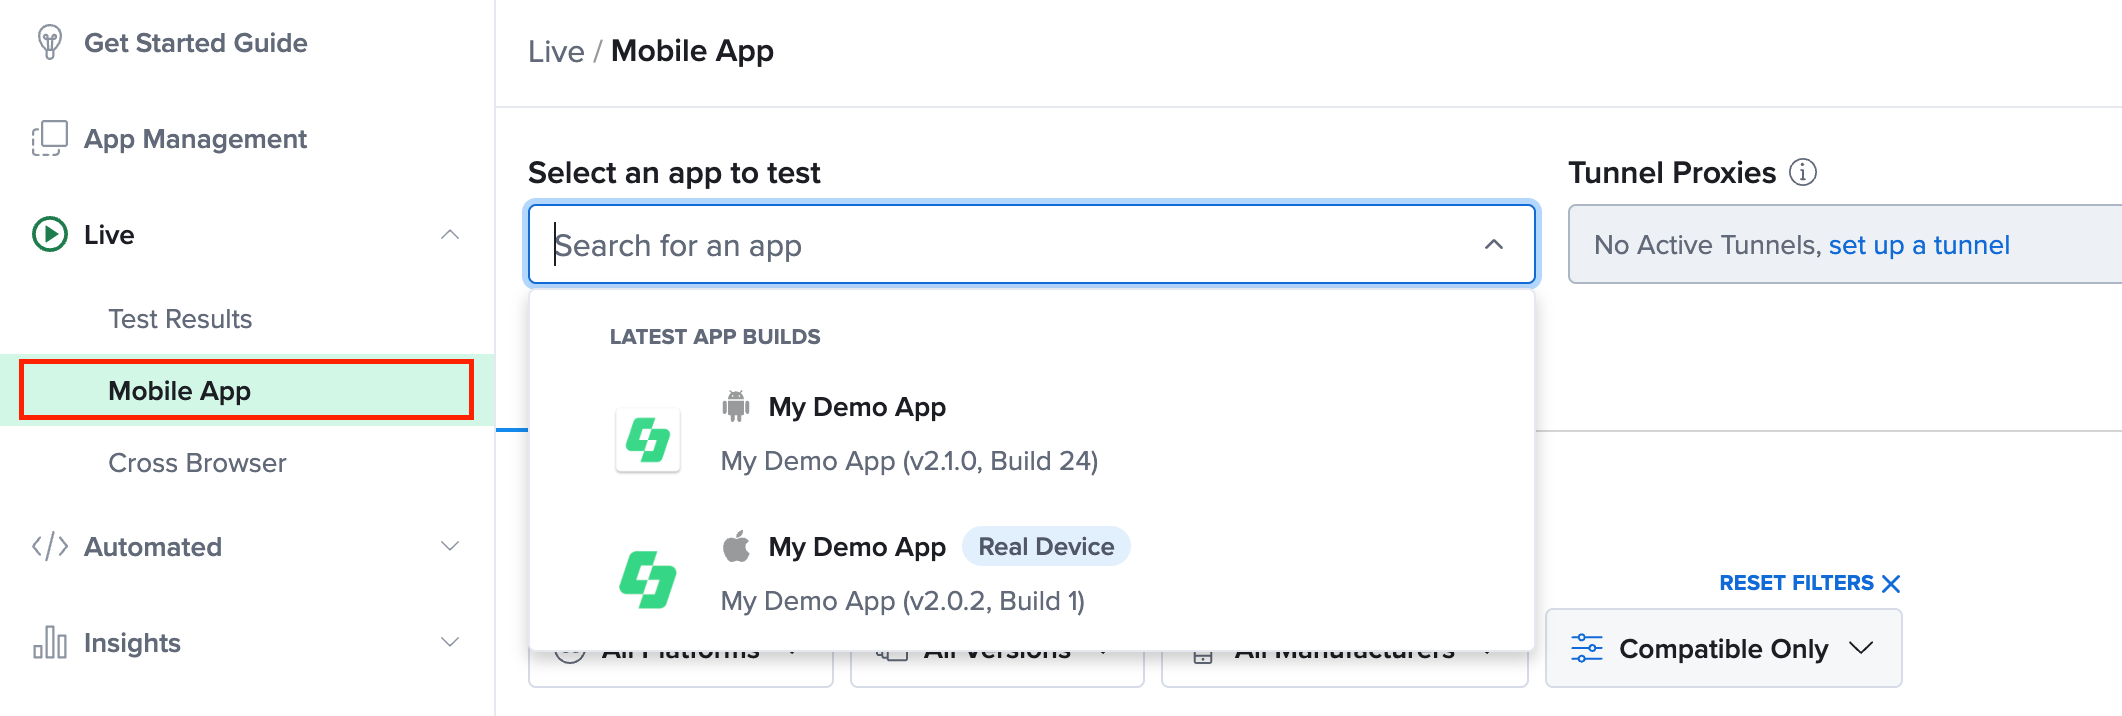
From Live - Mobile Apps
On the Live Mobile Apps Testing page, you can search for and select the desired app build from the dropdown list to begin testing.
Selecting a Device
If you are testing an iOS app, the device selection will only display the type (real/virtual) configured on the app.
You must select a device prior to launching a session.
To mark a device as a favorite, so you can find it easily in the future, click the pin icon next to the device name.
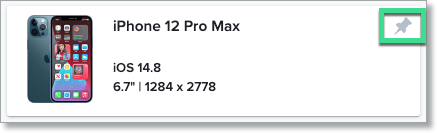
The default sorting for the device list is Pinned First.
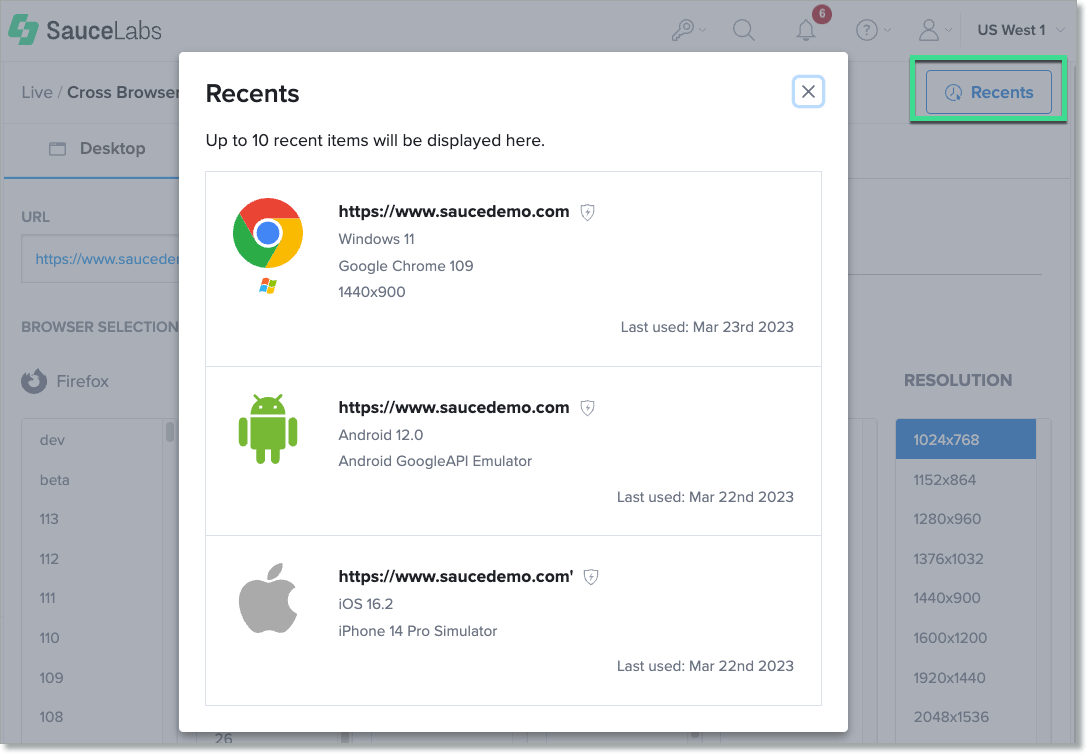
To view your recent configurations, click Recents.
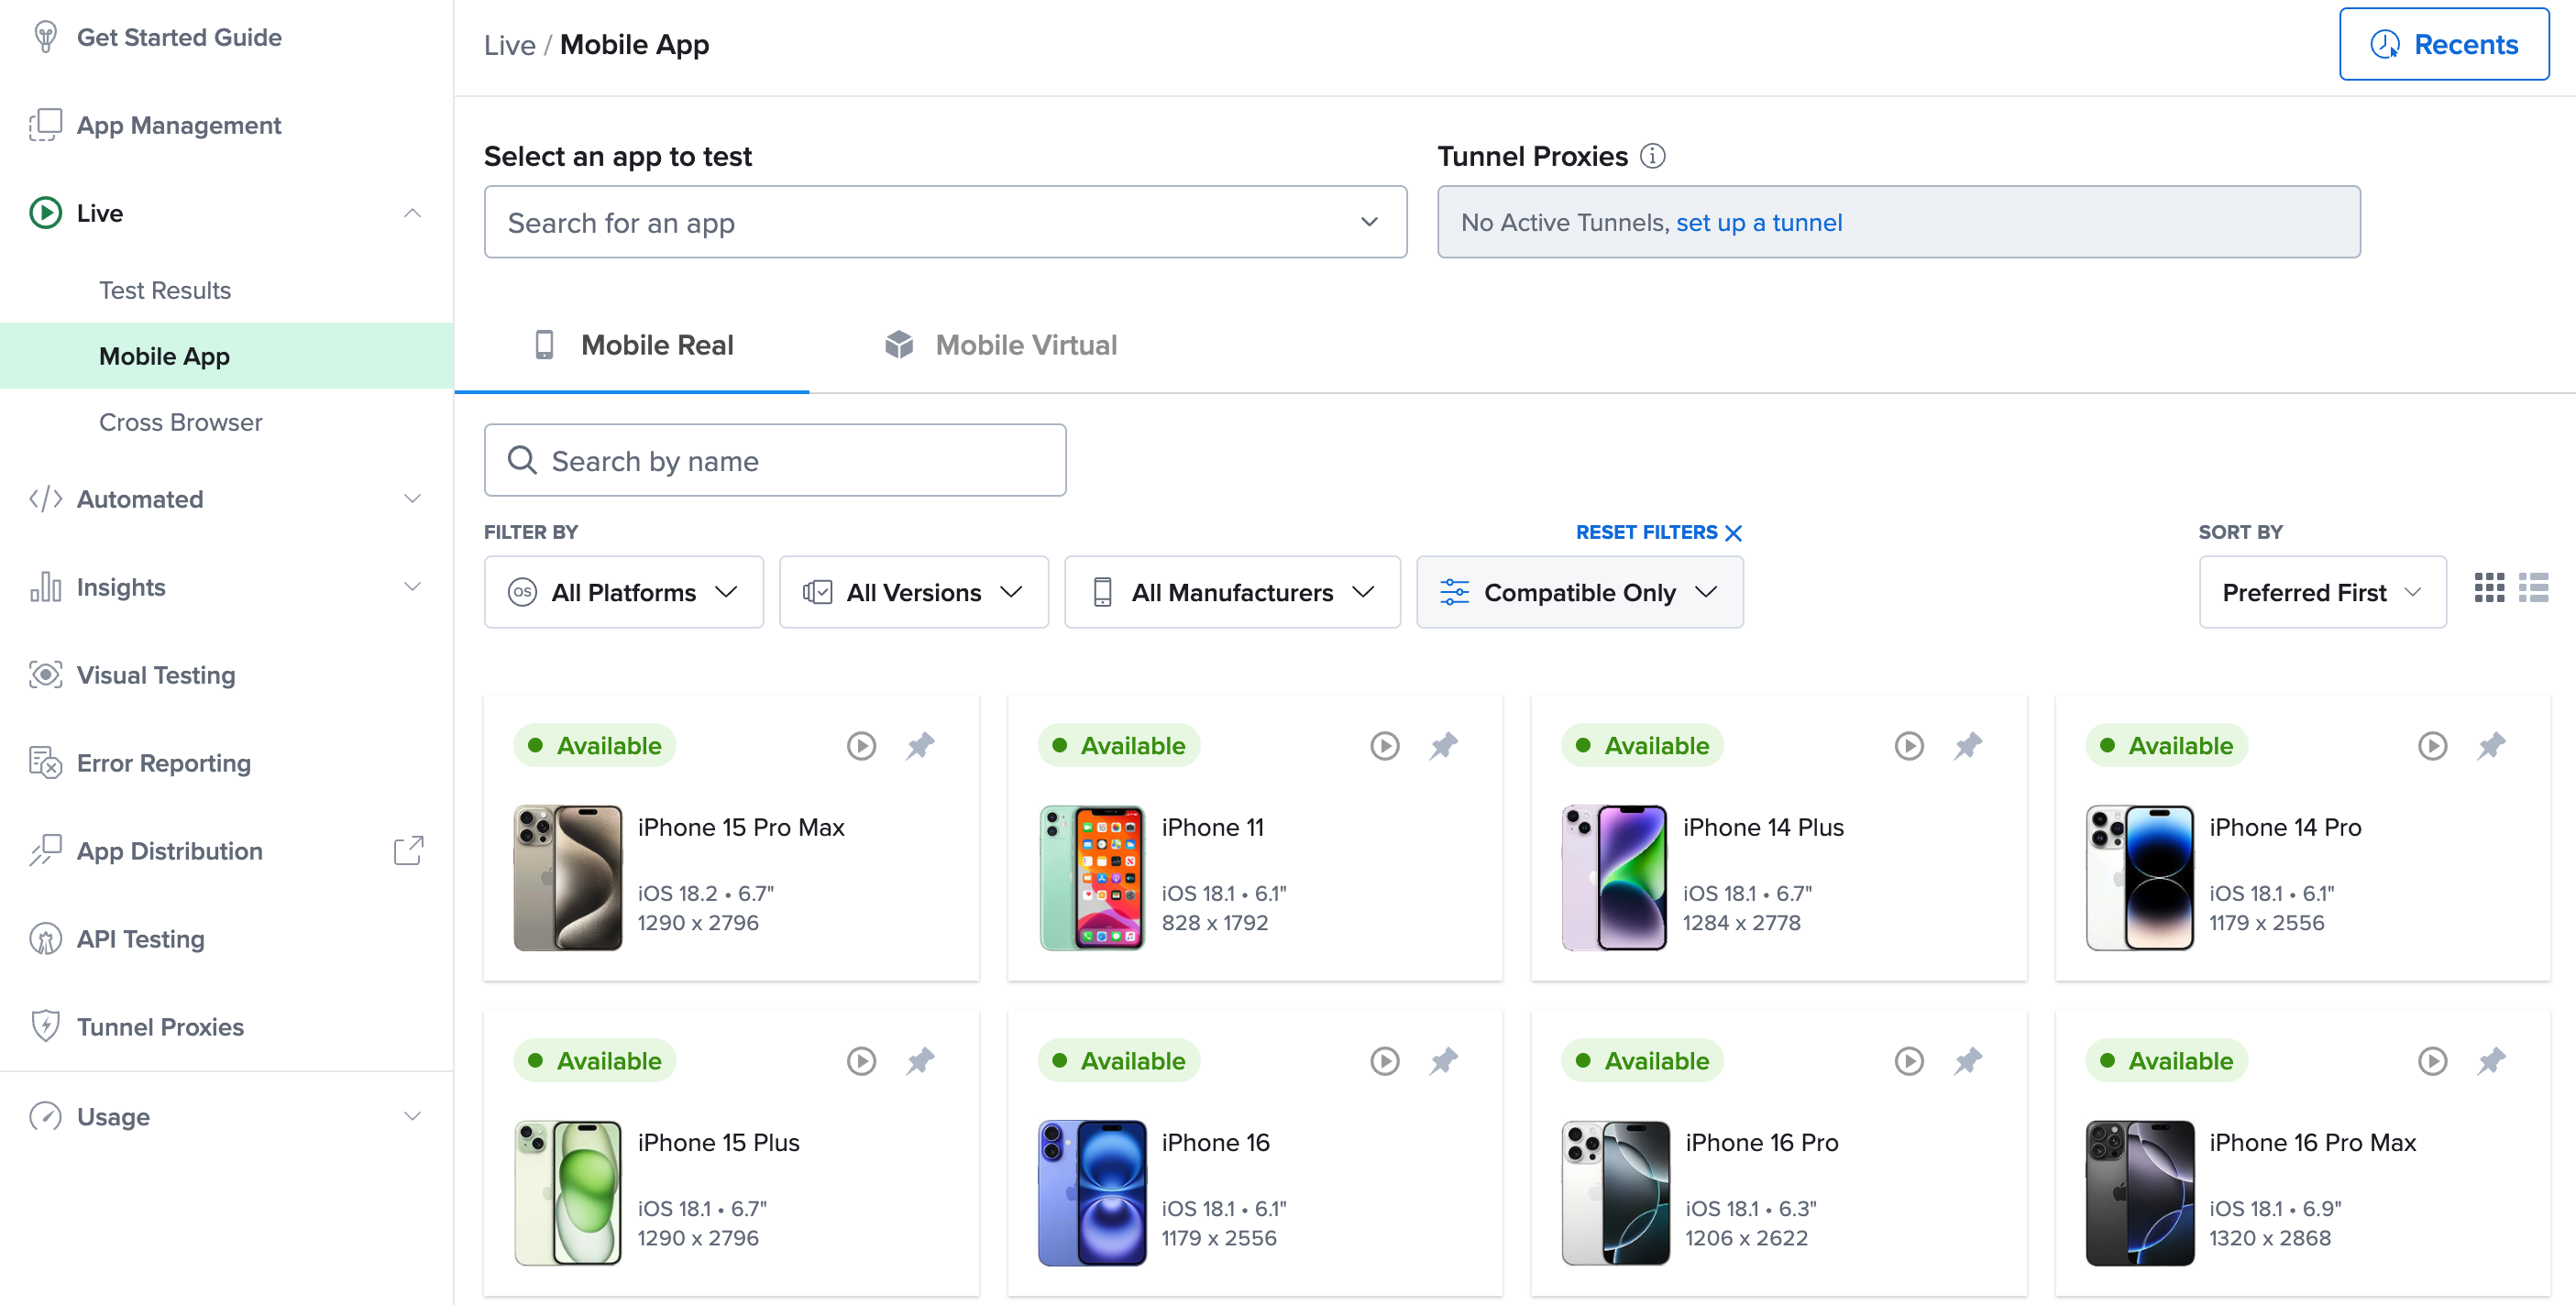
Real Devices
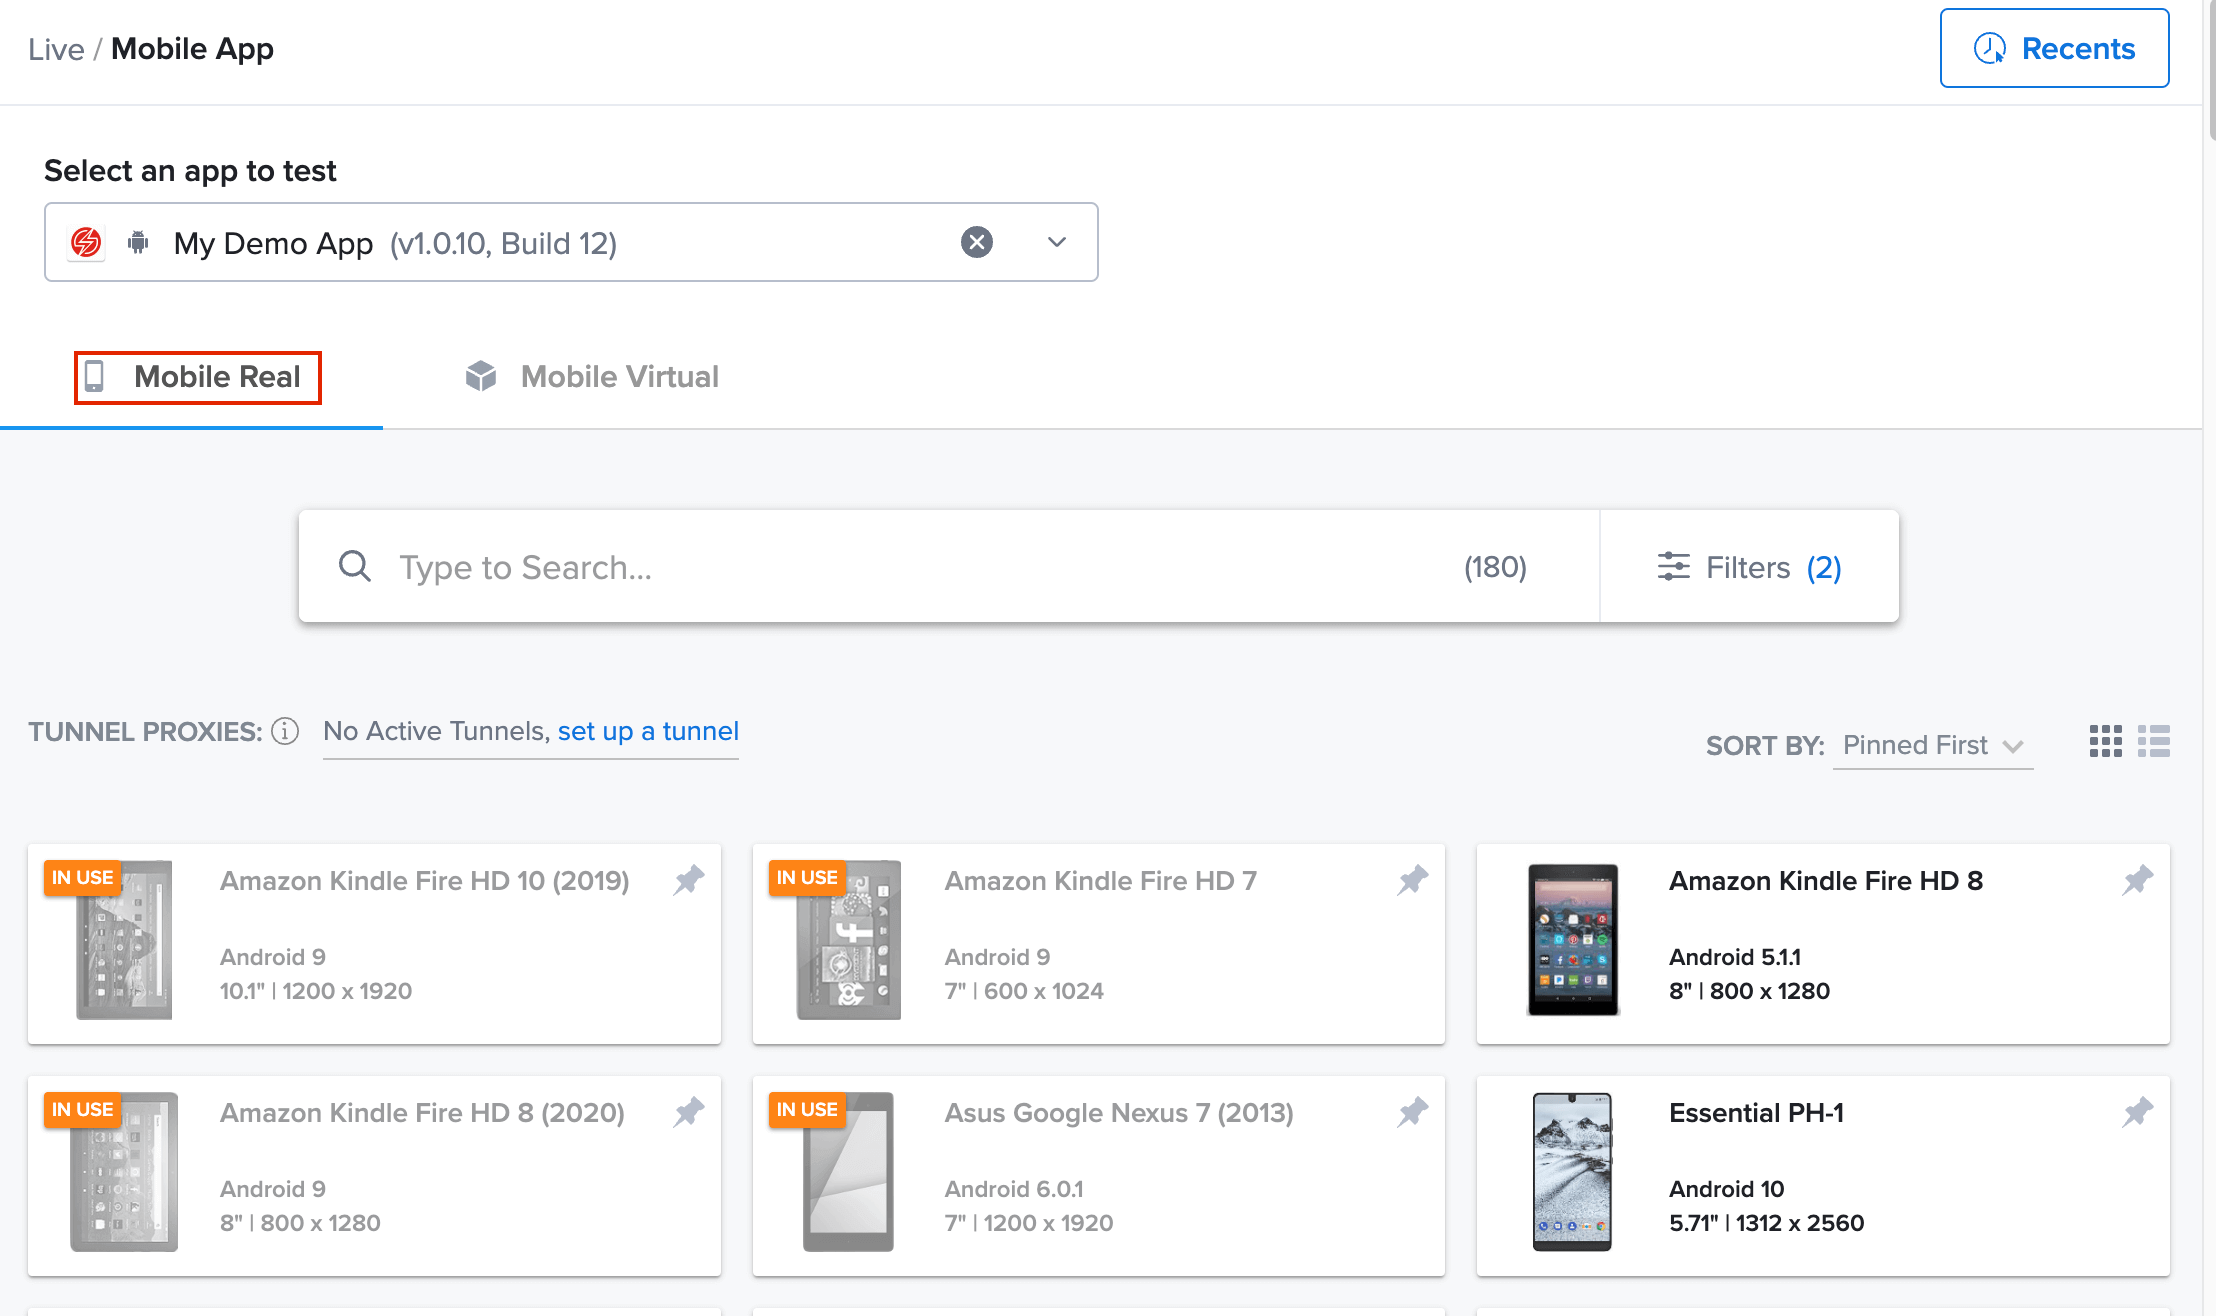
On the device selection page, click the Mobile Real tab. Use the search box and filters to find the device you want to test on, or select the device in the grid.
Public vs. Private Devices
There is a distinction between Public Devices and Private Devices.
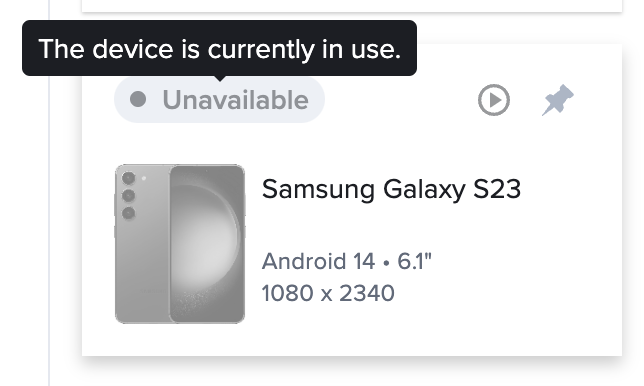
- Public devices are accessible by anyone with a Sauce Labs account and are subject to availability. If a device is in use, you will see a UNAVAILABLE flag on the tile.
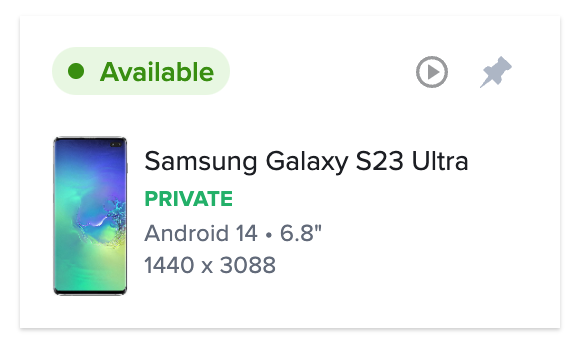
- Private devices are associated with your account and are an enterprise only feature. Private devices are indicated by the green PRIVATE on the tile.
If you are interested in upgrading to an enterprise plan, contact your Sauce Labs Sales Engineer or Customer Success Manager.
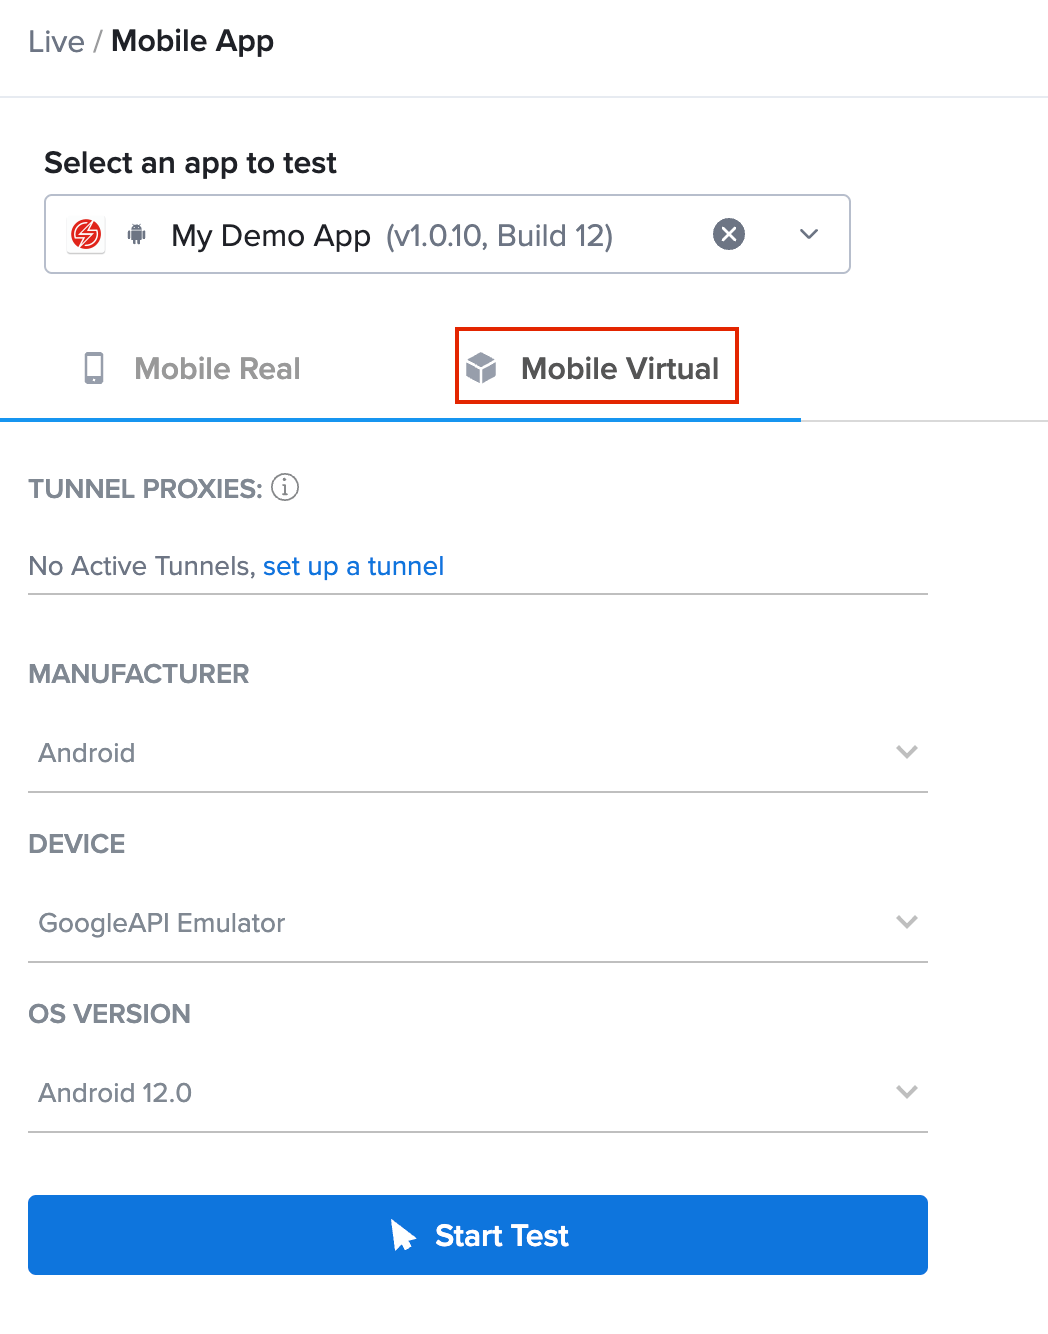
Virtual Devices
On the device selection page, click the Mobile Virtual tab. Use the dropdowns to select the details for the virtual device you want to test on, and then click Start Test.
Launching a Test
If you have issues starting live tests, check your IT infrastructure and make sure you are not blocking WebSockets.
You can launch a test from the following screens:
- Hover over the device in the grid and then click Start Test.
- Click on the device in the grid to open the Device Details. On the Details screen, click Start Test.

You'll see a loading screen, and then the app will launch in a live test window using the device you selected.

Time Limits and Timeouts for Real Devices
- Live tests for free users have a 10 minute limit from session start
- Live tests for all other users are limited to six hours
- Live tests for paid users will timeout after 15 minutes of inactivity
Trusting Enterprise Certificates
Private Devices OnlyIf you upload an app that is signed with an enterprise certificate, and Instrumentation is DISABLED in app settings, you must manually trust the certificate before it will successfully launch.
- If you receive an app installation failed error, click the X in the app loading screen to exit the device home screen.
- On the device home screen, navigate to Settings -> General.
- Under VPN & Device Management, tap the app you are trying to install and test.
- Tap Trust "app name" and then tap Trust.
- Reopen the app to continue the test.
Due to constraints introduced by Apple starting from iOS18 it's no longer possible to add enterprise certificates during a running test session in our platform. Please contact our Support team for assistance.
Adding a Test Name and Outcome for Your Test
Sauce Labs has introduced a new feature that allows you to enter a test name and test status (passed/failed) for your Live Tests after cross-browser and mobile app testing. This update enhances the testing efficiency by enabling you to add more context to test descriptions and add more clarity to your test repository.
Adding a test name is a straightforward process, and there are two ways to do it:
-
From the end session screen:
-
Start a Live Test session.
-
End the Live Test Session by clicking on the End button from the toolbar. The end session screen will pop up, and from there, you can edit the test name and select test outcome status:
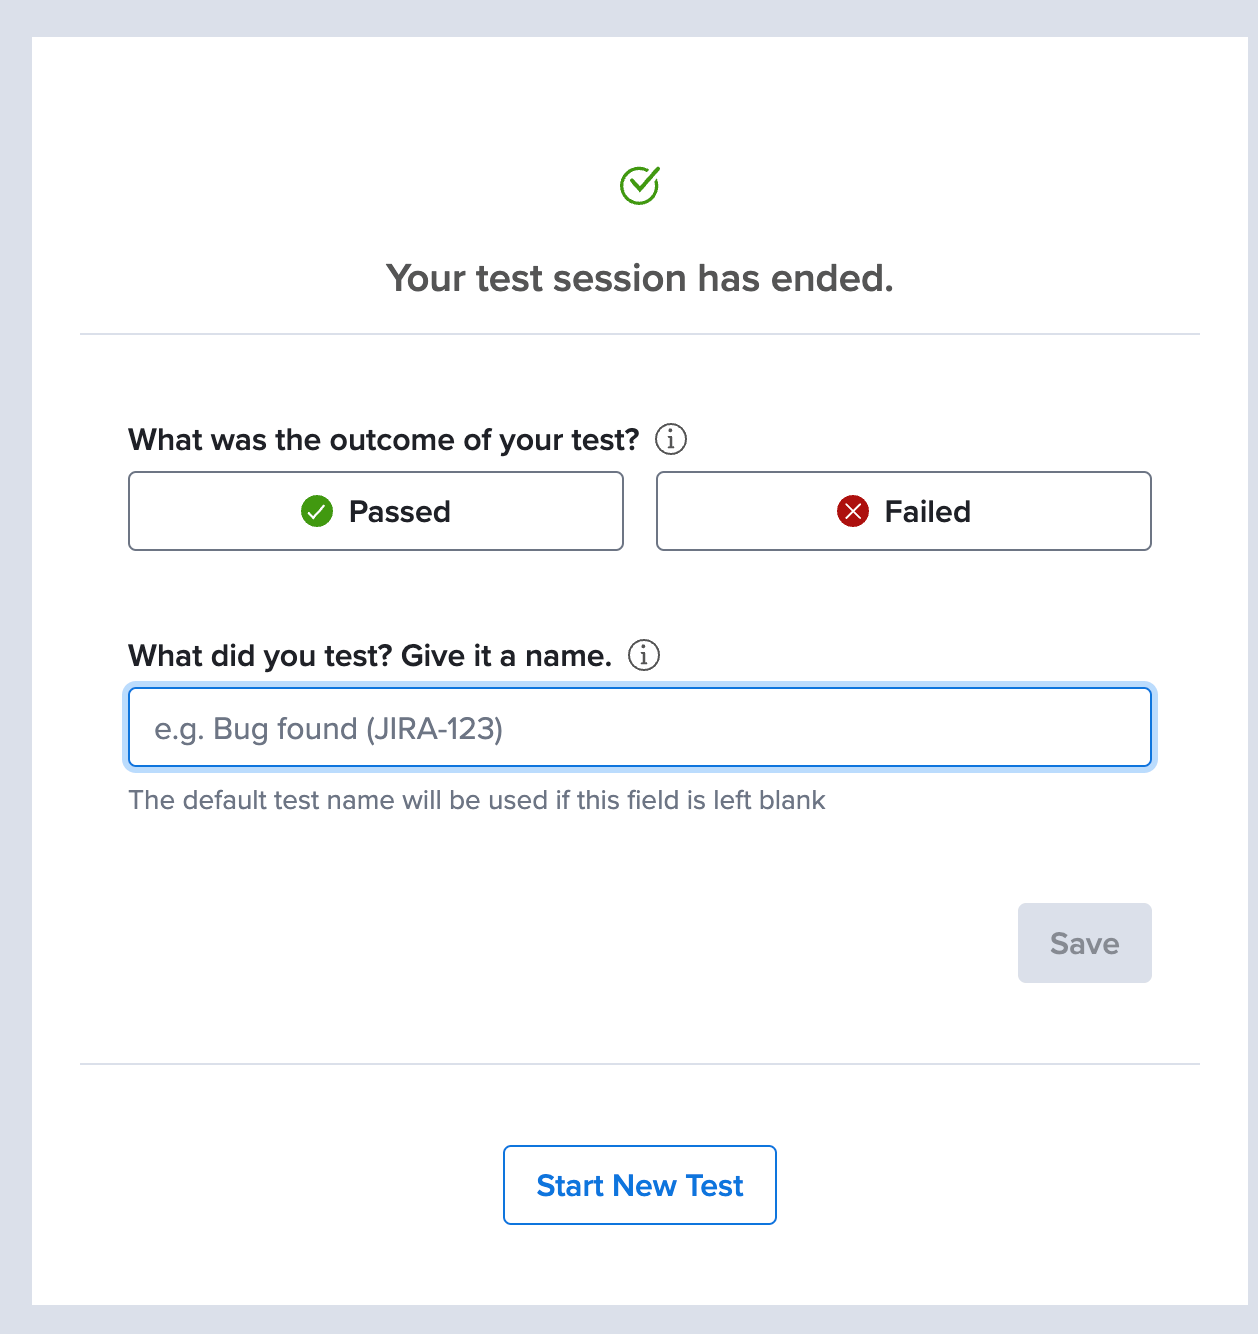
-
-
From the test details page:
- Go to Live -> Test results -> click on a test.
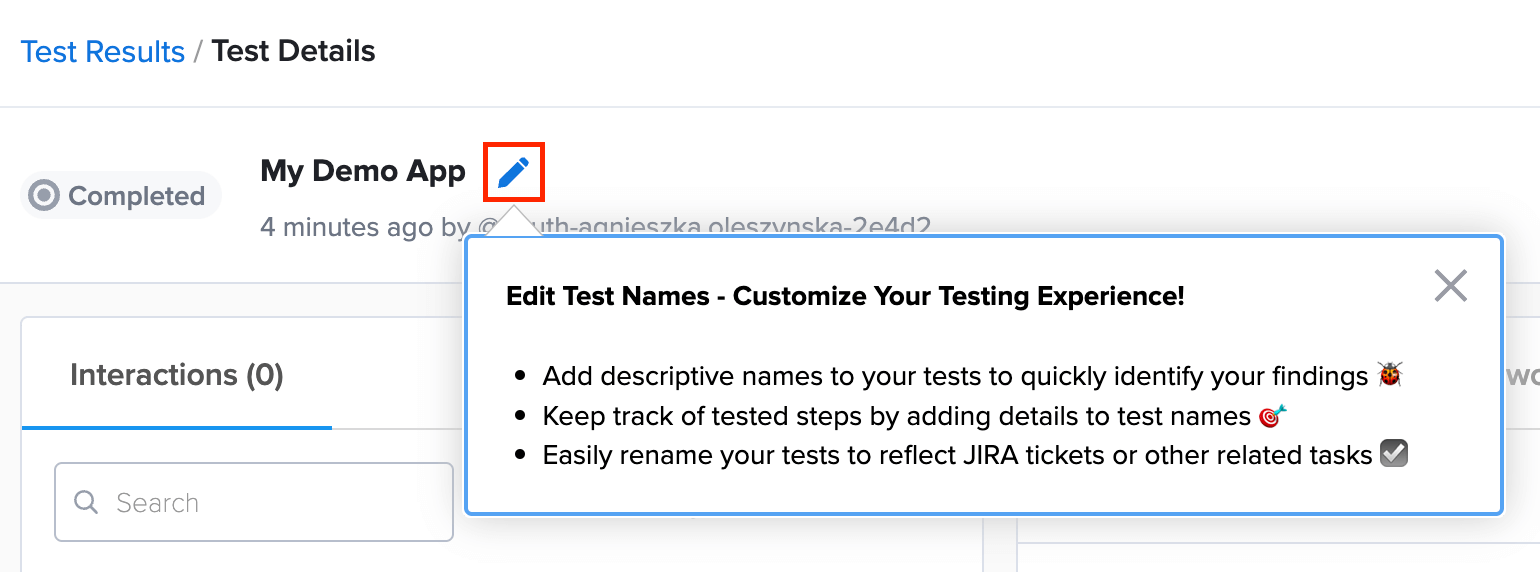
- On the test details page, click on the pencil nearby the test name to edit it:
This feature works the same way for both cross-browser testing and mobile app testing.
Use test names to customize your testing experience:
- Add descriptive names to your tests to quickly identify your findings.
- Keep track of tested steps by adding details to test names.
- Easily rename your tests to reflect Jira tickets or other related tasks.
This feature has a constraint on the maximum allowable length of the test name, which is limited to 255 characters. The utilization of emojis is not supported in the test name.
Live Test Interface
| Icon | Name | Description |
|---|---|---|
| Unpin/Pin Toolbar | Unpins or pins the live testing toolbar. | |
| Session Info | Opens the Current Session window, which includes app and device details. | |
| Take Screenshot | Takes a screenshot of the current device screen. The image downloads automatically as a .png file. | |
| Share Session | Opens the Share Device window. For a sharable link to the device, click Get Link. Users must be logged in to be able to view the test. | |
| Rotate Device | Rotates the device between portrait and landscape. | |
| Home | Opens the device home screen. | |
| More Device Options | Set Location - Set the GPS location using coordinates or by dropping a pin on the map. Camera Injection - Opens the Camera Injection window. See Camera Image Injection for more information. Biometric Injection - Opens the Biometric Authentication window. Performance mode On/Off - Enables you to increase frame rate per second, or switch back to lower frame rate video streaming, when your network connection or VPN is restrictive and you experience blurred screen. | |
| Restart App | Restarts the app. | |
| Switch App Version | Opens the Switch App Version window. To change the version of the app you are testing, hover over the version and then click Choose version. | |
| Clipboard | Opens the Paste Content Into Device window. | |
| Install Dependency | Opens the Install Dependent App window. | |
| Developer Options | Opens the Developer Options panel, which includes the Device Log and Dev Tools tabs. | |
| Mute/Unmute | Mutes or unmutes audio for your testing session. | |
| Passcode - Android Only | If your app requires a device passcode/screenlock to launch, you can enable this setting to run your tests on a passcode-protected device. On Android we are setting 000000. |
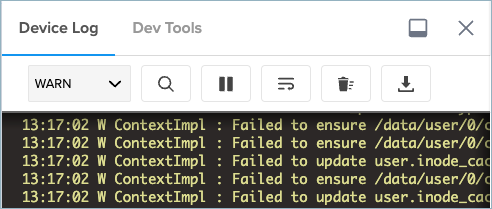
Device Log
| Icon | Name | Description |
|---|---|---|
 | Log Level |
|
 | App Log |
|
| Search Log | Opens the Search log interface. Enter a term or terms in the search box and select or deselect the following checkboxes as necessary:
| |
| Pause Log | Pauses the log feed. | |
| Wrap Text | Wraps text in the log for easier reading. | |
| Clear Log | Clears the log feed. | |
| Download Log | Downloads the log as a .txt file. |