XCUITest Introduction
XCUITest is a test automation framework used for UI testing of mobile apps and web applications on iOS devices such as iPads and iPhones. It is built into Xcode and is Apple's official testing framework for iOS. With Sauce Labs, you can easily run your XCUITests on real iOS devices and Simulators. This allows you to quickly and easily test your app on a variety of devices and configurations.
XCUITest for Simulators is in and requires saucectl version 0.155.0 or later. If you are using an earlier version, you must upgrade to the latest version.
What You'll Need
- A Sauce Labs account (Log in or sign up for a free trial license).
- You need to set
SAUCE_USERNAMEandSAUCE_ACCESS_KEYas environment variables. - saucectl to orchestrates XCUITest.
Building and Testing your XCUITest on Sauce Labs
The first step is to write an XCUITest for an iOS app. Let's take this example to demonstrate the test workflow, you can clone the repository and use the DemoApp.
Here is a simple implementation that displays Hello, world! on the UI:
import SwiftUI
struct ContentView: View {
    var body: some View {
        VStack {
            Image(systemName: "globe")
                .imageScale(.large)
                .foregroundColor(.accentColor)
            Text("Hello, world!")
        }
        .padding()
    }
}
struct ContentView_Previews: PreviewProvider {
    static var previews: some View {
        ContentView()
    }
}
The next step is to add a class to launch the UI and do an assertion. For reference, see the example below:
import XCTest
final class DemoAppUITests: XCTestCase {
    override func setUpWithError() throws {
        // In UI tests it is usually best to stop immediately when a failure occurs.
        continueAfterFailure = false
        // In UI tests it’s important to set the initial state - such as interface orientation - required for your tests before they run. The setUp method is a good place to do this.
    }
    override func tearDownWithError() throws {
        // Put teardown code here. This method is called after the invocation of each test method in the class.
    }
    func testExample() throws {
        // UI tests must launch the application that they test.
        let app = XCUIApplication()
        app.launch()
        // Use XCTAssert and related functions to verify your tests produce the correct results.
        XCTAssert(app.staticTexts["Hello, world!"].exists)
    }
}
Building the Project
XCUITest can be executed on Sauce Labs Real Devices and Simulators and needs an app to be tested (testApp) and an app that holds the tests (testRunner). Use the following steps to build the project:
- Real Devices: Create
.ipatestApp and testRunner files - Simulators: Create
.apptestApp and testRunner files
Running XCUITest Using saucectl
To run a XCUITest, set app and testApp fields in the example .sauce/config file.
xcuitest:
  app: <DemoApp.ipa-location>
  testApp: <DemoAppUITests-Runner.ipa-location>
For more information about app and testApp, see our guide.
The next step is to trigger the test by following command:
$ saucectl run
saucectl uploads DemoApp.ipa and DemoAppUITests-Runner.ipa to Sauce VM and executes XCUITest. You can review test results on Sauce UI.
Sharding XCUITest
saucectl supports running tests in parallel. To test in parallel, configure saucectl as follows. See yaml configuration for more details.
suites:
  - name: "sharded suites"
    shard: concurrency
    testListFile: test_classes.txt
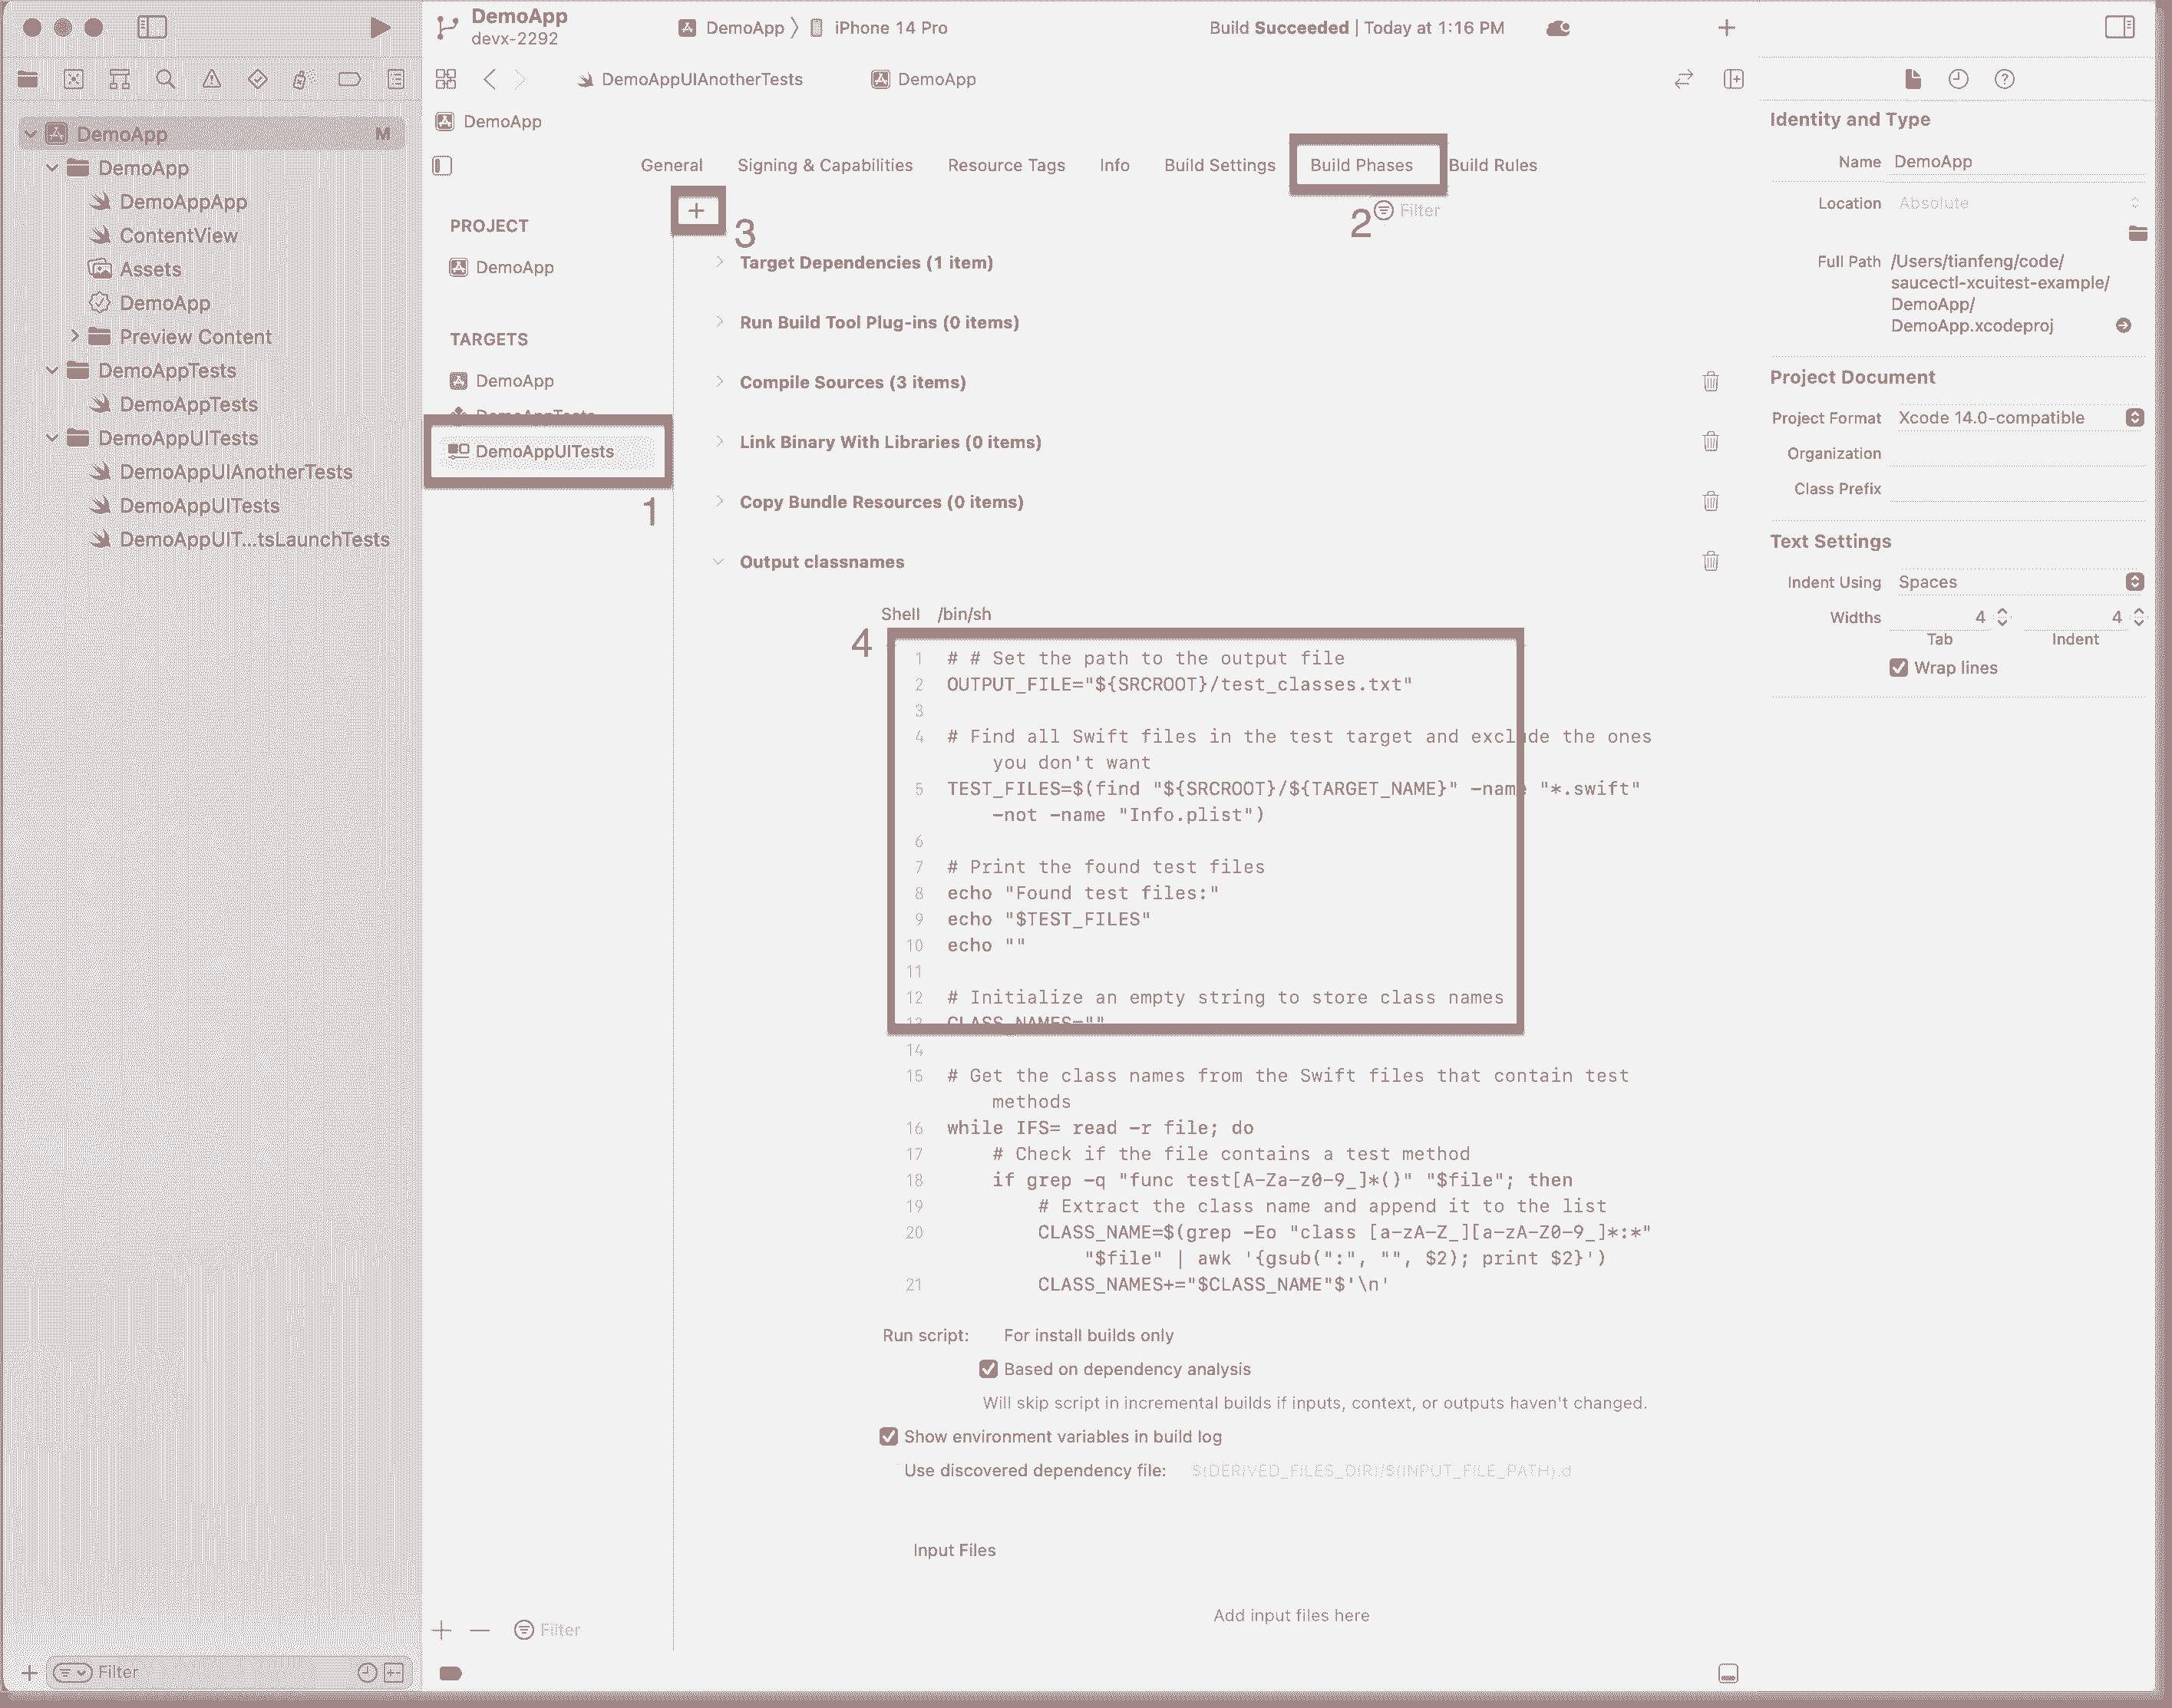
The test_classes.txt can be generated by following these steps.
- Open the project in XCode and select test target.
- Click
Build Phases. - In
Build Phases, click the+-sign. - Add one of the following scripts:
loading...
loading...
- The script can be triggered,
- by Xcode:
- Going to
Product>Build For>Testing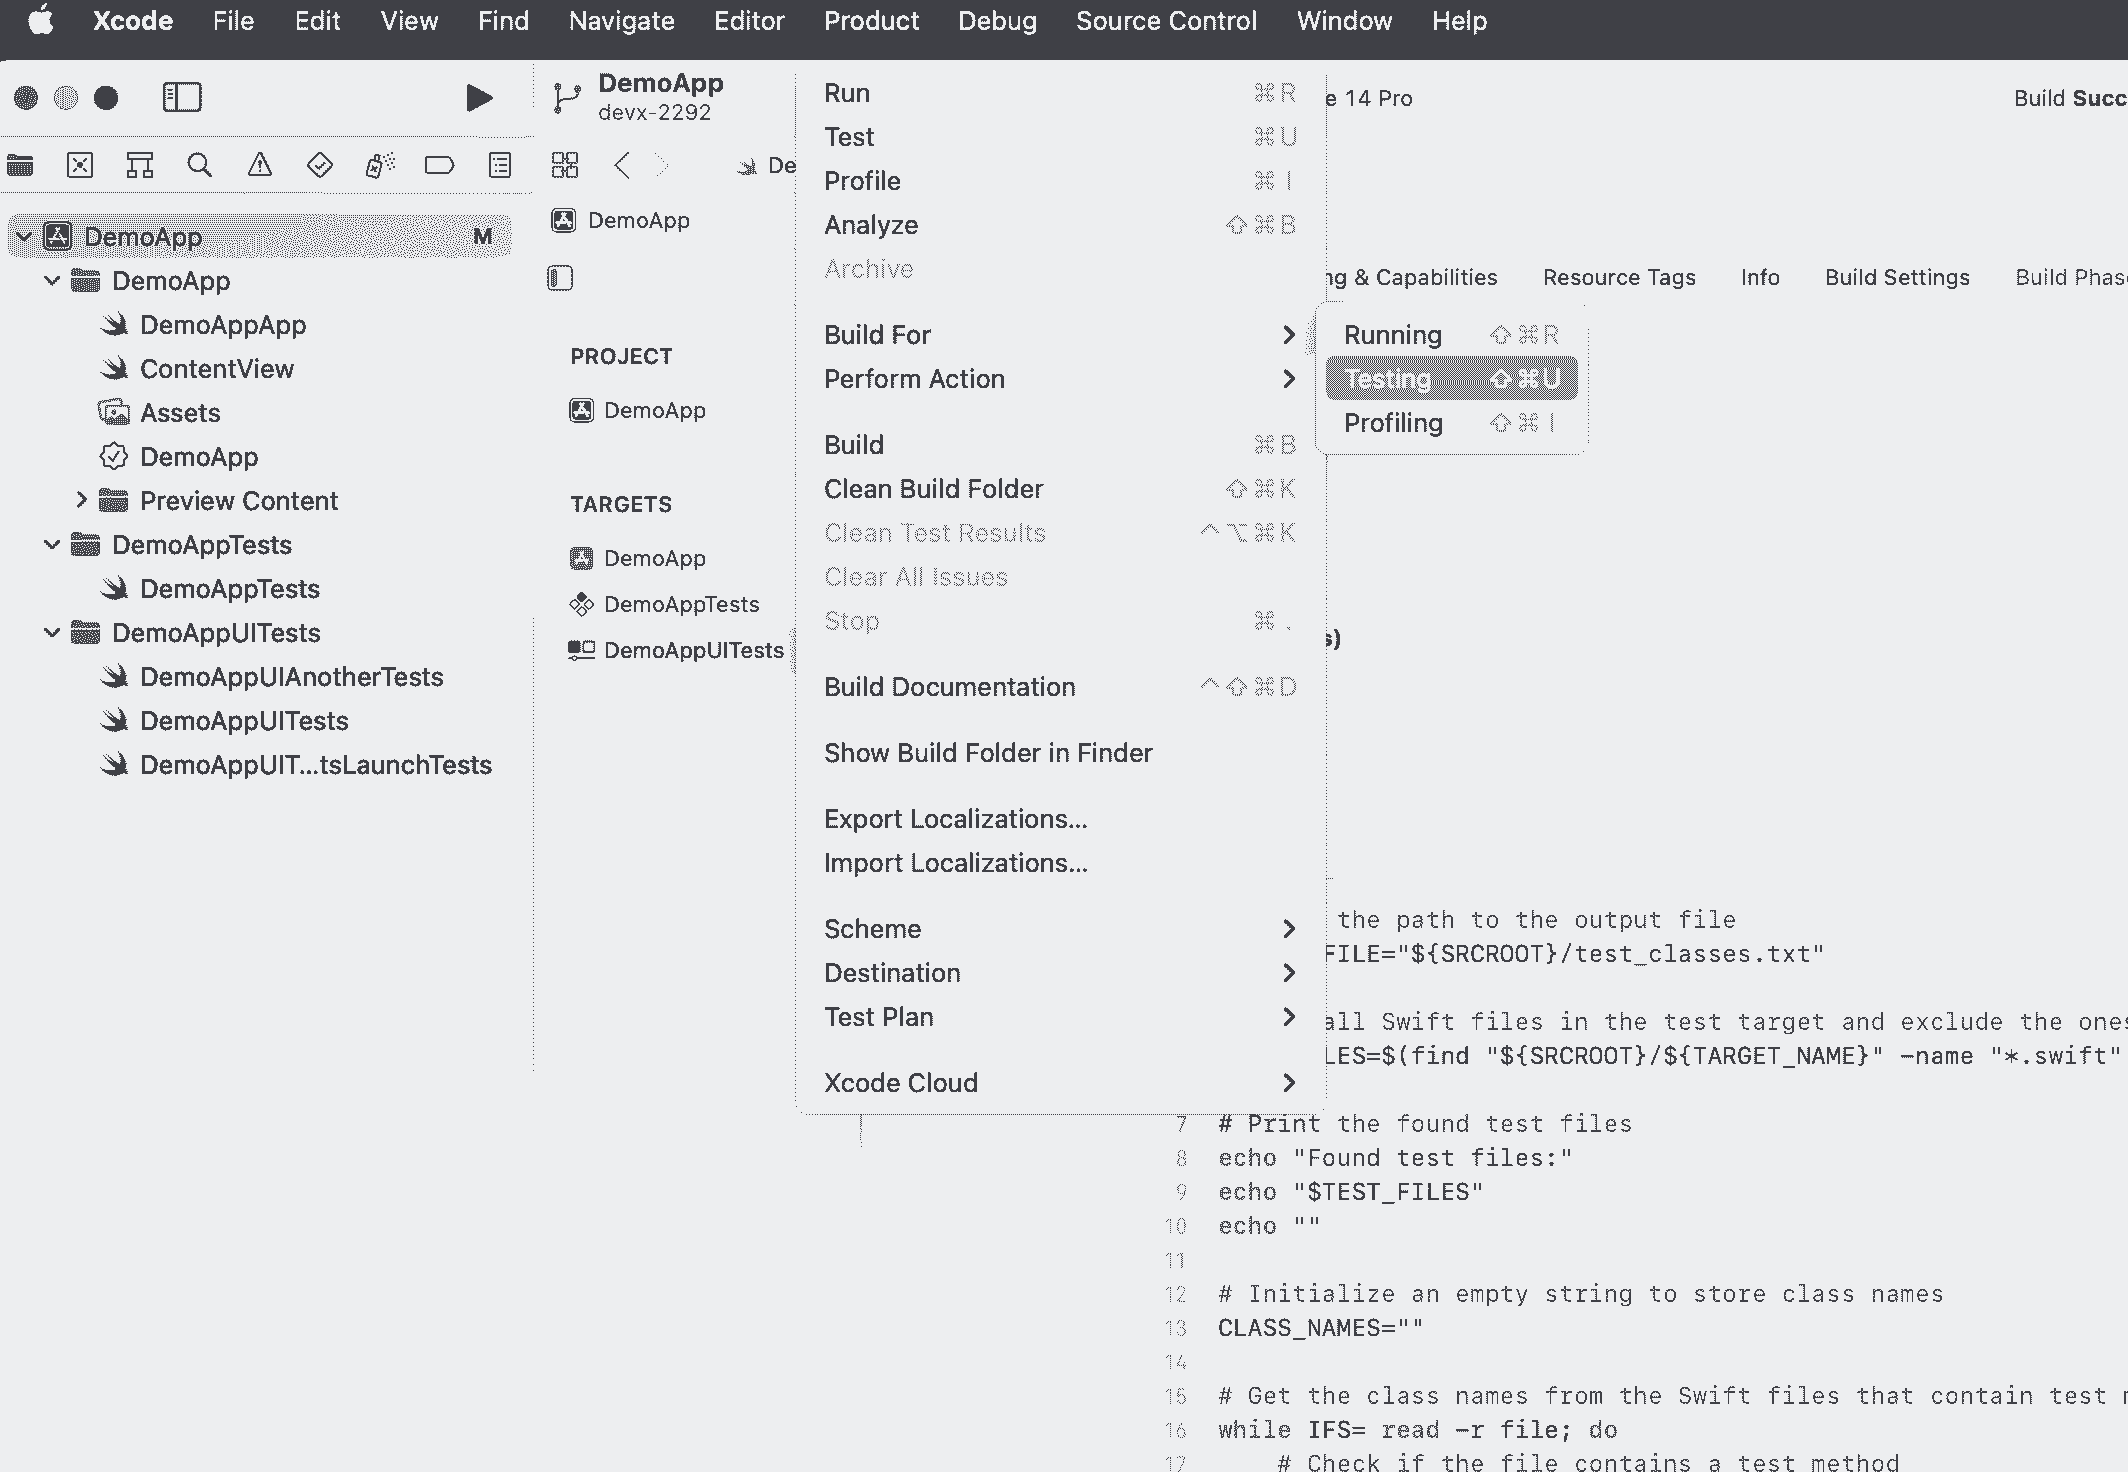
- Or triggering a Testing build by using
Command + Shift + U
- Going to
- by running this command
- by Xcode:
xcodebuild \
  CODE_SIGN_IDENTITY="" \
  CODE_SIGNING_REQUIRED=NO CODE_SIGNING_ALLOWED=NO \
  clean build-for-testing \
  -workspace "{workspaceName}.xcworkspace" \
  -scheme "{schemeName}" \
  -sdk iphoneos
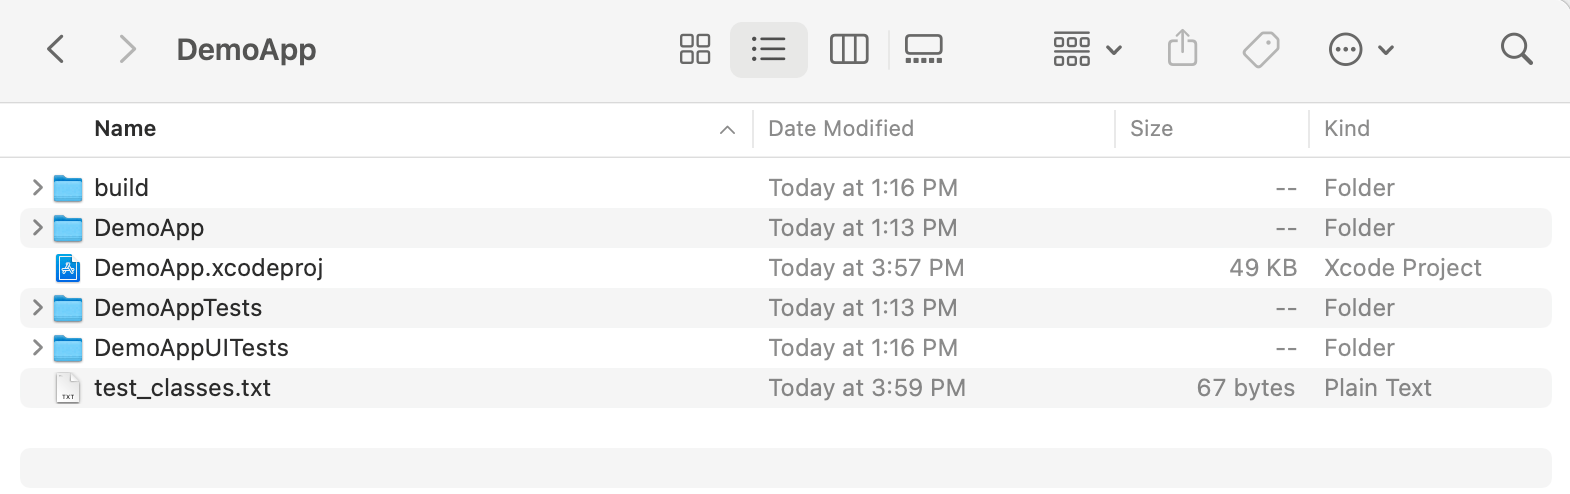
The generated test_classes.txt or test_classes_and_tests.txt can be found here:
Pipeline Setup
We also provide some examples for pipeline setup.