Creating Real Device .ipa Files for Appium and XCUITest
Details of the resigning process were moved to Features/iOS App Resiging
Creating .ipa files for Appium testing
Building an .app Bundle
- Open your app project in Xcode.
- Select a Any iOS Device (arm64) as your product's device target.
- In the Product menu, select Clean Build Folder.
- In the Product menu, select Build.
- Navigate to your Xcode project's Products directory and find the generated .app file.
Building an .ipa from an .app Bundle
- Create an empty directory with the name
Payload. - Move the .app file inside the
Payloaddirectory. - Compress the
Payloaddirectory into an archive (.zip file) and give it a new name with .ipa appended to the end of the file name. - Your
.ipafile is now ready for upload to Sauce Labs.
# example for building an '.ipa' file out of an '.app'
mkdir Payload
cp -r PATH_TO_BUILD_FOLDER/Runner.app Payload
zip -r Runner.ipa Payload
Building an .ipa File
You can use any of the existing methods of distribution for your iOS app, except for the App Store type. This means that you can choose any of the three other export methods: Ad Hoc, Enterprise, or Development.
We highly recommend to use Ad-hoc and Development targets to get the most out of our capabilities. Enterprise-signed apps have limitations, and in some cases we are not able to install Enterprise re-signed applications due to Apple restrictions and protections.
- Open your app project in Xcode.
- Select Generic iOS Device or Any iOS Device (arm64) as your project's device target.
- In the Product menu, select Clean Build Folder.
- In the Product menu, select Archive. When the archiving process completes, you'll see your app listed under Archives.
- Select your app and click Distribute App.
- When prompted for a distribution method, select Custom, and click Next.
- On the next step, select Release Testing, and click Next.
- Set these distribution options:
- App Thinning: None.
- Clear the selection Include manifest for over-the-air installation.
- Select your Distribution Certificate, Provisioning Profile (Automatic or Manual), and click Next. This will generate the
.ipafile. - When the file generation process completes, click Export and choose where to save the
.ipafile. - Your
.ipafile is now ready for upload to Sauce Labs.
Creating an .ipa File from a XCUITest Package
saucectl supports archiving from .app to .ipa Testing with XCUITest when devices are used during the configuration of your suites.
-
Open your app project in Xcode.
-
Select Generic iOS Device or Any iOS Device (arm64) as your project's device target.
-
Make sure that your UI tests are part of a Target Membership and that those Targets are selected to be built in your Xcode Build scheme. Targets containing UI Tests are typically selected to be built at the "Test" build action.
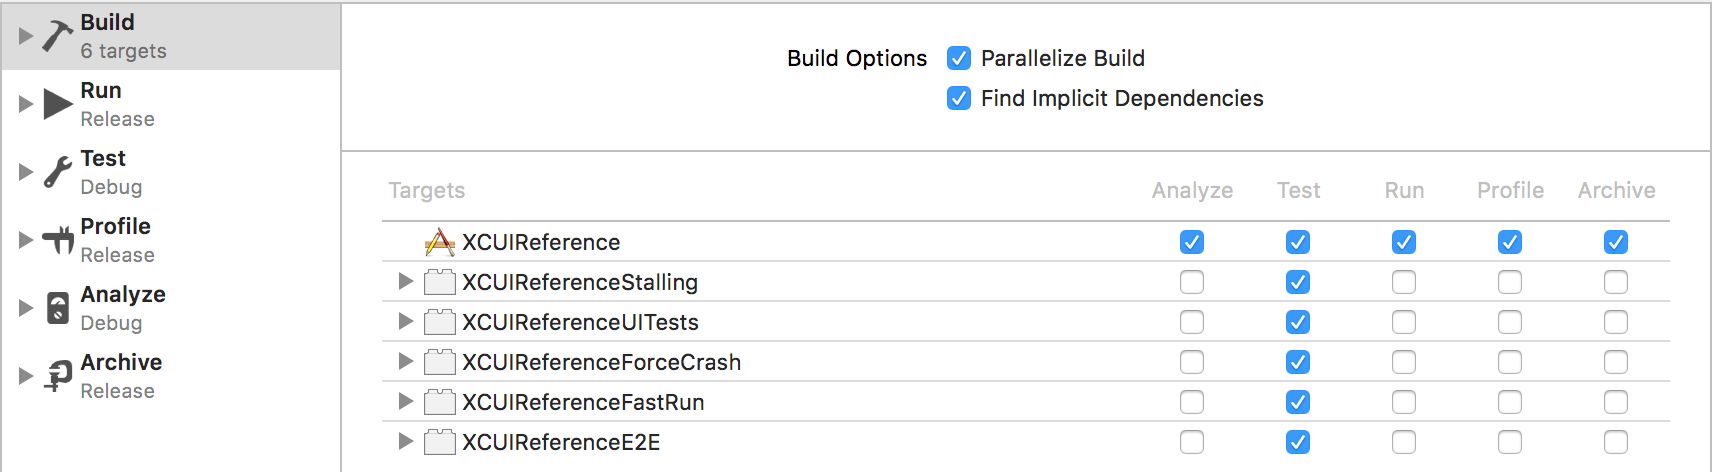
-
Generate your test package by selecting Product > Build For > Testing.
-
Navigate to your Xcode project's Products directory and find the generated .app file.
-
Create an empty directory with the name
Payload. -
Move the .app file inside the
Payloaddirectory. -
Compress the
Payloaddirectory into an archive (.zip file) and give it a new name with .ipa appended to the end of the file name. -
Your
.ipafile is now ready for upload to Sauce Labs.
Setting iOS Deployment Target for XCUITest Compatibility
Make sure that you set the same iOS version for your app and test runner iOS Deployment Target. If they don't match, your tests will run locally, but fail when you run them against Sauce Labs real devices.
To set the iOS version in your Xcode Project:
- Select the Project you want to build.
- Under Build Settings, set the iOS Deployment Target to the iOS version you want to use in your test. All target outputs of this project, including the app and your test runner, will be set to the same iOS version.
To set the iOS version in your Xcode Target:
- Select the Target for your Project.
- Under Build Settings, set the iOS Deployment Target to the iOS version you want to use in your test.
This will also overwrite the Build Settings at the Project level to that iOS version. If you use this method, be aware that your Targets can become out of sync with each other and the Project settings, and your tests will break. If you change the iOS version for one target output, you may want to build the Project again to make sure all your targets are in sync.
Sauce Labs Resigning Enablements
Details of the resigning Enablements were moved to Features/iOS App Resiging#Side Effects
Common Errors
Details of the resigning Enablements were moved to Features/iOS App Resiging#Common Errors