Audio Injection (Speech-to-Text)
Real Devices Only
Does your mobile app use speech-to-text, such as voice search, voice commands, or dictation, that you want to test without speaking into a microphone every time?
Audio Injection is a Sauce Labs Real Device Cloud feature that simulates speaking into your app. Instead of using the device microphone, your app receives a pre-recorded audio file that you upload. When the app starts listening for speech, it gets your audio as if someone had spoken it into the device, so you can run the same voice input on every test, in both live and automated sessions.
Audio Injection does not tap into or monitor the device microphone continuously. It only replaces microphone input at the exact moment your app actively requests speech recognition — the device microphone is otherwise unaffected.
Sauce Labs feeds the audio you upload directly to the device's speech recognition service. The transcription itself comes from the device's own speech service, so the recognized text is whatever that audio would normally produce.
Audio Injection (Speech-to-Text) is currently in beta and may have limited availability. Reach out to your Sauce Labs representative or Support to have it enabled for your account.
Make sure you have a debuggable and non-obfuscated version of your application uploaded to Mobile App Storage.
What You'll Need
- A Sauce Labs account (Log in or sign up for a free trial license).
- Upload your app to Sauce Labs prior to testing. Audio Injection points to Sauce Labs storage to get your app information.
- A pre-recorded audio file with the speech you want to inject (see Key Specs for supported formats).
Key Specs
Audio Injection is available for testing on Sauce Labs Android and iOS real devices. The audio file requirements differ by platform.
| Supported | Not Supported | |
|---|---|---|
| Device Type | ||
| Android real devices | ✓ | |
| iOS real devices | ✓ | |
| Android Emulators | ✕ | |
| iOS Simulators | ✕ | |
| App Type | ||
| Flutter (iOS/Android) | ✕ | |
| React Native (iOS/Android) | ✕ | |
| Cordova (iOS/Android) | ✕ | |
| Framework Type | ||
| Appium | ✓ | |
| Espresso (Android) | ✕ | |
| XCUITest (iOS) | ✕ |
Audio file requirements:
| iOS | Android | |
|---|---|---|
| Audio format | MP3, WAV, M4A, or AAC | MP3 only |
| Maximum size | 15 MB | 15 MB |
| Minimum version | iOS 13 and above | Android 13 and above |
- Mobile browsers and pre-installed system apps.
- Cross-platform development frameworks like Flutter, React Native, and Cordova (libraries and frameworks are not supported).
- Android versions below 13.
- Device voice assistants such as Google Assistant or Siri. Audio Injection works with your app's own speech-to-text, not the device assistant.
Example Use Cases
Below are common use cases ideal for implementing Audio Injection in your tests.
- Voice search and voice commands: Check that spoken queries and commands are transcribed and handled correctly, with the same clip on every run.
- Dictation and note-taking: Confirm that dictated text lands in the right fields and displays correctly.
- In-app voice assistants and chatbots: Start a conversational flow with a spoken prompt, without a person talking during the test.
- Accessibility and localization: Test speech recognition with clips in different languages or accents.
Live Testing
During a live test, you'll enable Audio Injection for your app and then upload the audio file that will be fed to your app in place of the device microphone.
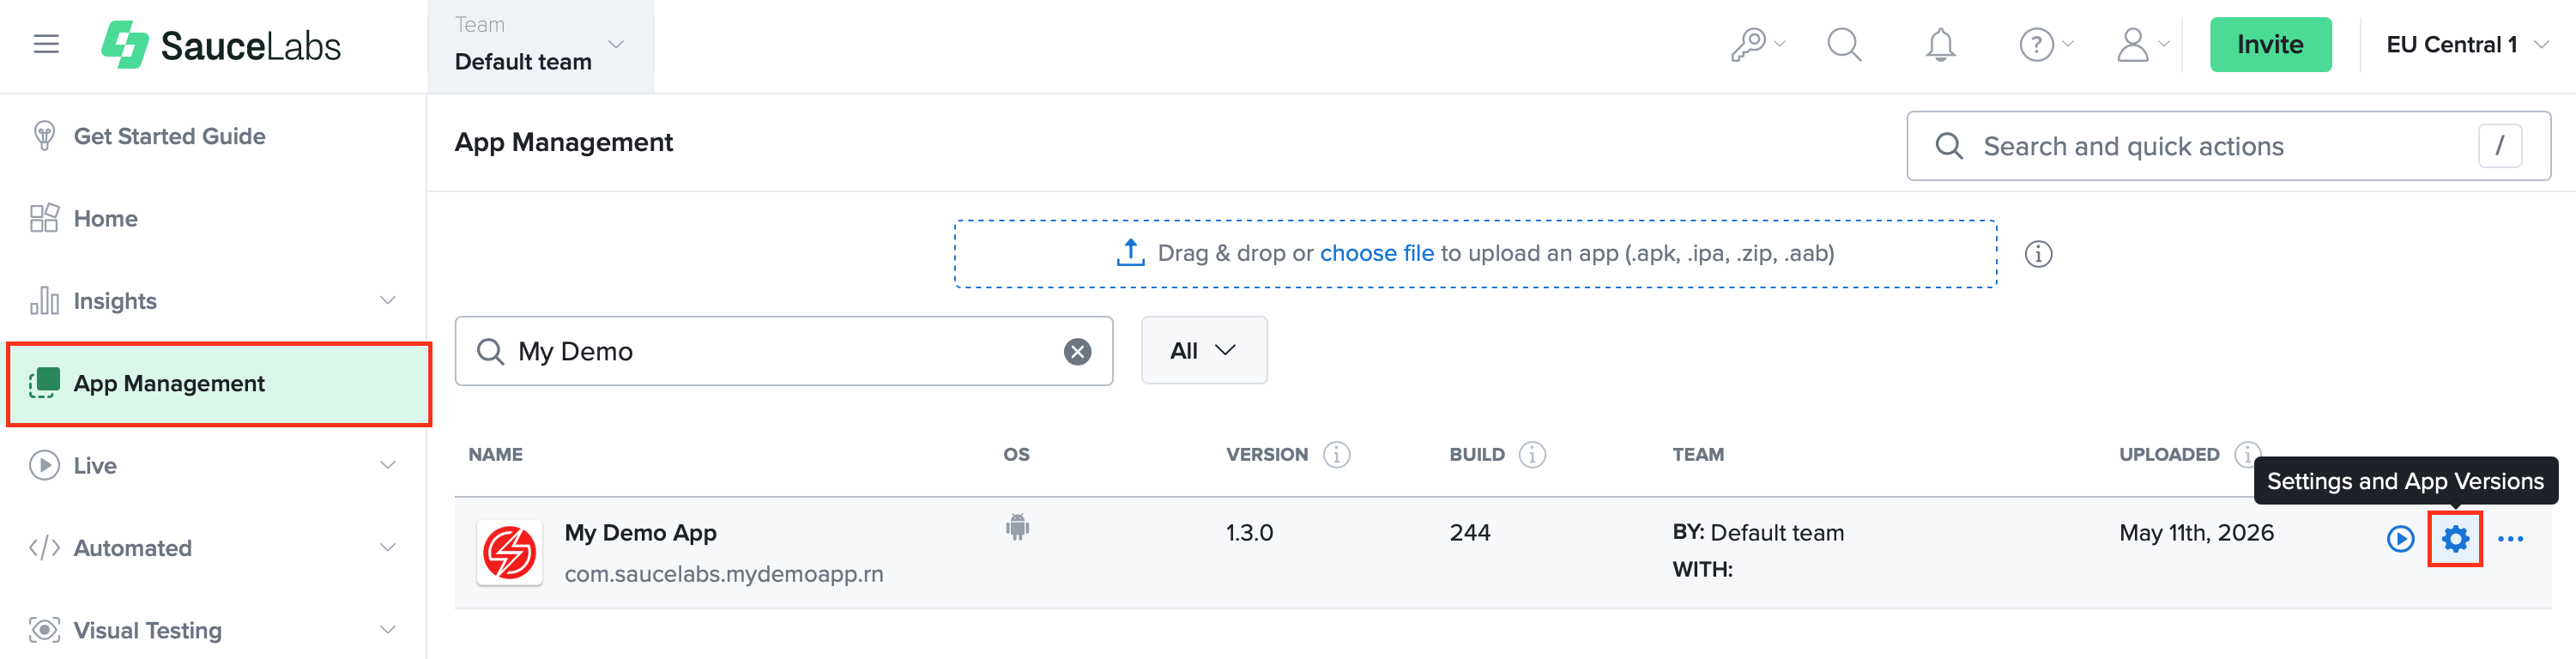
- In Sauce Labs, click App Management, hover over the test, and then click Settings.
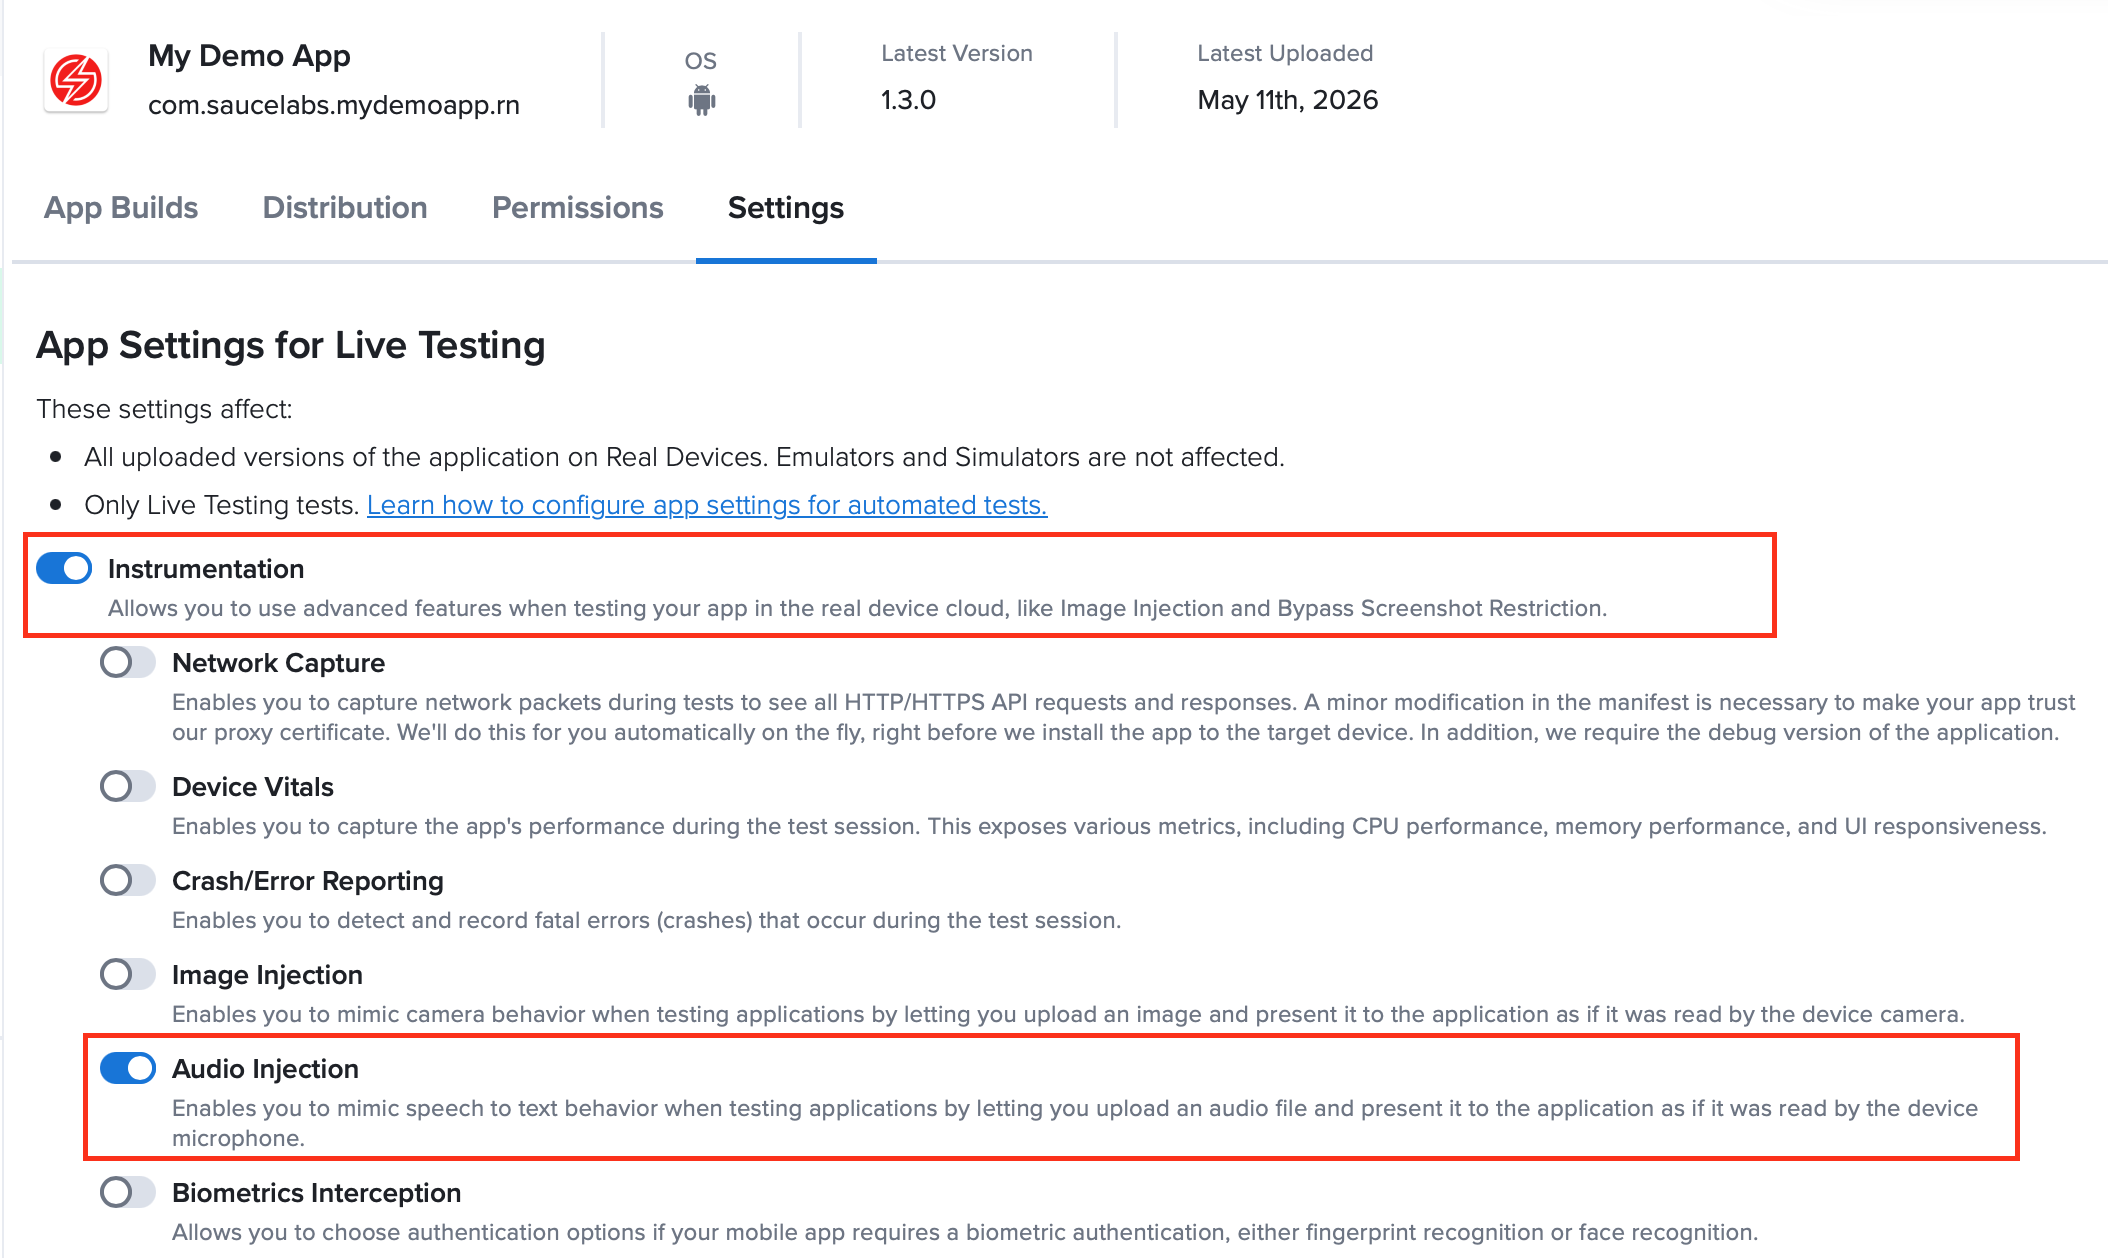
- On the Settings page, ensure that Instrumentation and Audio Injection are enabled, and then return to the App Management page.
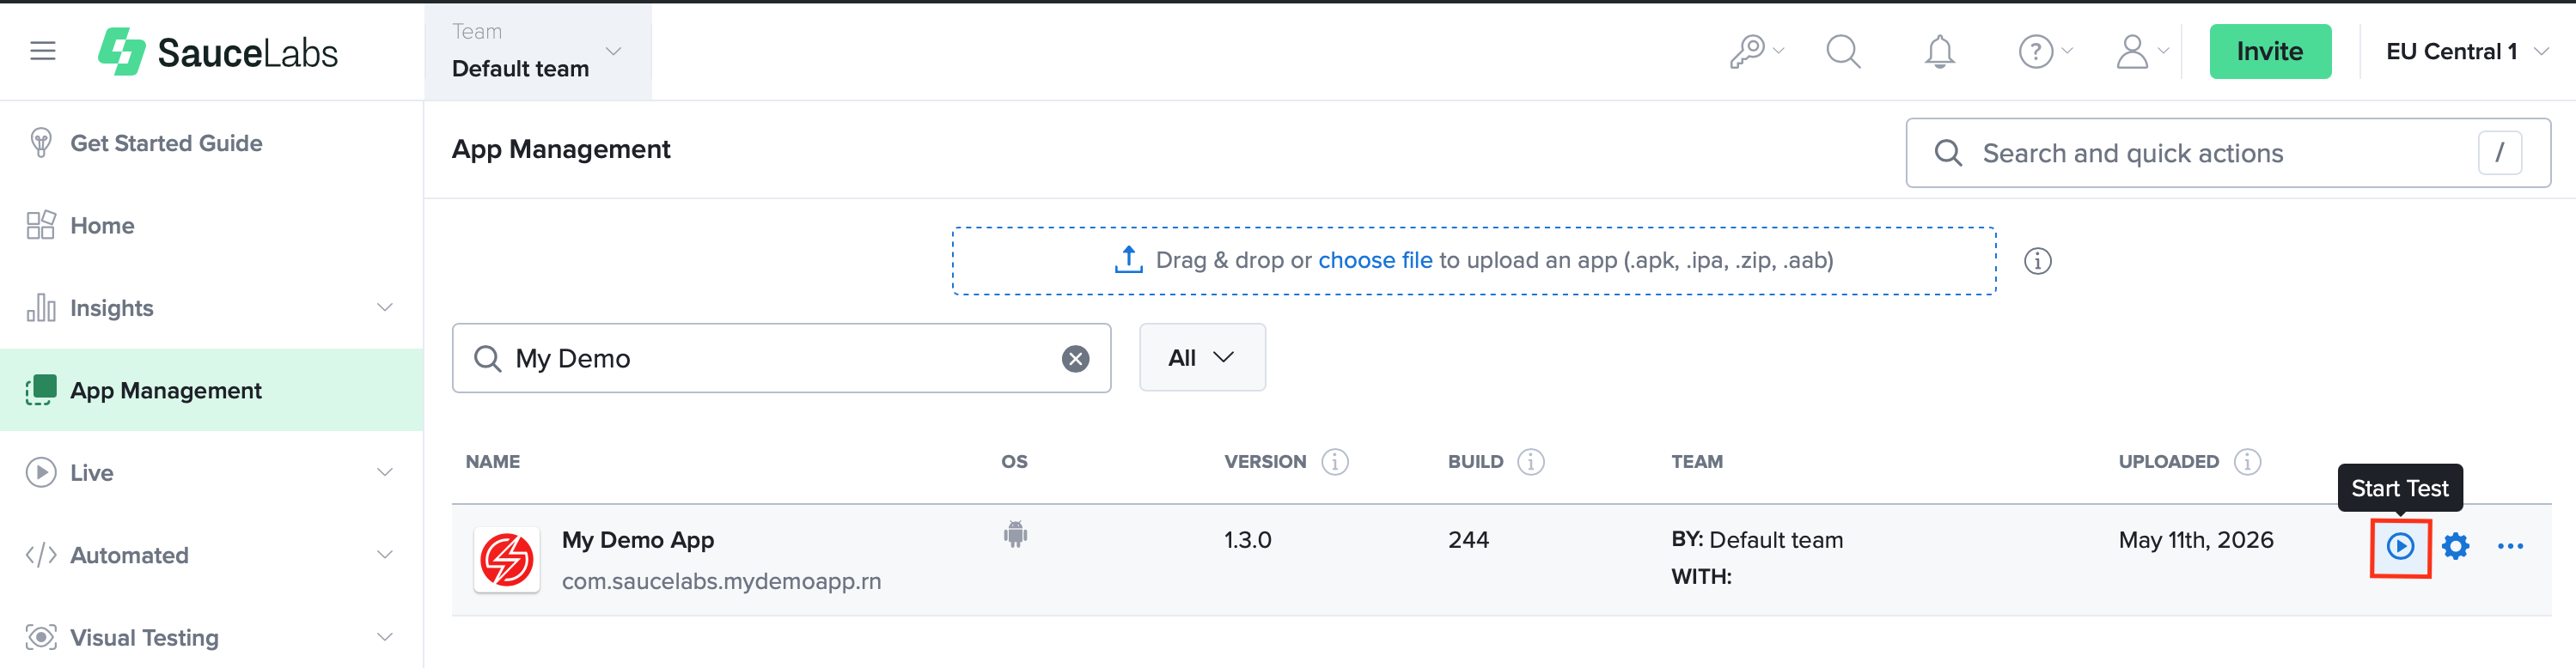
- On the App Management test page, hover over the test and then click Start Test.
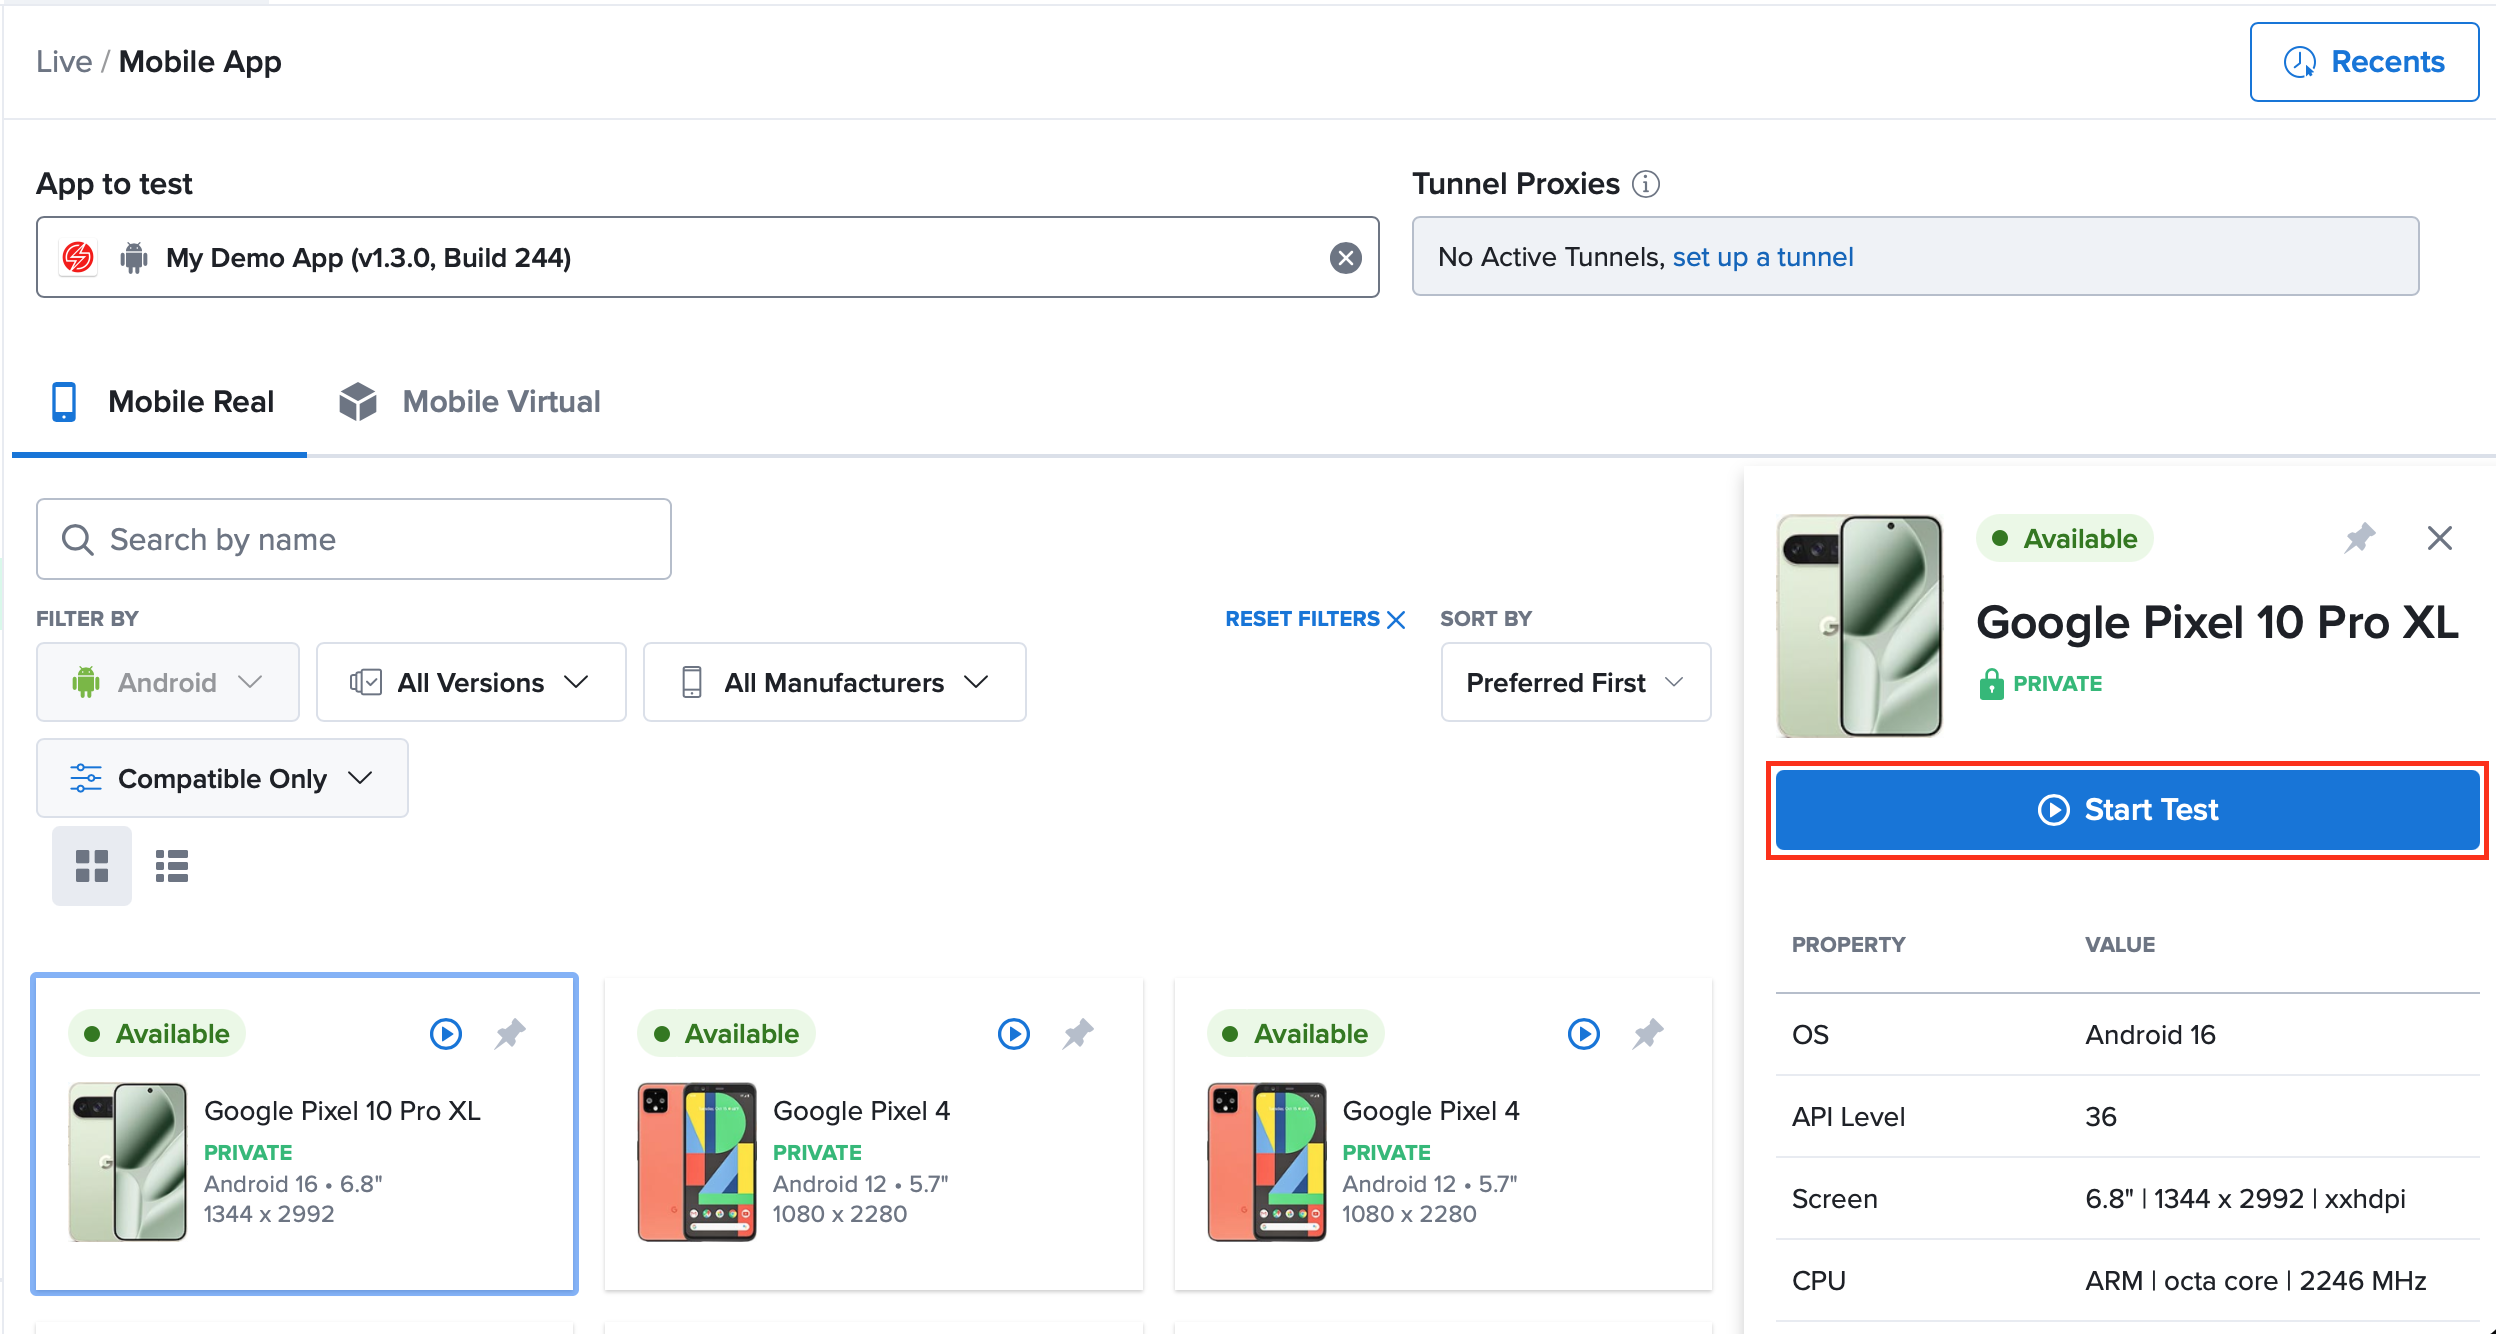
- On the device selection page, hover over a device and then click Start Test.
- In the live test window, in the right toolbar, click Tools and then click Audio Upload.
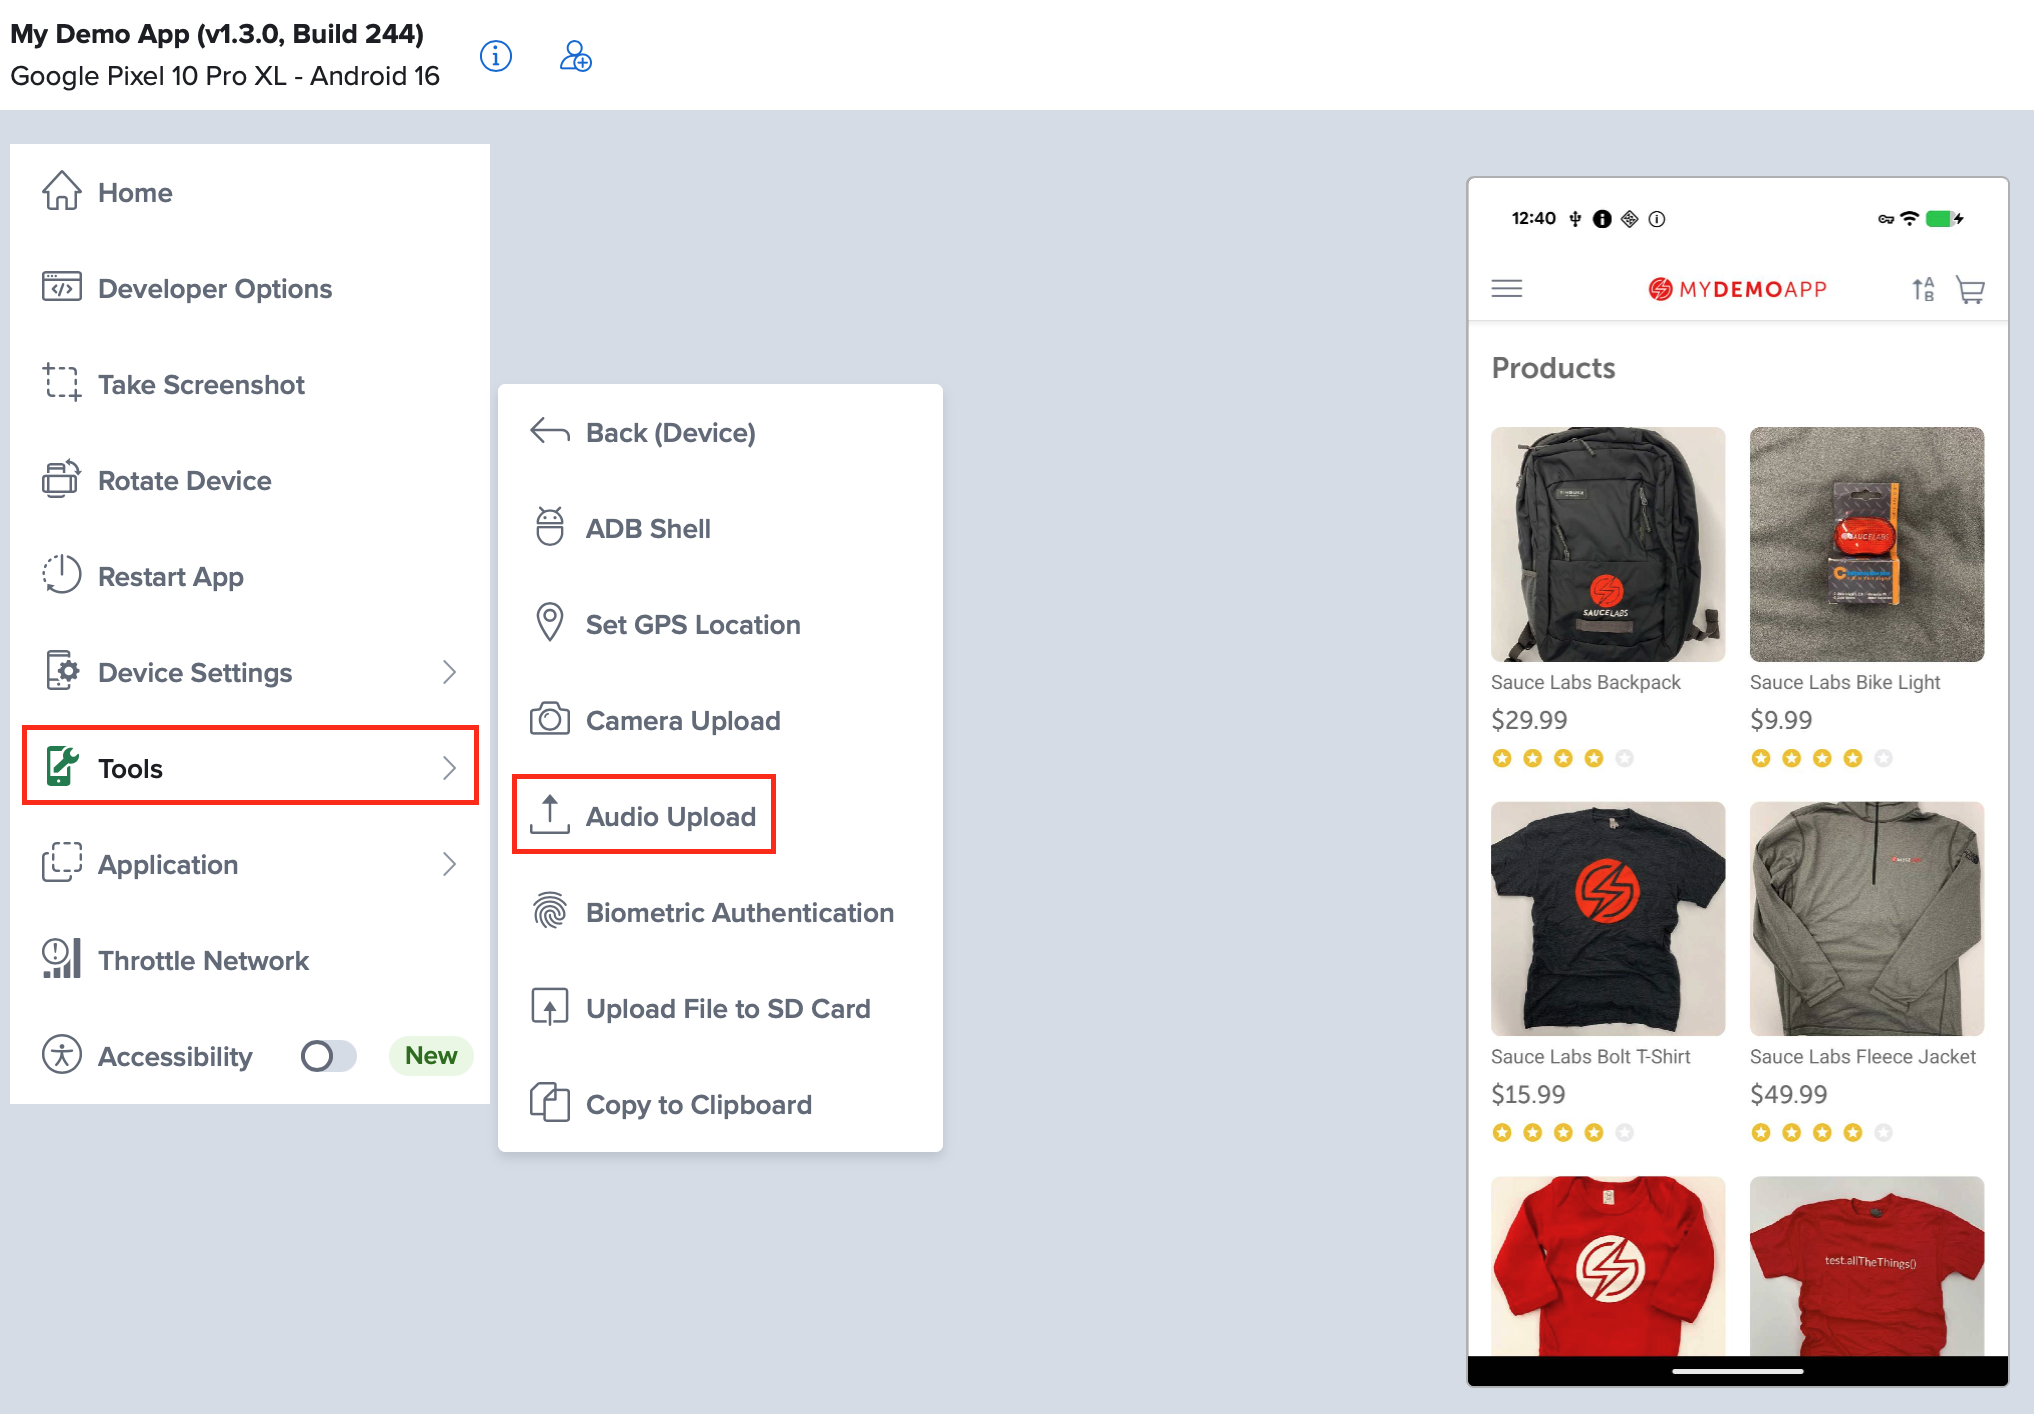
- Click Choose Audio and select your audio file (up to 15 MB; MP3 on Android, or MP3, WAV, M4A, or AAC on iOS).
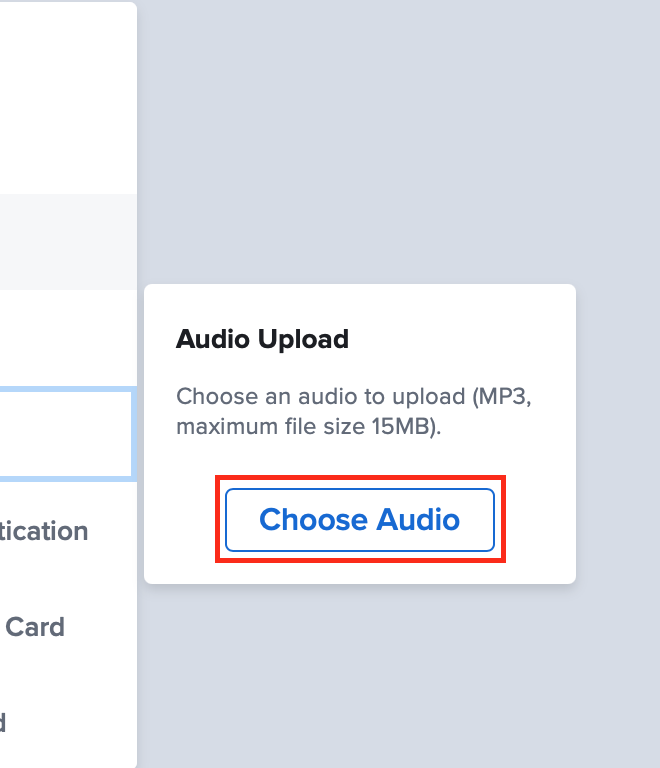
Once the upload succeeds, trigger speech recognition inside your app. The app receives your uploaded audio as if it had been spoken into the device microphone. You can upload another file to inject different audio later in the same session.
Automated Testing
During an automated test, you'll enable Audio Injection for your app and then pass an audio file to the audio injection command. When your app starts listening for speech, it receives your uploaded audio instead of input from the device microphone.
-
Enable Audio Injection for the app under test, either in App Management (see Live Testing) or by adding the
audioInjectioncapability to your test configuration and setting it totrue. TheaudioInjectioncapability requires instrumentation to be enabled for the session.exports.config = {//...capabilities: [{deviceName: 'Google Pixel 8',platformName: 'Android',platformVersion: '14',automationName: 'UiAutomator2',// Enable audio injection on real devicesaudioInjection: true}]//...} -
In your test script, provide your audio file to the audio injection command by passing it as a base64-encoded string. You can call this command in one or more places in your test, and each call injects the audio for the next speech-recognition request.
noteThe audio file path must be converted to base64 encoding (RFC 4648). If the payload is not valid base64, the command fails.
- Webdriver.io example
- Java example
const { readFileSync } = require('fs')const { join } = require('path')// Read the audio file from your project and transform it to a base64 stringconst audio = readFileSync(join(process.cwd(), 'assets/speech.mp3'),'base64')// Provide the transformed audio to the devicedriver.execute(`sauce:inject-audio=${audio}`)import java.util.Base64;import static org.apache.commons.io.IOUtils.toByteArray;// Read the audio file and transform it to a base64 stringFileInputStream in = new FileInputStream("assets/speech.mp3");String audio = Base64.getEncoder().encodeToString(toByteArray(in));// Provide the transformed audio to the device((JavascriptExecutor) driver).executeScript("sauce:inject-audio=" + audio); -
Drive your app to start speech recognition and assert on the transcribed result. To inject different audio later in the same test, call
sauce:inject-audioagain with a new file. On Android, if injection is enabled but no valid audio has been provided, speech recognition falls back to the device microphone.
Common Errors
Here are some common errors you may see while testing with Audio Injection and how to resolve them. For a full reference, see Audio Injection Failed.
When you call sauce:inject-audio, Sauce Labs checks the request and rejects it right away if something is wrong, so the errors below surface as a failed command in your test. That is separate from what happens when your app actually starts listening, described in When no audio is available.
Error: Audio data cannot be parsed because it is empty.
The payload passed to sauce:inject-audio was empty. Pass a base64-encoded audio file (see the Automated Testing examples).
Error: The audio cannot be injected because it is not base64 encoded according to chapter 4 of RFC 4648.
The payload passed to sauce:inject-audio is not valid base64. Encode the audio file to a base64 string before injecting it (see the Automated Testing examples).
Error: The audio cannot be injected because it is too large.
The audio file is over the 15 MB maximum. Reduce the file size (for example, lower the bitrate or trim the clip) before injecting it.
Error: Cannot inject audio: Unsupported audio format.
The file is not a supported format. Use MP3, WAV, M4A, or AAC on iOS, or MP3 on Android (see Key Specs).
Error: Cannot inject audio: Audio injection is not enabled.
Audio Injection is not enabled for the app. Enable it in App Management (see Live Testing), or set the audioInjection capability to true, before running the test.
Error: Audio was not injected because no app is installed.
No app is installed on the device, or the app has not fully loaded. Wait until your app has fully launched before injecting audio.
When No Audio Is Available
Injecting audio and using it are two separate steps. The errors above happen at injection time, when you send a file that Sauce Labs rejects. Using the audio happens later, when your app starts listening for speech.
On Android, if Audio Injection is enabled but no valid audio file is available when your app starts listening (for example, you never injected one), speech recognition uses the device microphone instead of returning an error. A missing file on Android shows up as normal microphone recognition, not as a failed command.
On iOS, the behavior is the same: if no valid audio file has been provided, the device falls back to its default speech recognition framework and uses the device microphone.
Additional Resources
- Camera Image Injection: the equivalent feature for injecting images through the device camera.
- Audio Capture: recording the audio your app produces during a test.
- Audio Injection Failed: error reference for audio injection.