Create and Manage Test Suites
Test Suites help you keep related test cases together in one place. Instead of working with individual test cases one by one, you can add and group them into a suite based on a common feature, workflow, or testing goal.
For example, you might create a test suite for login functionality, checkout workflows, user management features, smoke tests, or regression tests. This makes it easier to find the tests you need, keep them organized, and run multiple related test cases as a single unit.
Create a Test Suite
You can create a Test Suite by grouping one or more existing test cases from the Test Cases and Suites page.
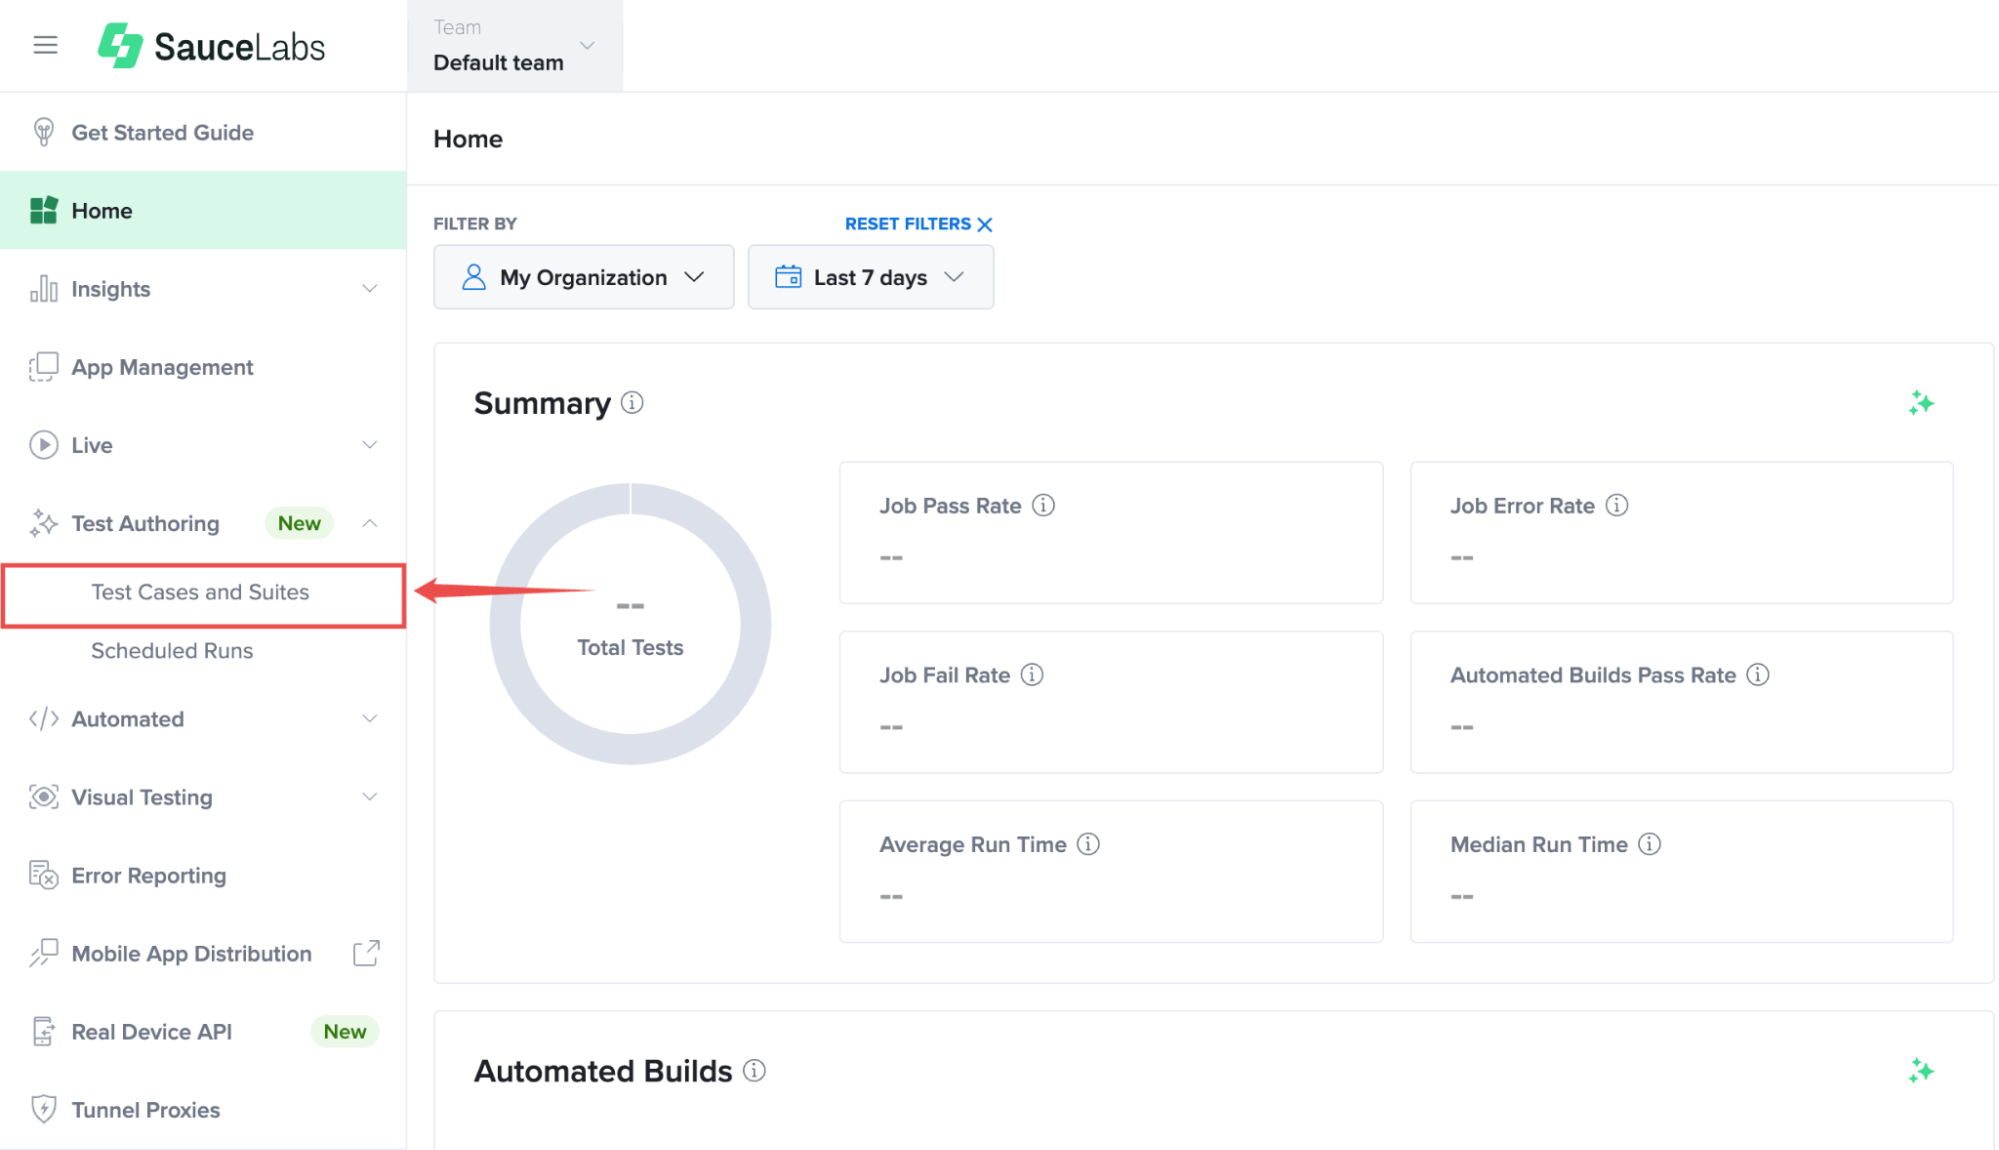
Step 1: Inside your Sauce Labs account, find Test Authoring from the left-hand navigation menu, expand its available options, and select Test Cases and Suites.
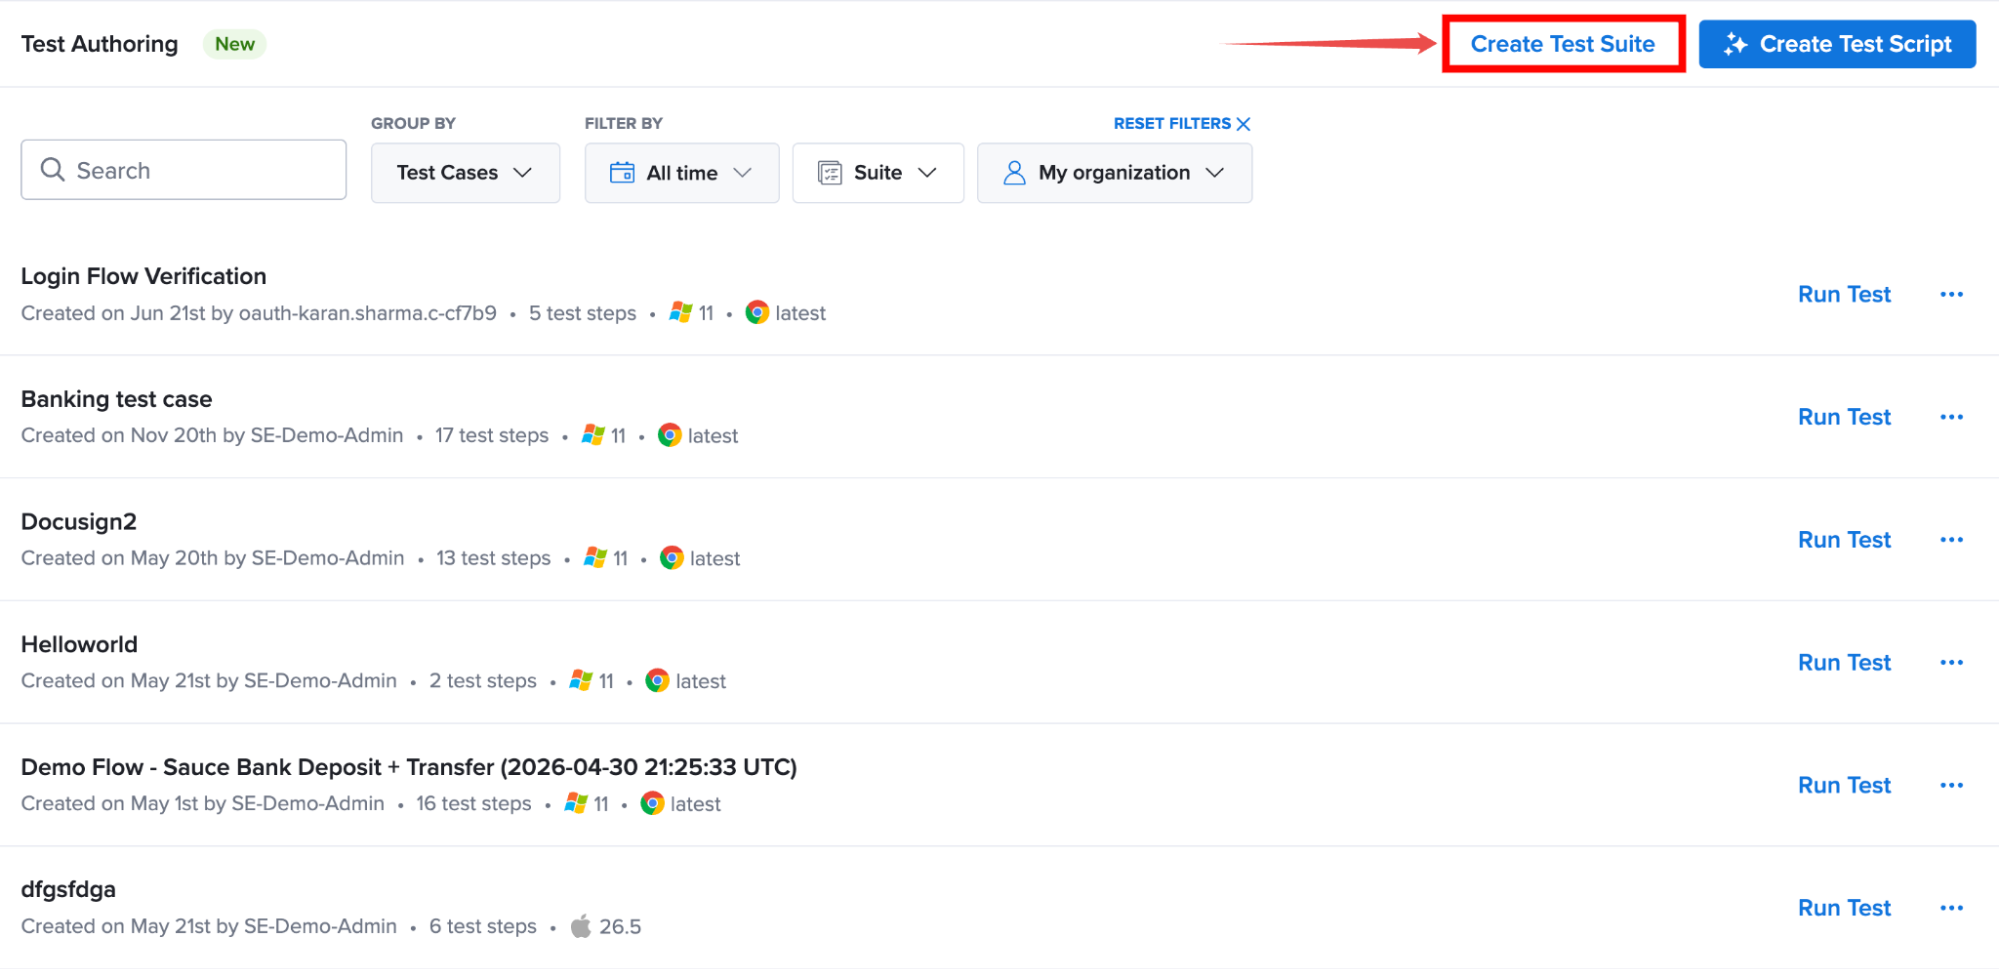
Step 2: Click Create Test Suite located in the top-right corner of the page.
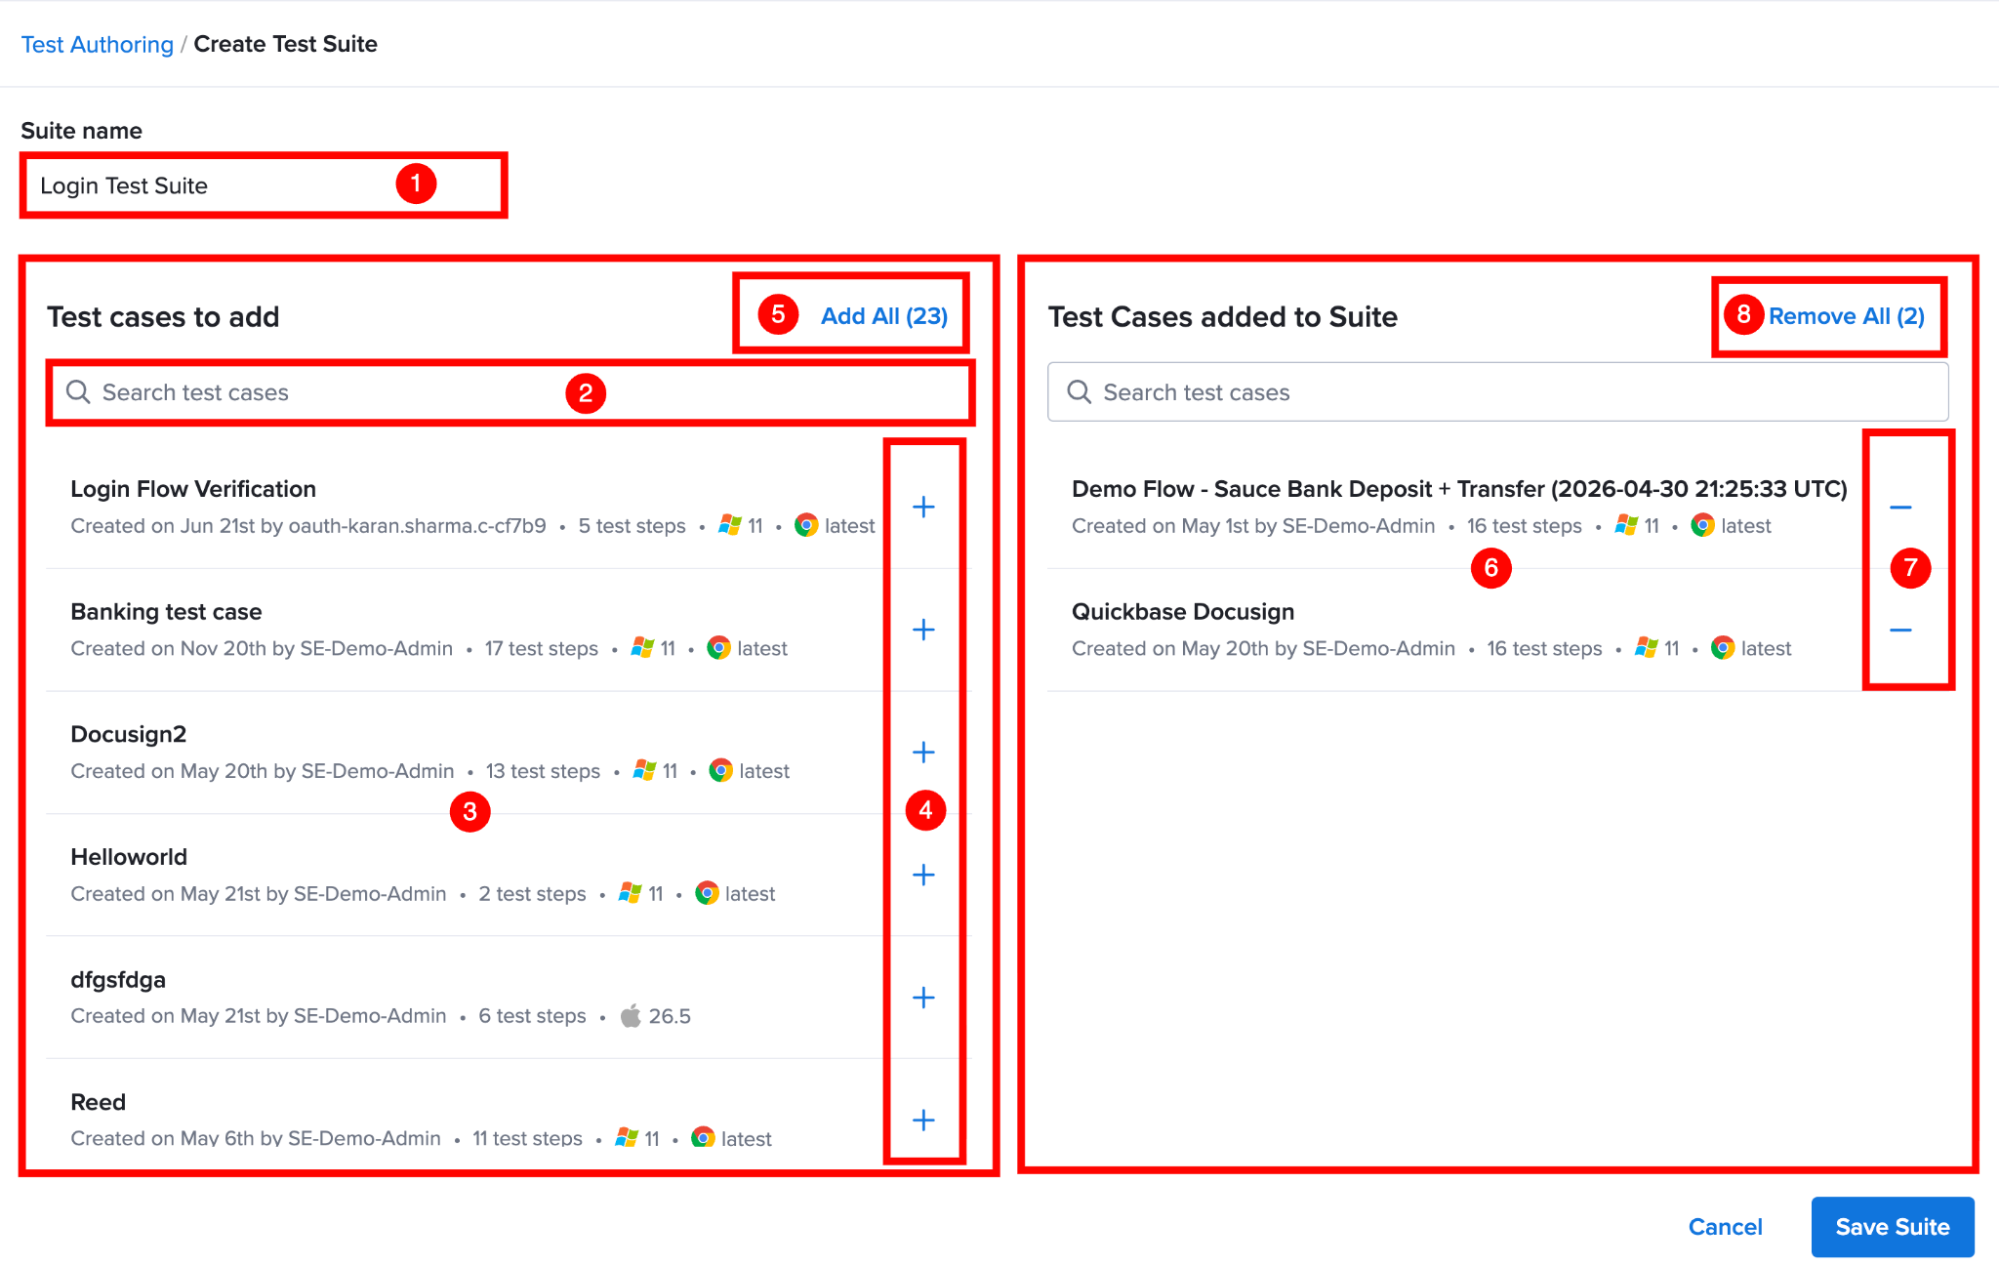
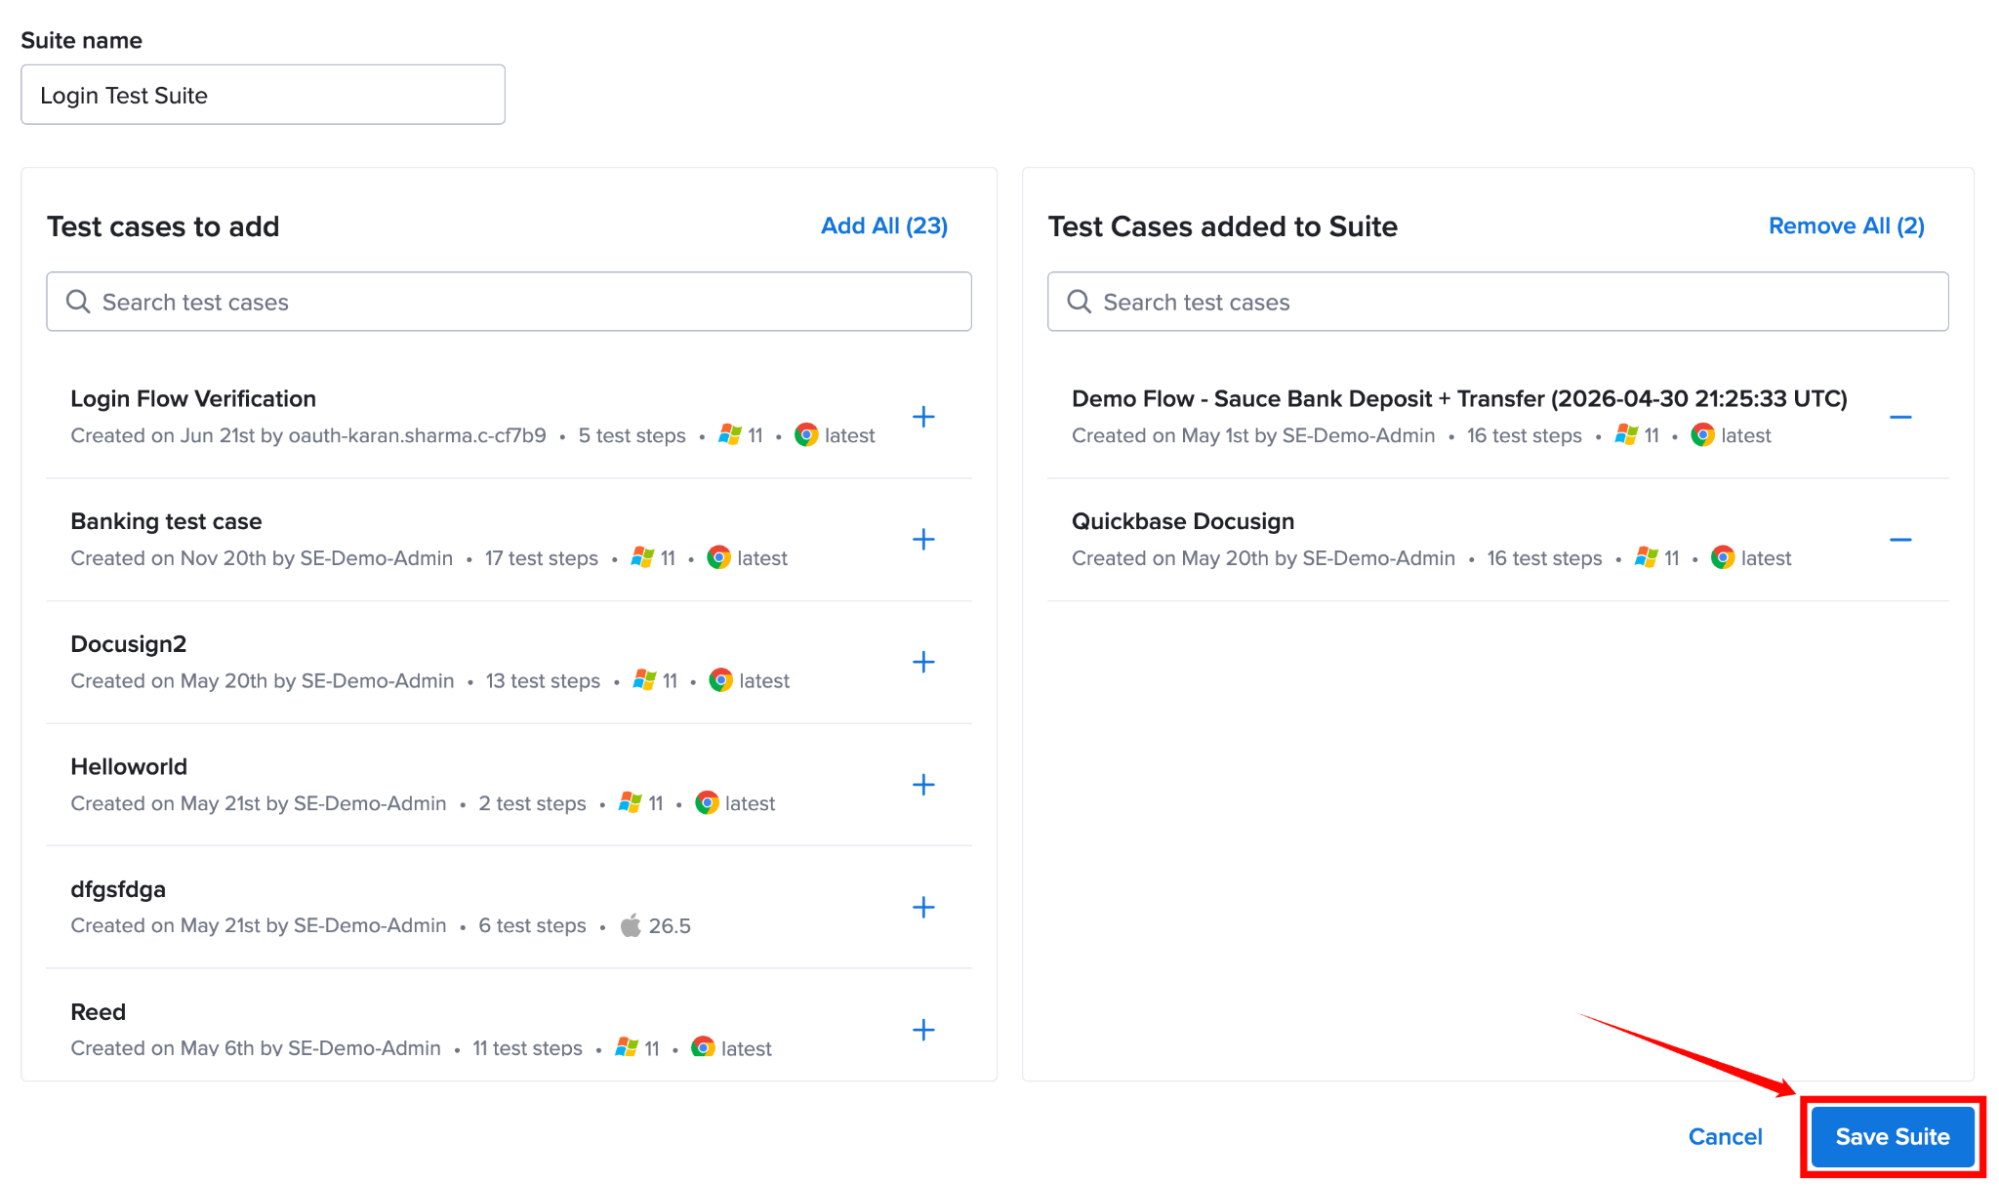
Step 3: The Create Test Suite page opens, where you can configure your test suite and select the test cases you want to include in it.
| Ref | Configuration | Description |
|---|---|---|
| 1 | Suite Name | Enter a descriptive name for your test suite. The suite name helps identify the purpose of the collection and does not need to be unique. |
| 2 | Search Test Cases | Use the search field to quickly locate specific test cases available for addition to the suite. |
| 3 | Test Cases to Add | Displays all available test cases that can be included in the test suite, along with information such as the creator, number of test steps, and supported platform or browser configuration. |
| 4 | Add Test Case (+) | Click the + icon next to a test case to add it to the suite. The selected test case appears in the Test Cases Added to Suite section. |
| 5 | Add All | Click Add All to include all available test cases in the suite at once. |
| 6 | Test Cases Added to Suite | Displays the list of test cases that have been selected for the test suite. |
| 7 | Remove Test Case (-) | Click the – icon next to a test case to remove that individual test case from the selected test suite without affecting the original test case. |
| 8 | Remove All | Removes all selected test cases from the suite before saving, allowing you to modify your selection. |
Step 4: Click on the Save Suite to create the test suite. The new test suite will then be available from the Test Cases and Suites page for future execution and management.
A single test case can be associated with only one test suite at a time.
View and Organize Test Suites
By default, the Test Cases and Suites page displays individual test cases.
To view your test suites, select Test Suites from the Group By dropdown list.
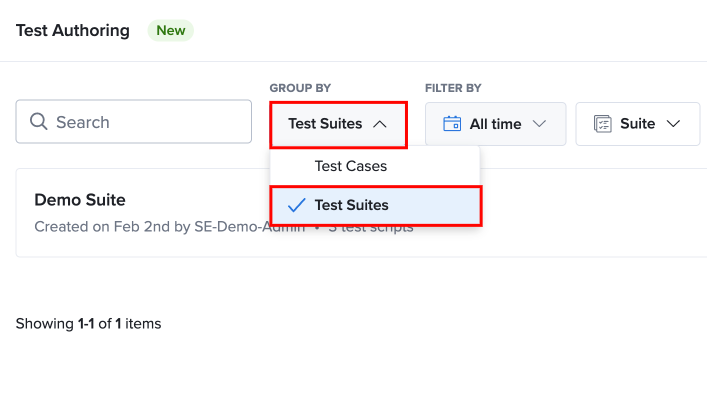
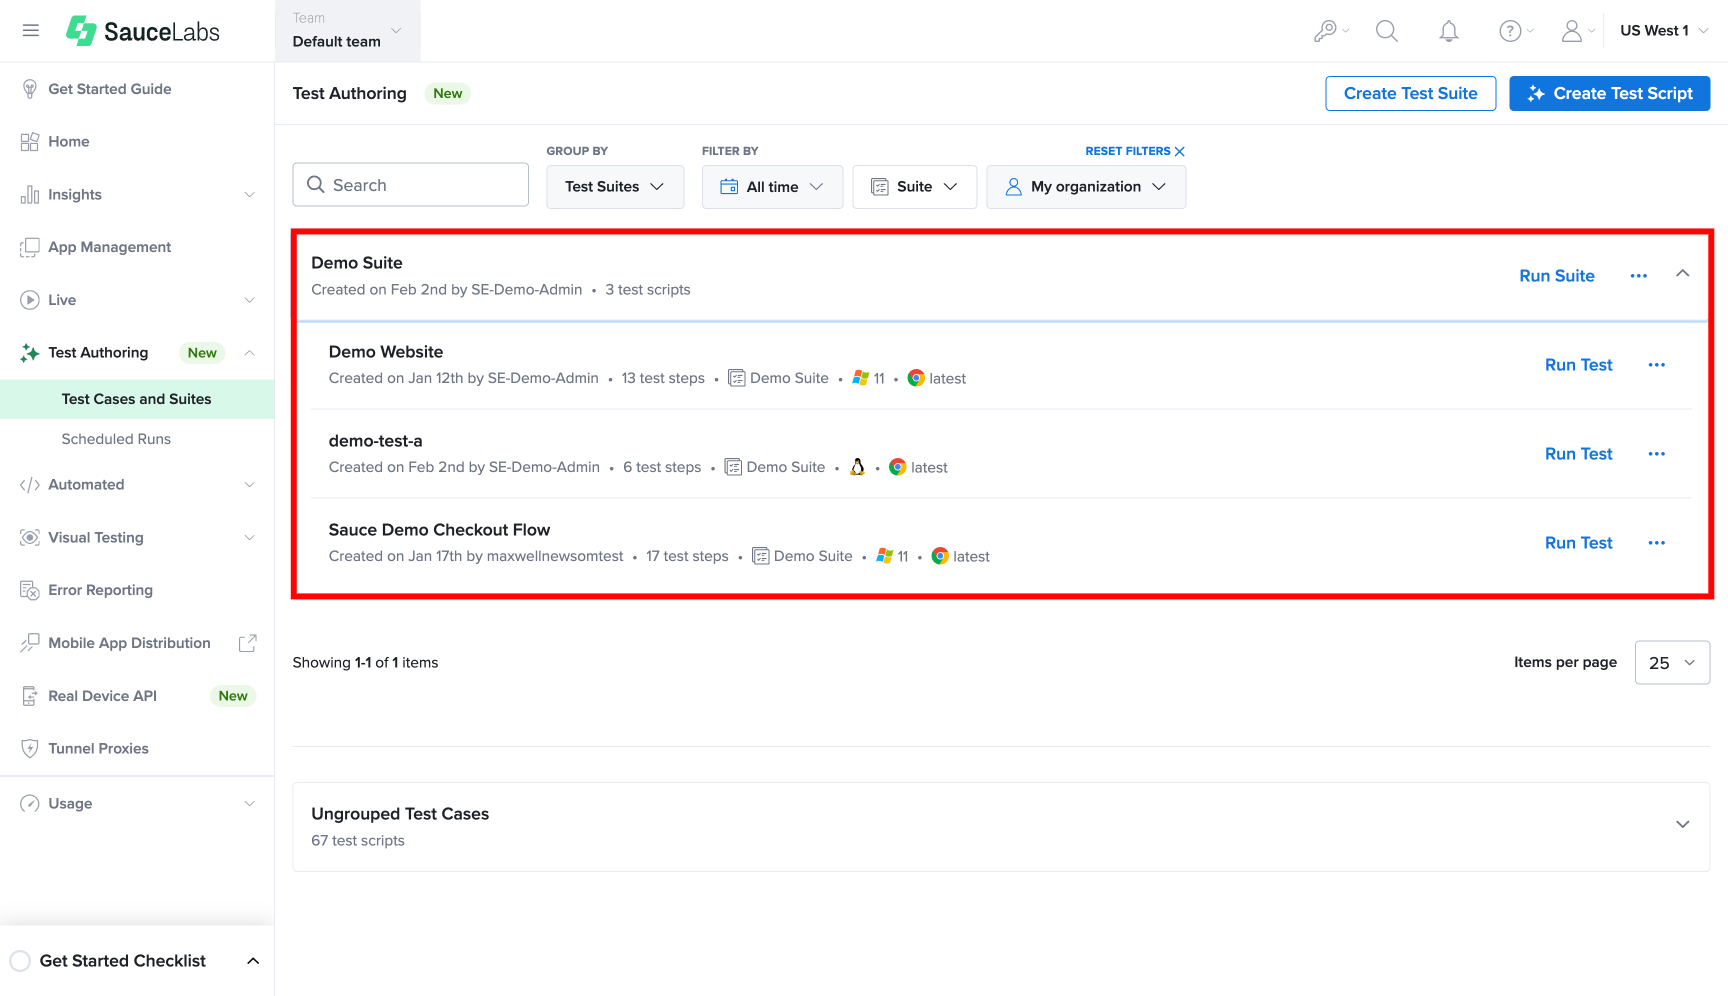
The page updates to display test cases grouped under their respective test suites, making it easier to review and manage related test scenarios together.
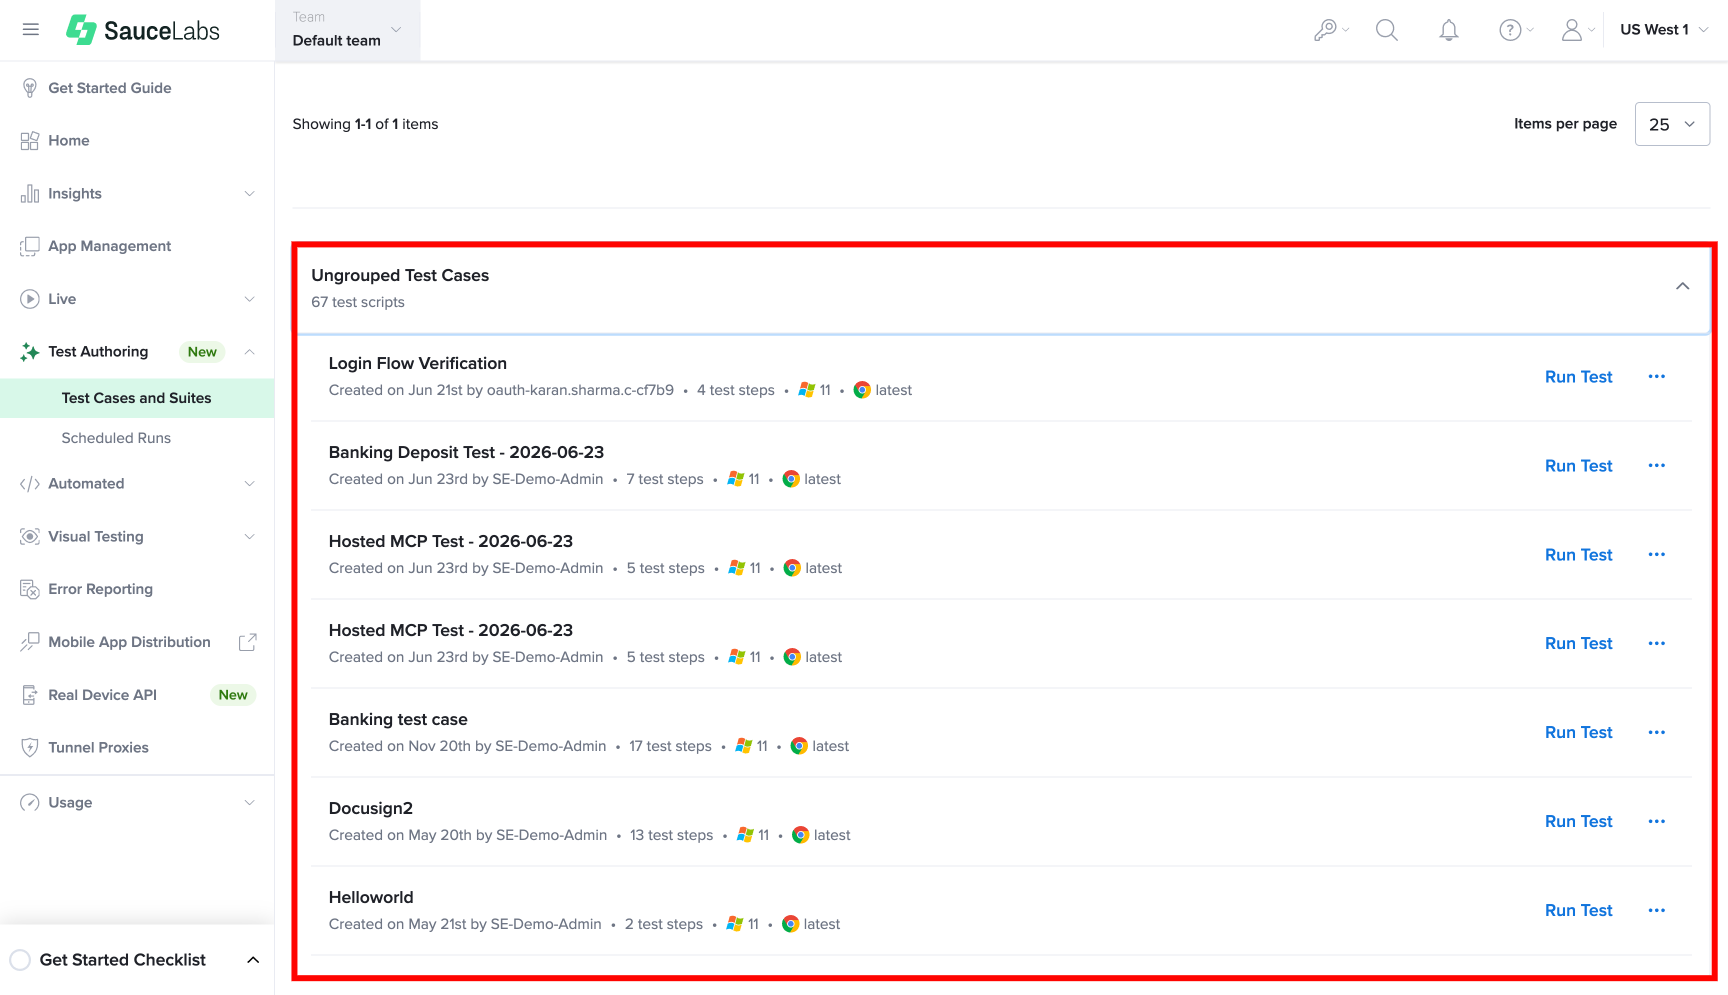
Any test cases that are not associated with a test suite are displayed separately under the ungrouped section.
Your selected Group By preference is saved at the user level and remains applied for future sessions until you change it again.
Edit a Test Suite
You can update an existing test suite whenever your testing requirements change. This allows you to add new test cases, remove unnecessary ones, or modify the overall suite composition.
Step 1: Ensure the Group By option is set to Test Suites, then locate the test suite that you want to modify.
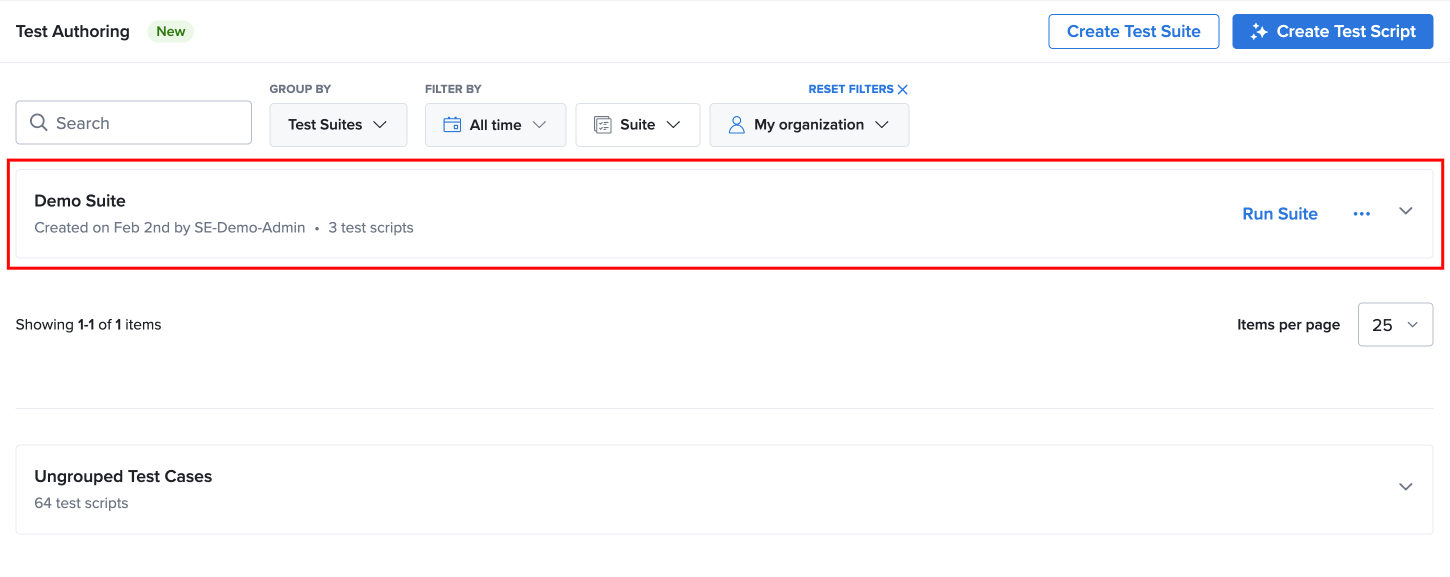
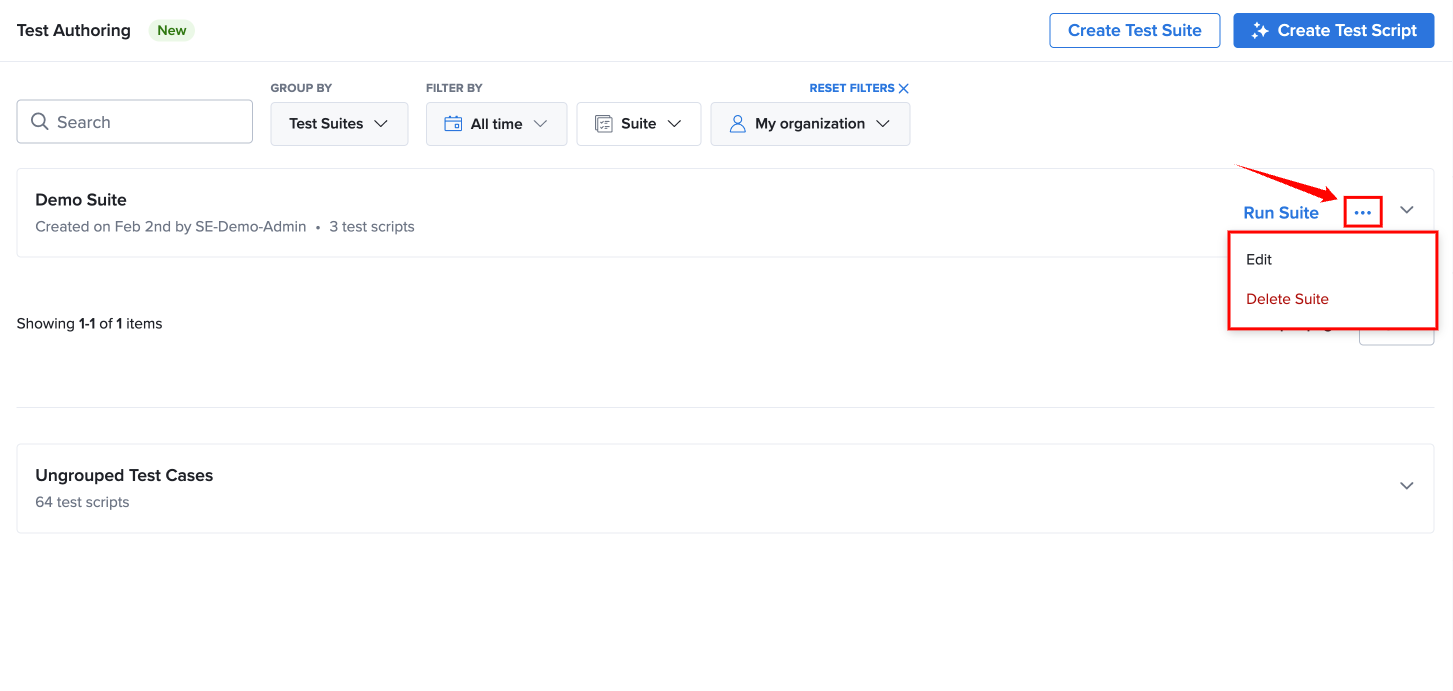
Step 2: Click the More Options (⋯) menu next to the selected test suite and select Edit.
Step 3: Update the test suite as required by adding additional test cases to expand test coverage, removing existing test cases that are no longer relevant, or reviewing and adjusting the overall test suite composition.
After you have completed the required changes, click Save Suite to apply and save the updated test suite.
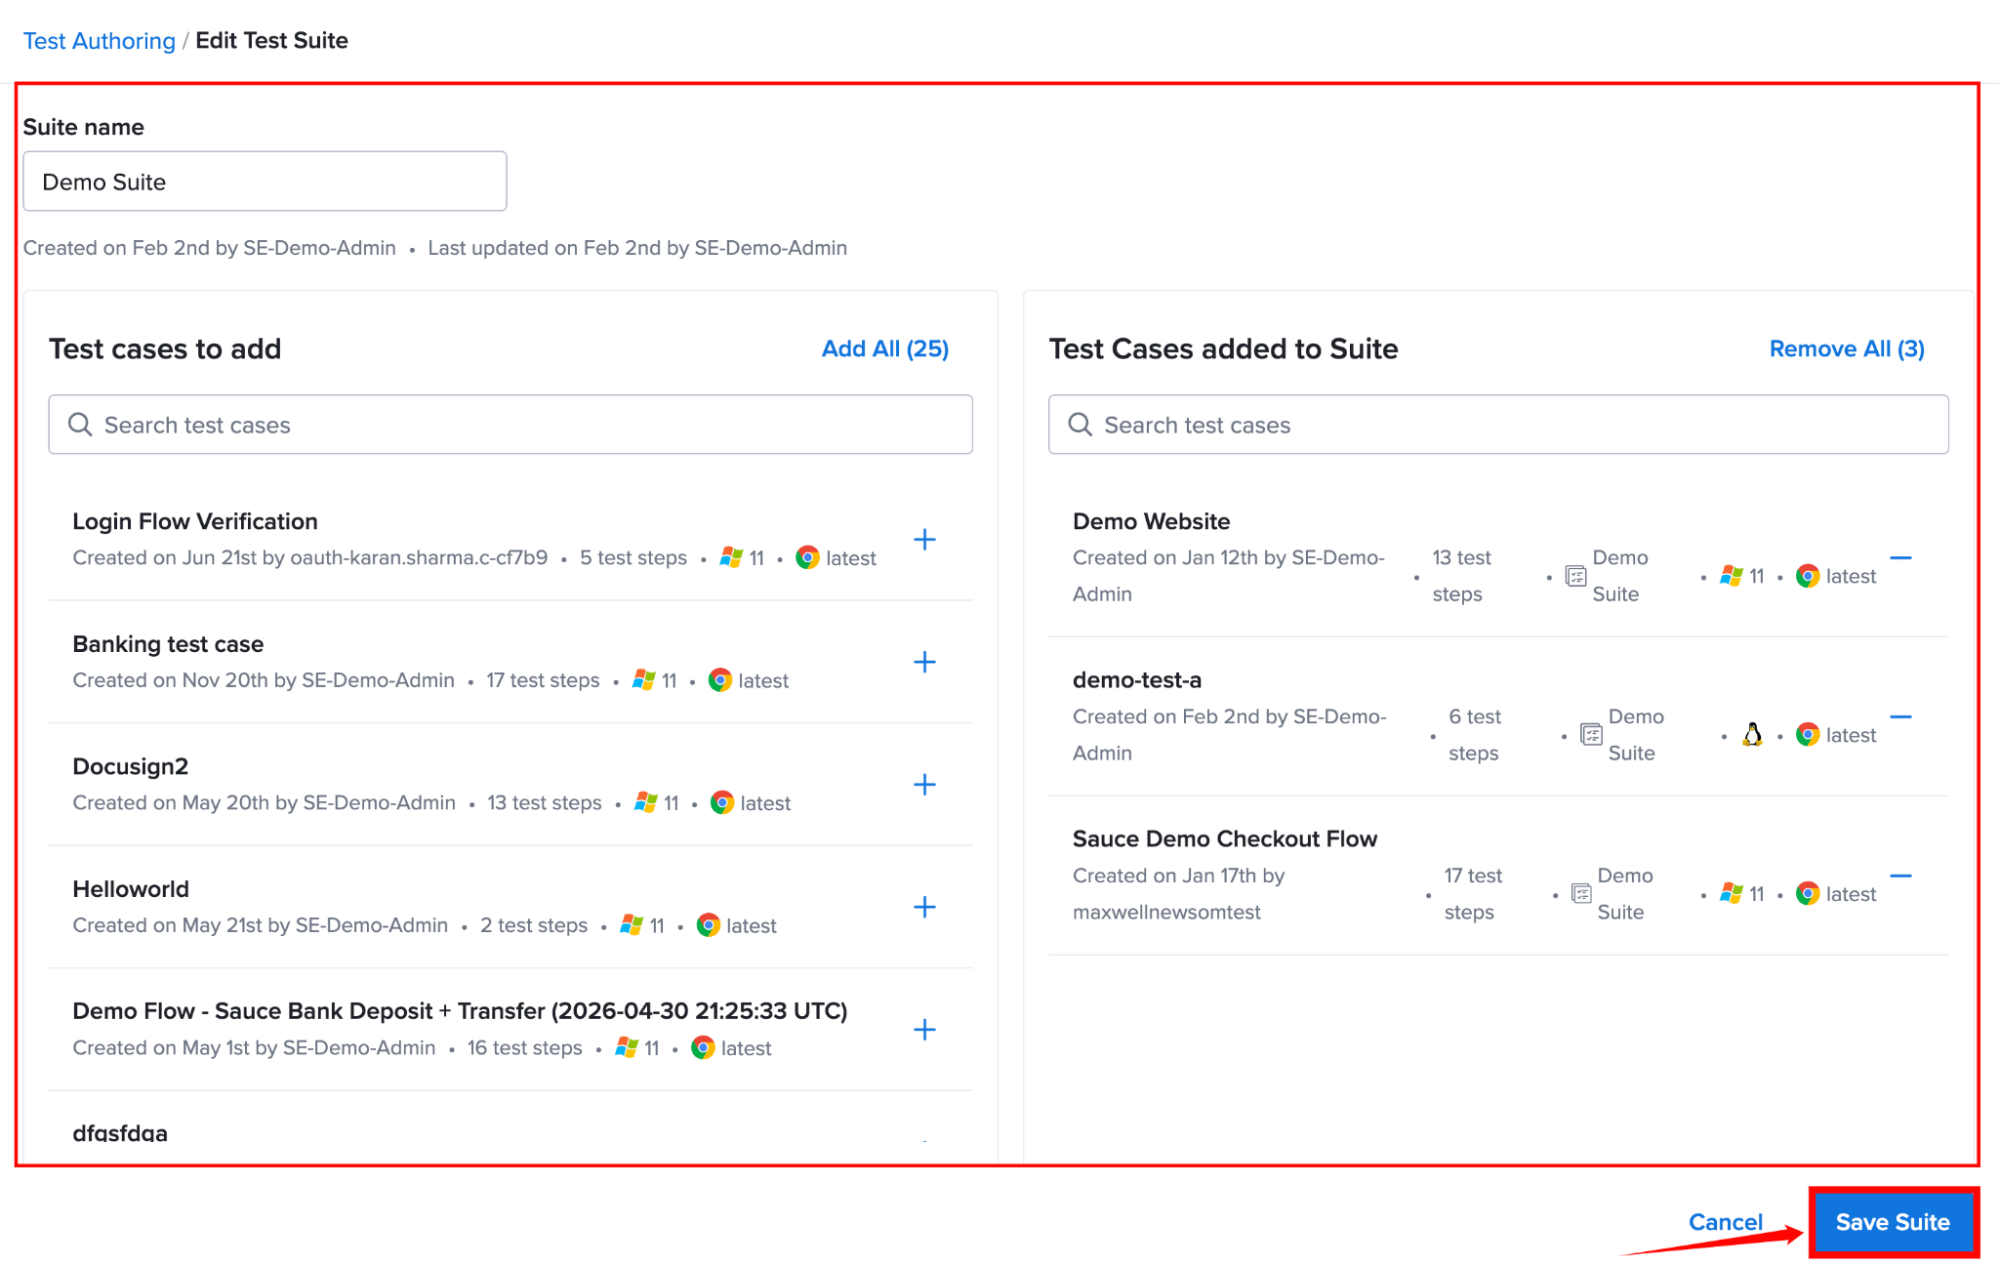
After saving your test suite, it becomes available for future Test run.
Delete a Test Suite
You can remove test suites that are no longer required while keeping your testing library organized.
Step 1: Ensure the Group By option is set to Test Suites, then locate the test suite that you want to remove.
Step 2: Click the More Options (⋯) menu next to the selected test suite and select Delete.
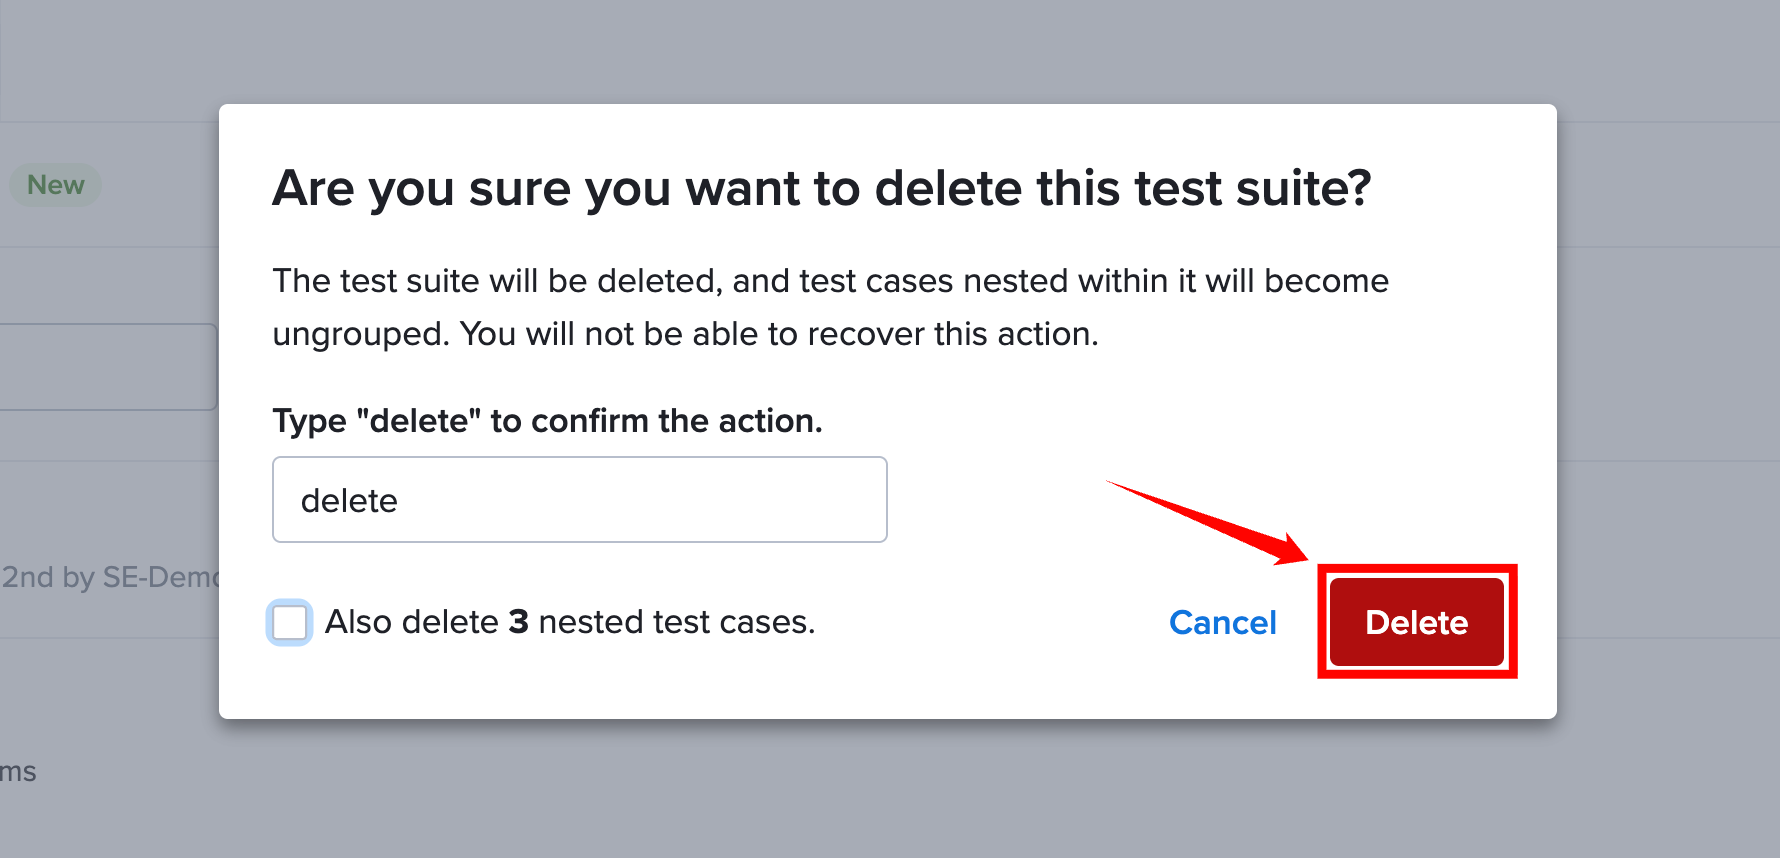
Step 3: When you delete a test suite, Sauce Labs displays a confirmation dialog to prevent accidental deletion. Type “delete” in the confirmation field to verify the action.
You can then choose one of the following options:
-
Leave the Also delete nested test cases checkbox unchecked to delete only the test suite. The associated test cases remain in your account and become ungrouped.
-
Select the Also delete nested test cases checkbox to permanently delete the test suite along with all associated test cases.
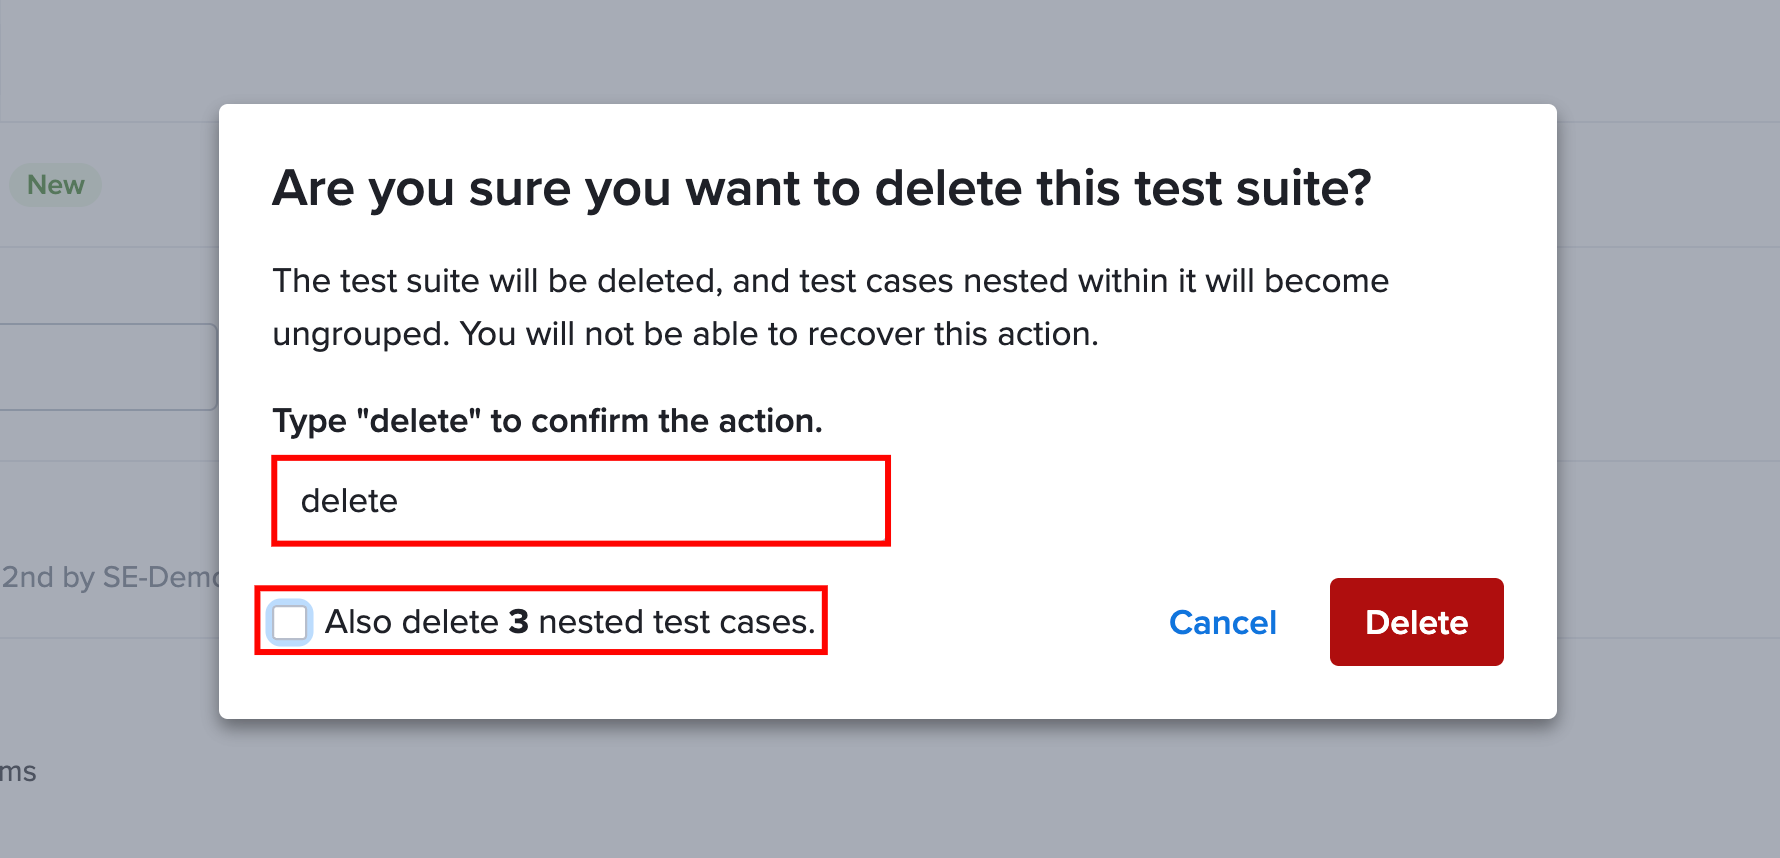
Step 4: Click Delete to permanently remove the test suite based on the selected deletion option.
Deleting a test suite cannot be undone. If you delete only the test suite, the associated test cases remain available in your account and become ungrouped. Test cases are permanently removed only if you explicitly select the option to delete the nested test cases during the deletion process.