Writing API Tests with the Composer
The API Testing Composer enables you to quickly generate API functional tests (no coding experience required) and/or code them from scratch. You can reuse these tests as end-to-end integration tests and load (stress) tests. In turn, load tests can be reused as monitors for performance testing.
What You'll Need
- A Sauce Labs account (Log in or sign up for a free trial license).
- An existing API Testing Project. For details on how to create one, see API Testing Quickstart.
Creating a Test with the Composer
Create a Test
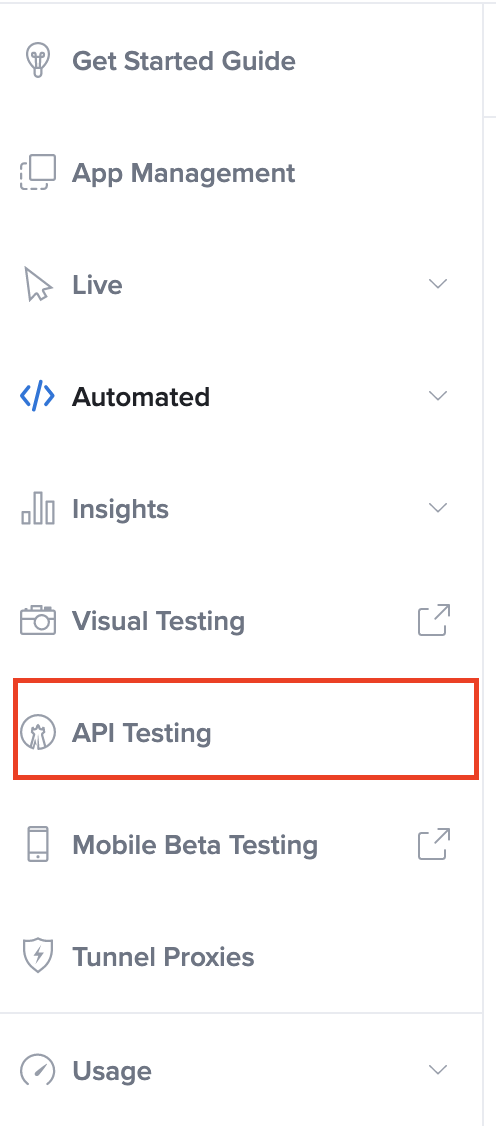
- In Sauce Labs, click API Testing.
On the Projects page:
- If you have no tests or projects yet, in the Write your own test box, click Use Composer.
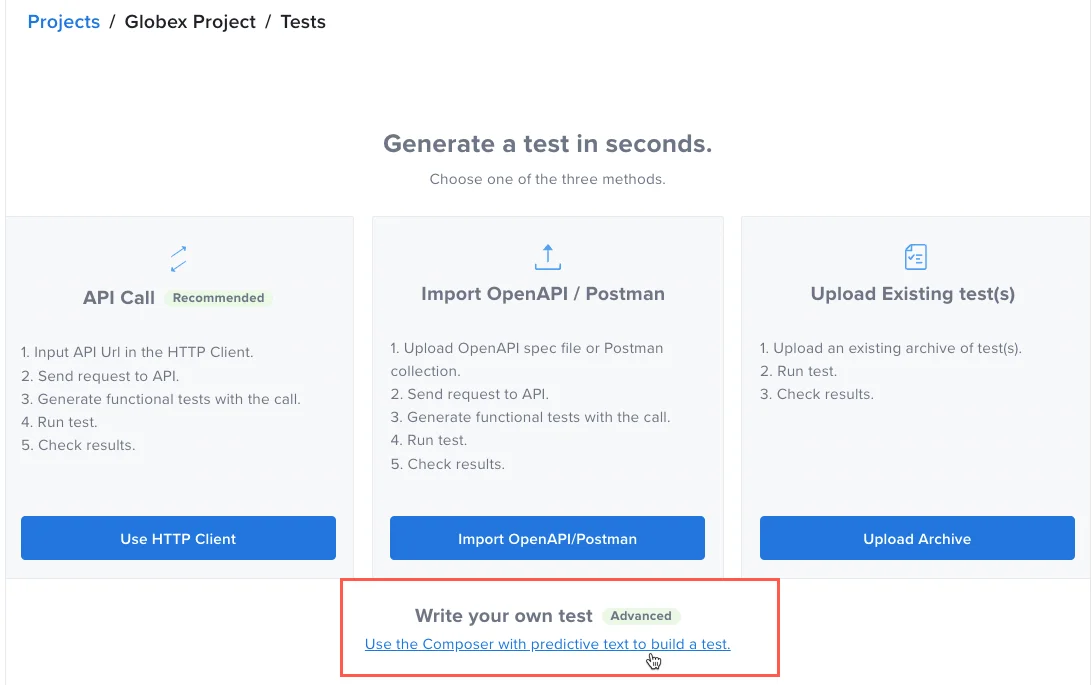
If you have a project but no tests, on the Projects page, click Write your own test.
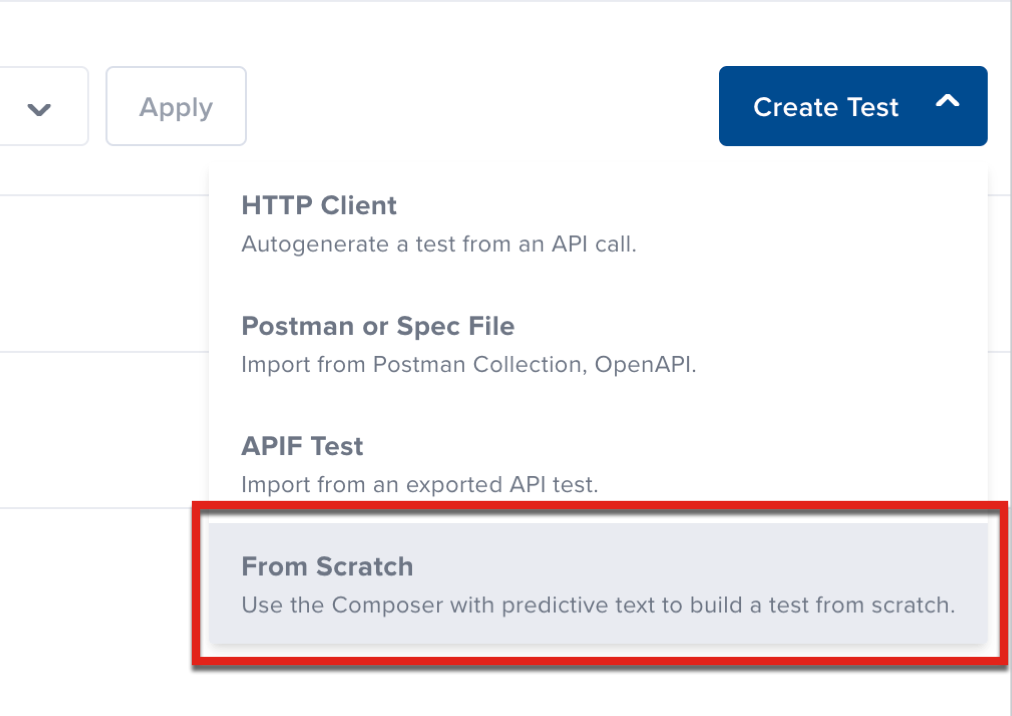
If your project has tests, click Create Test and then click From Scratch.
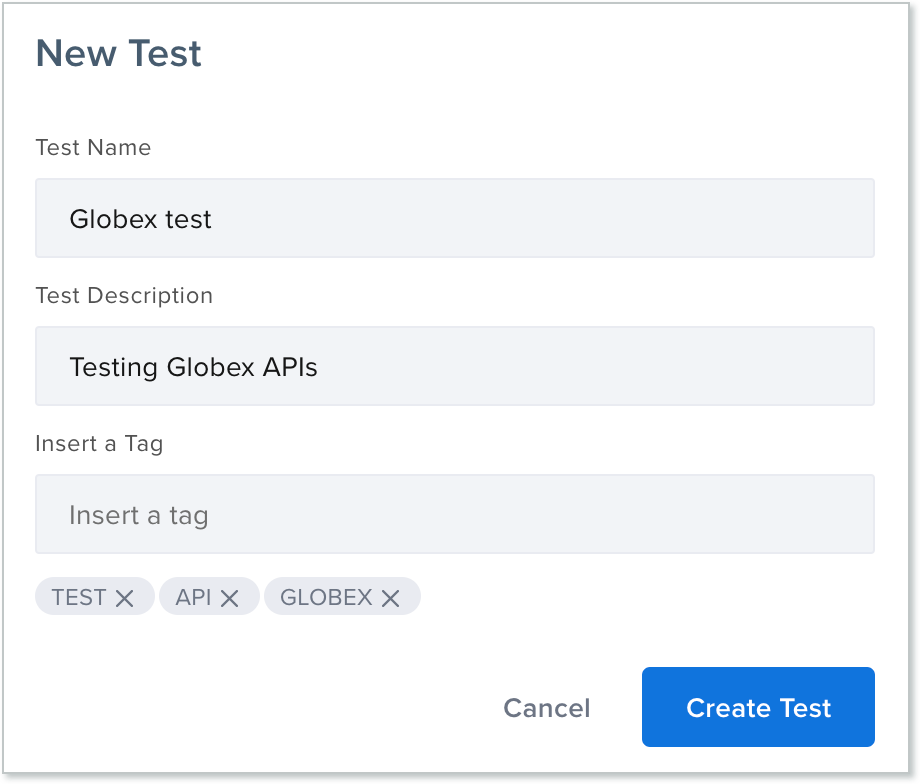
In the New Test box, enter a test name, test description (optional), and tags (optional), and then click Create Test.
You can use either the Visual composer (guides you through building components, with no coding required) or the Code composer (requires you to write code from scratch). For this guide, we're using Visual.
For more information, see Input Sets and Visual View and Code View.
Edit a Test
To edit a test at any time, on the Projects page, on the Tests tab, hover over a test name and then click Edit Test.

Add Test Components
When test components are combined, they act as our test logic. See the following pages for more information about the components types available in API Testing:
Add an I/O Request Test Component
To create a simple GET
request and validate that response is correct:
- In API Testing, on the Compose page, click Add child component.

- In the list of component options, click the GET component.
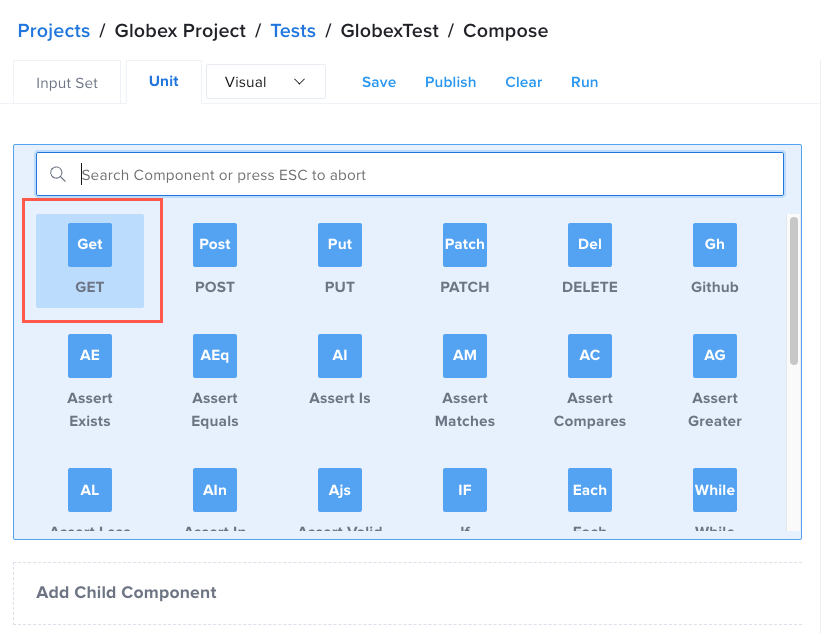
- In the GET request window, in the Url field, enter
https://api.us-west-1.saucelabs.com/rest/v1/public/tunnels/info/versions
.
This endpoint will return a JSON response body. 4. In the Variable field, enter payload. This variable stores the response, so it can now be referred to as payload.
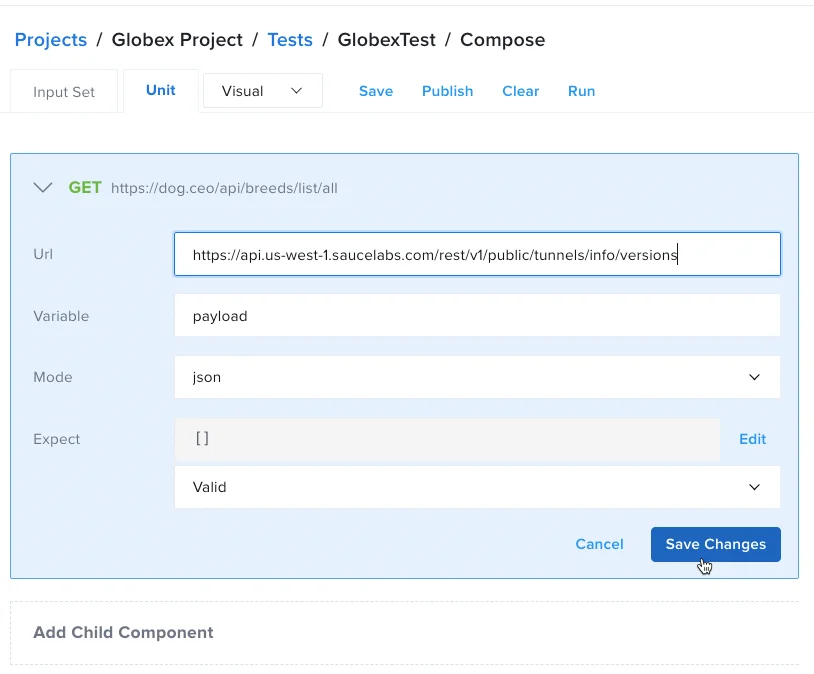
- Leave the rest of the fields blank and then click Save Changes.
The result should look like the following:
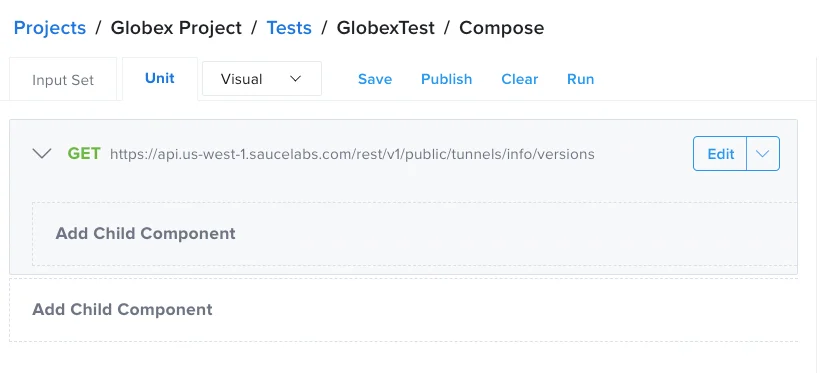
For more information, see I/O Request Test Components.
Add an Assertion Component
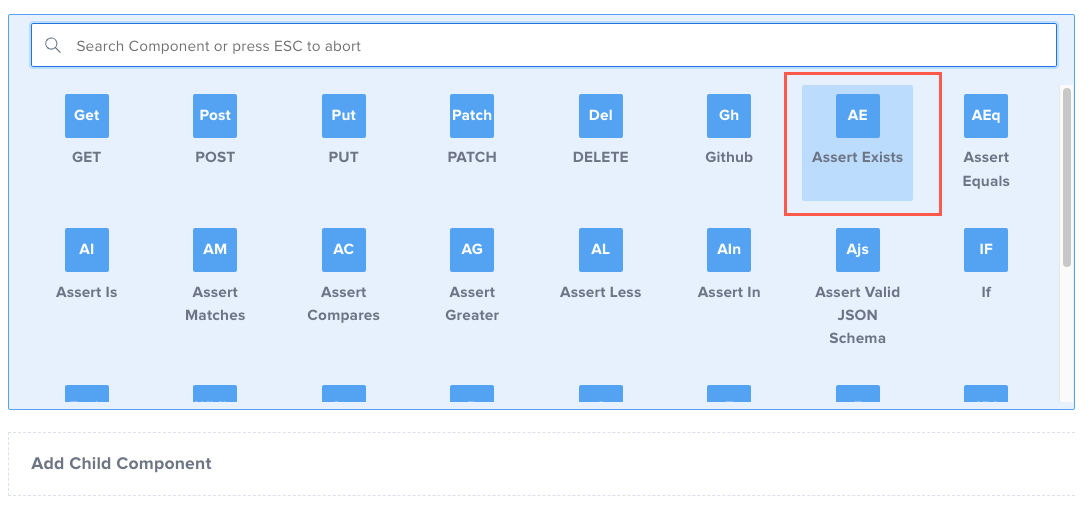
- In API Testing, on the Compose page, click Add child component.

- In the list of component options, click the Assert Exists component.
In the Assert exists window, in the Expression field, enter
payload.downloads
. This expression checks for the downloads field in the json response body.Leave the rest of the fields blank and click Save Changes.
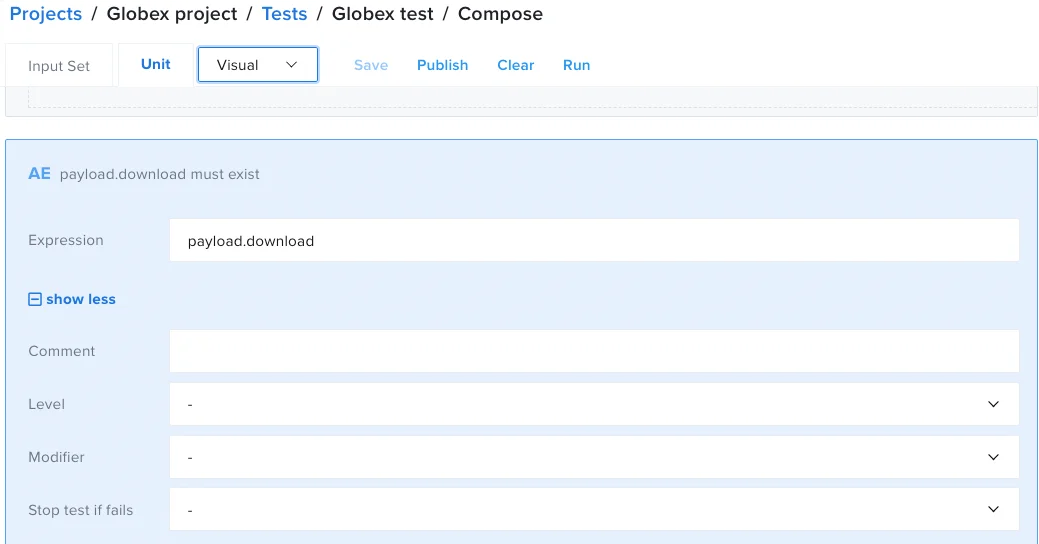
- The result should look like the following:

For more information, see Assertion Test Components.
Additional Example
In the following example, the expression checks if the download_url
value inside the Linux object is a valid URL.
In API Testing, on the Compose page, click Add child component.
In the list of component options, click the Assert Is component.
In the Assert is window, in the Expression field, enter
payload.downloads.linux.download_url
. This expression checks for the download_url field in the json response payload.Leave the rest of the fields blank and click Save Changes.
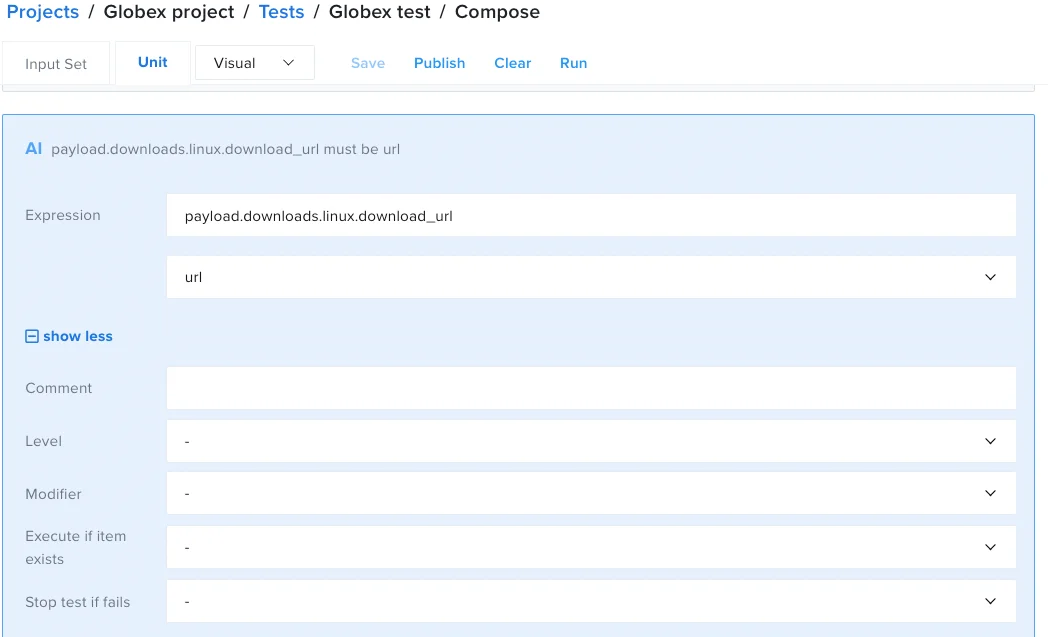
- The result should look like the following:

Run the Test
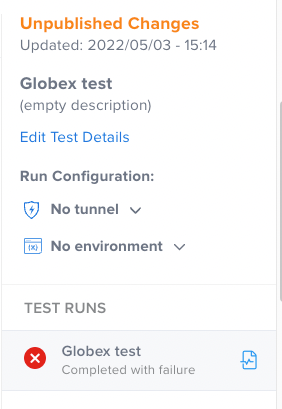
In the Composer, click Run.

All test runs appear to the right of the Composer, under the test details and environment sections.
Review Test Results
To view your results, in the Composer, in the Test Runs list, click the name of the test. This will open the Test Report Details. For more information, see Test Outcome Report.
Integration Tests
Integration testing is critical for creating a strong API testing strategy. An integration test allows you to create end-to-end tests that resemble common user flows. While only testing individual endpoints is a good start, this method will miss a large number of problems that occur when all services need to work together.
Token-based Authentication API
Company A has an authentication server. This server, when given the proper user credentials, returns an authentication token. This token is required for all other calls throughout the platform’s API environment. Without this first API call, none of the other API calls can work.
- To get the token, make a
POST
call to the authorization server.

The request body is the user ID and password. Given proper credentials, the authentication server will return a user token.

Use this token to make further calls to the application.
Add a
Set (variable)
component by entering/selecting the following in the Composer:- Variable (the variable name) -
access_token
- Mode (the variable type) -
String
- Value -
${authPayload.access_token}
- Variable (the variable name) -
This step takes the access_token
variable in the authPayload
response, and sets it as access_token
; the response body from the original post call was saved to a variable called authPayload
. The access key for the token is access_token
, which can be found by calling authPayload.access_token
.
The dollar sign and brackets are necessary when referencing variables so that Sauce Labs API Testing knows to interpret what’s between the brackets instead of using it literally.
Variables are used to store data temporarily for a test, but you can use the Sauce Labs API Testing Vault for permanent variables. For more information, see Creating Reusable Variables and Snippets with the Vault).
- Make follow-up calls.
In the following example, the API has a cart function that requires a user token to add items to a cart or view items currently in the cart. Use a PUT
request to the cart endpoint to update the cart. Use the access token granted by the authentication server to add items to a cart by setting the token
header to ${access_token}
.

You can also reuse access tokens:

Test Interactions between Endpoints
In the following example, there is an API endpoint that produces an array of all the available products and another endpoint that shows the details of a specific product based on its ID.
http://demoapi.apifortress.com/api/retail/product
http://demoapi.apifortress.com/api/retail/product/${id}
To create an integration test to test the interaction between the endpoints:
Call the product listing endpoint and assign the response to the
productsPayload
variable.Add an
each
assertion and reference theproductsPayload.products
object.
In a scenario in which the response contains many products, it may be useful to pick a few at random by using pick(n)
.
Test the response payload for the endpoint.
Add a new
Set (variable)
assertion to set theid
variable as every singleproductsPayload.product
that is returned. In the following example, the string is${_1.id}
. The system uses_1
automatically when recognizing a subroutine, which makes it easier when there are multiple sub-levels.Create a
GET
request to the product details endpoint, using the newid
variable as the id parameter. Variables last through the entire test unless overwritten.Test the response payload for the endpoint.
- id: get
children:
- id: header
name: key
value: ABC123
url: http://demoapi.apifortress.com/api/retail/product
var: productsPayload
mode: json
- id: if
children:
- id: comment
text: endpoint is not working fine, test will be stopped
- id: flow
command: stop
expression: productsPayload_response.statusCode!='200'
- id: assert-is
expression: productsPayload
comment: payload must be an array
type: array
- id: each
children:
- id: comment
text: "product id is: ${_1.id} and product name is: ${_1.name}"
- id: assert-is
expression: _1.id
comment: id must be an integer value
type: integer
- id: set
var: id
mode: string
value: ${_1.id}
- id: assert-exists
expression: _1.name
comment: name must exists
- id: assert-is
expression: _1.price
comment: price must be a float number
type: float
- id: assert-exists
expression: _1.category
comment: category must exists
- id: assert-exists
expression: _1.description
comment: description must exists
- id: assert-is
expression: _1.quantity
comment: quantity must be an integer value
type: integer
- id: assert-greater
expression: _1.quantity
comment: quantity must be greater than 0
value: 0
- id: assert-is
expression: _1.imageURL
comment: imageURL must be a valid url value
type: url
- id: assert-is
expression: _1.color
comment: color must be an array
type: array
- id: each
children:
- id: assert-exists
expression: _2
comment: color array should contain some values
- id: assert-in
expression: _2
comment: colors must be the expected one
value:
- yellow
- blue
- red
- green
- brown
- orange
- gray
- pink
- black
- white
expression: _1.color
- id: assert-exists
expression: _1.createdAt
comment: createdAt must exists
- id: assert-exists
expression: _1.updatedAt
comment: updateAt must exists
- id: comment
text: get product details
- id: get
children:
- id: header
name: key
value: ABC123
url: http://demoapi.apifortress.com/api/retail/product/${id}
var: productPayload
mode: json
- id: if
children:
- id: comment
text: endpoint is not working fine, test will be stopped
- id: flow
command: stop
expression: productPayload_response.statusCode!='200'
- id: assert-exists
expression: productPayload
comment: payload must exist, if not, test does not need to be executed
- id: comment
text: "product id is: ${productPayload.id} and product name is:
${productPayload.name}"
- id: assert-is
expression: productPayload.id
comment: id must be an integer value
type: integer
- id: assert-exists
expression: productPayload.name
comment: name must exists
- id: assert-is
expression: productPayload.price
comment: price must be a float number
type: float
- id: assert-exists
expression: productPayload.category
comment: category must exists
- id: assert-exists
expression: productPayload.description
comment: description must exists
- id: assert-is
expression: productPayload.quantity
comment: quantity must be an integer value
type: integer
- id: assert-greater
expression: productPayload.quantity
comment: quantity must be greater than 0
value: 0
- id: assert-is
expression: productPayload.imageURL
comment: imageURL must be a valid url value
type: url
- id: assert-is
expression: productPayload.color
comment: color must be an array
type: array
- id: each
children:
- id: assert-exists
expression: _2
comment: color array should contain some values
- id: assert-in
expression: _2
comment: colors must be the expected one
value:
- yellow
- blue
- red
- green
- brown
- orange
- gray
- pink
- black
- white
expression: productPayload.color
- id: assert-exists
expression: productPayload.createdAt
comment: createdAt must exists
- id: assert-exists
expression: productPayload.updatedAt
comment: updateAt must exists
expression: productsPayload.pick(5)
Terminology
Visual View and Code View
This toggle switches between the Visual and Code views in the Composer. You can make calls and add assertions for testing your APIs, and insert variables wherever needed. You can use either, depending on which you're more comfortable with.
Visual View
Guides you through creating API tests using automated real-time suggestions via predictive text. No coding experience is required.
Code View
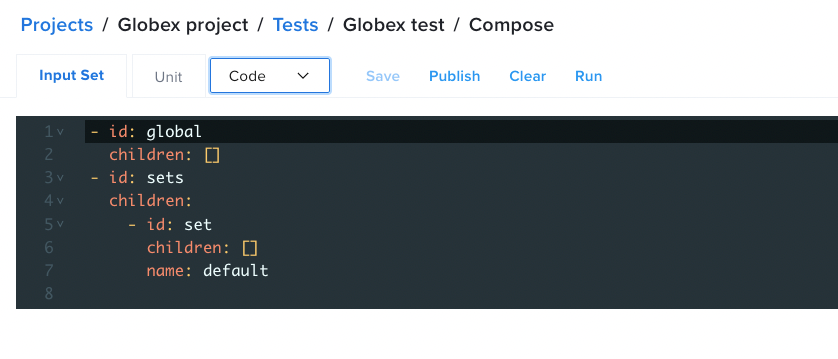
Enables you to write tests here from scratch, if you feel more comfortable working in code.
Add Child Component
This button displays all available assertion components, I/O components, and logical components.

If a component is not valid for the operation you are conducting, it will not be made available to help avoid mistakes. For instance, if you don’t add a POST
first, you cannot add a POST
Body or POST
Param.
Sauce Labs free trials may not give you access to all available components.
Component Options
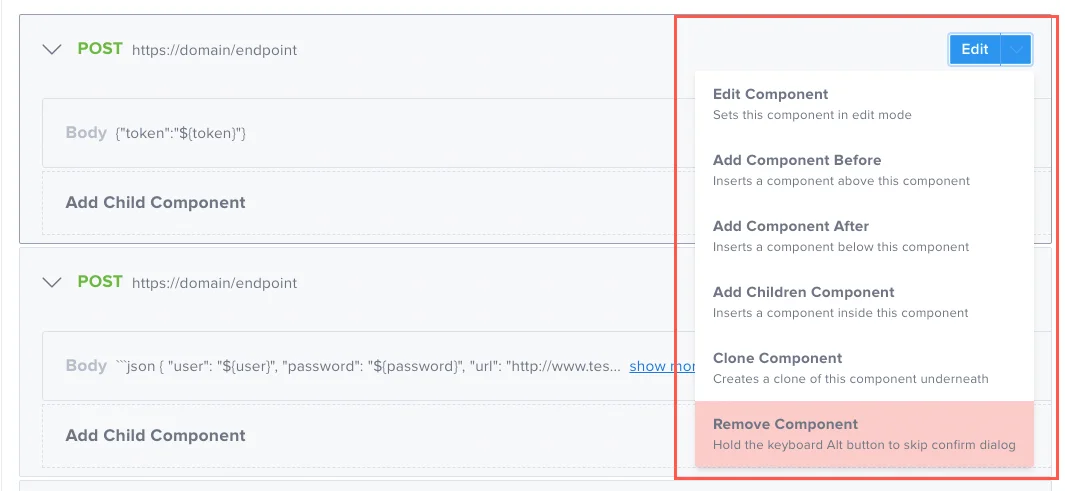
Click Edit to modify an existing component, or use the dropdown menu next to Edit to perform the actions shown below.

Save
Saves your progress.

Publish
Publishes your test.

Clear
Clears the most recent unpublished changes made to your test.

Run
Executes a test.

Input Sets
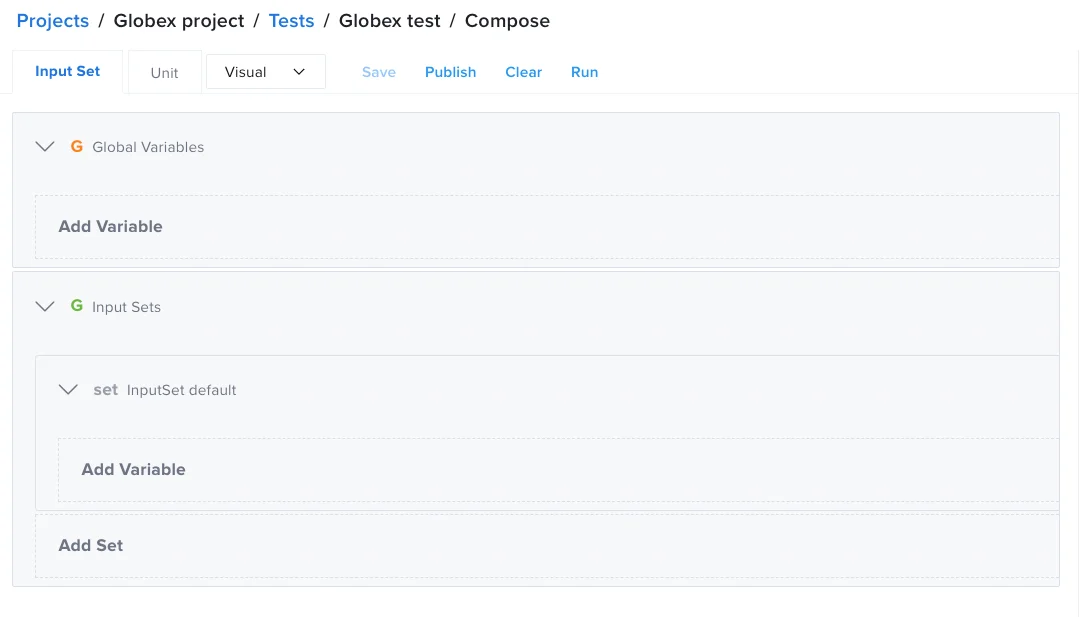
Displays the Input Set view where you can store input data sets to reuse within the specific test you're working on.

There are two types of input data sets you can use:
- Global Parameters - Variables that are available within a test, valid for that specific test only.
- Input Set - Group of input variables representing a scenario, valid for that specific test only. The test will be executed once for each input set, overriding the variable values into your test.
Input Set with Visual View | ![]() |
Input Set with Code View | ![]() |
Unit View
These buttons switch between the Input Set and Unit views.

Test Options
Once you've generated your tests in the Composer, you can manage them from the Tests tab. In your project, on the Tests tab, hover your mouse over the test line item. You'll see icons that allow you to edit, run, schedule, or delete a test.

- Pencil icon: Edit the test (opens the Compose tab)
- Play icon: Run the test manually
- Calendar icon: Open the test scheduler
- Gauge icon: Opens the load testing page
- Trash icon: Delete the test
More Information
- API Testing Quickstart
- Check our Use Cases out to see practical examples to help you write your tests.