Using a File in your Tests
You can use files stored in the Vault drive in your test in several ways. This guide explains how you can use files stored in the Vault drive as a data source in your tests.
What You'll Need
- A Sauce Labs account (Log in or sign up for a free trial license).
- An existing API Testing Project. For details on how to create one, see API Testing Quickstart.
Using a File as Datasource
A common scenario for using an external file in your test is when you have to generate a large number of different inputs inside your tests. In this case, it is difficult to add all your data inside the Input Sets because it would take a lot of time and often you might need to replace your data with a new set. In this case, the best solution is to use an external file as a data source for your tests.
Step 1: Uploading the file in Vault Drive
Consider a scenario where an endpoint requires a city as a parameter and returns the weather of that city. To make sure the response is always the expected one, a good practice is testing with as many cities as possible. In a scenario like this, it is not feasible to enter a list of cities as input sets.
First, upload your file to the Vault drive:
- Open the project you want to create the test in.
- In the left panel, click Vault, then click Drive.
- Click Upload file.
- Upload the file using drag and drop or Choose file, or enter the URL, then click Upload.
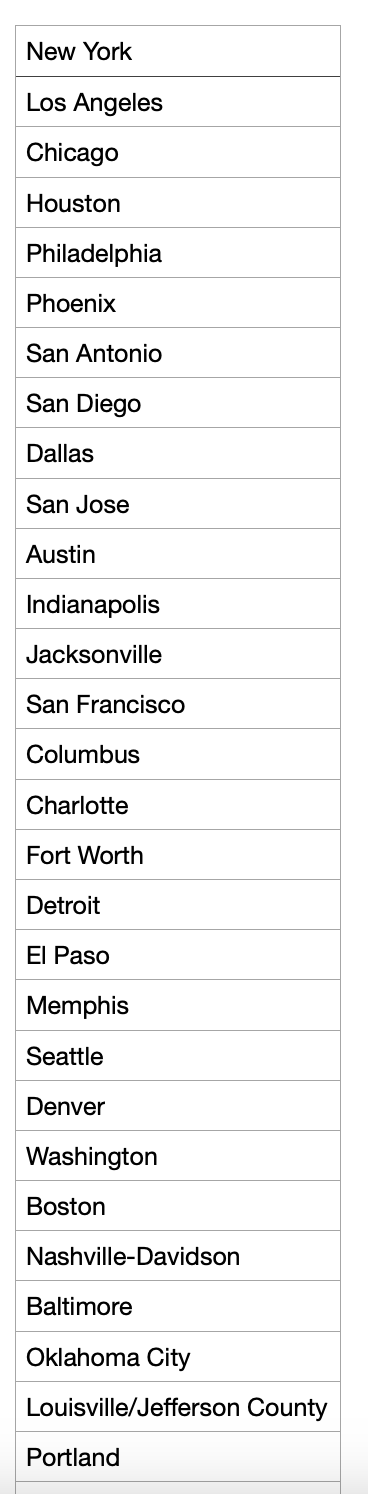
This example uses the cities.csv file that contains a list of US cities as shown:
Step 2: Creating the Test
Once the file is in the Vault drive, you can create your test.
- In the left panel, click Tests.
- Click Create Test, then From Scratch.
- Enter the Test Name.
- Optionally, you can add a Description and/or Tags.
- Click Create Test.
Step 3: Writing the Test
Retrieving the File From the Drive
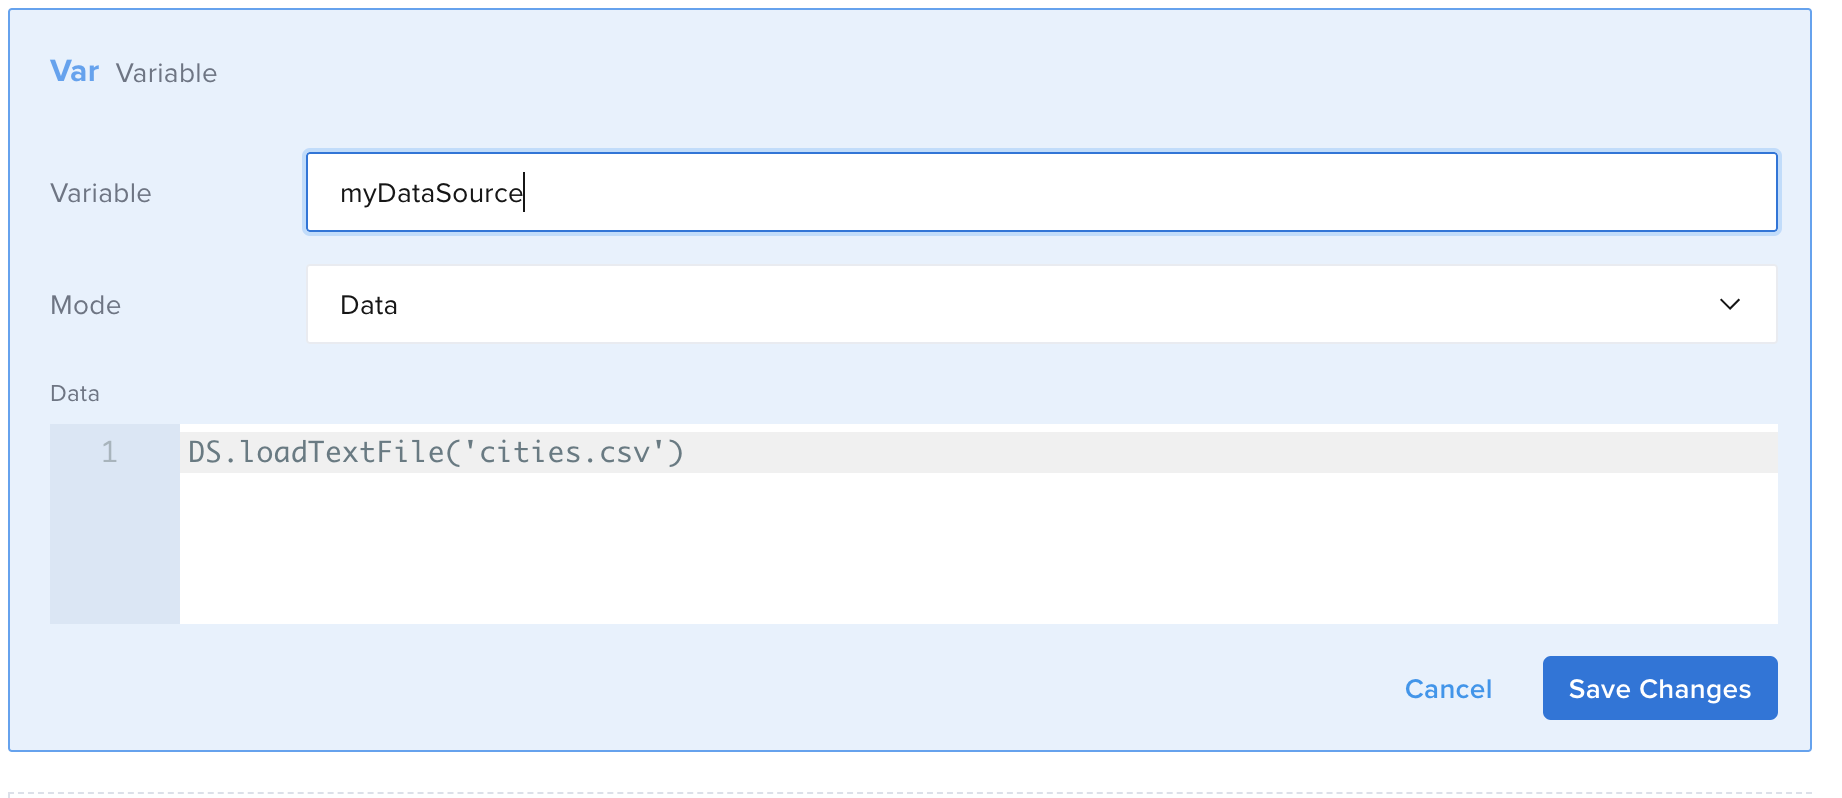
- Add the File DataSource component.
- Select the file you uploaded in the Drive.
- Enter the Variable, then click Save Changes.
Parsing the File
The next step is parsing the file to let the system know the type of file you are working with.
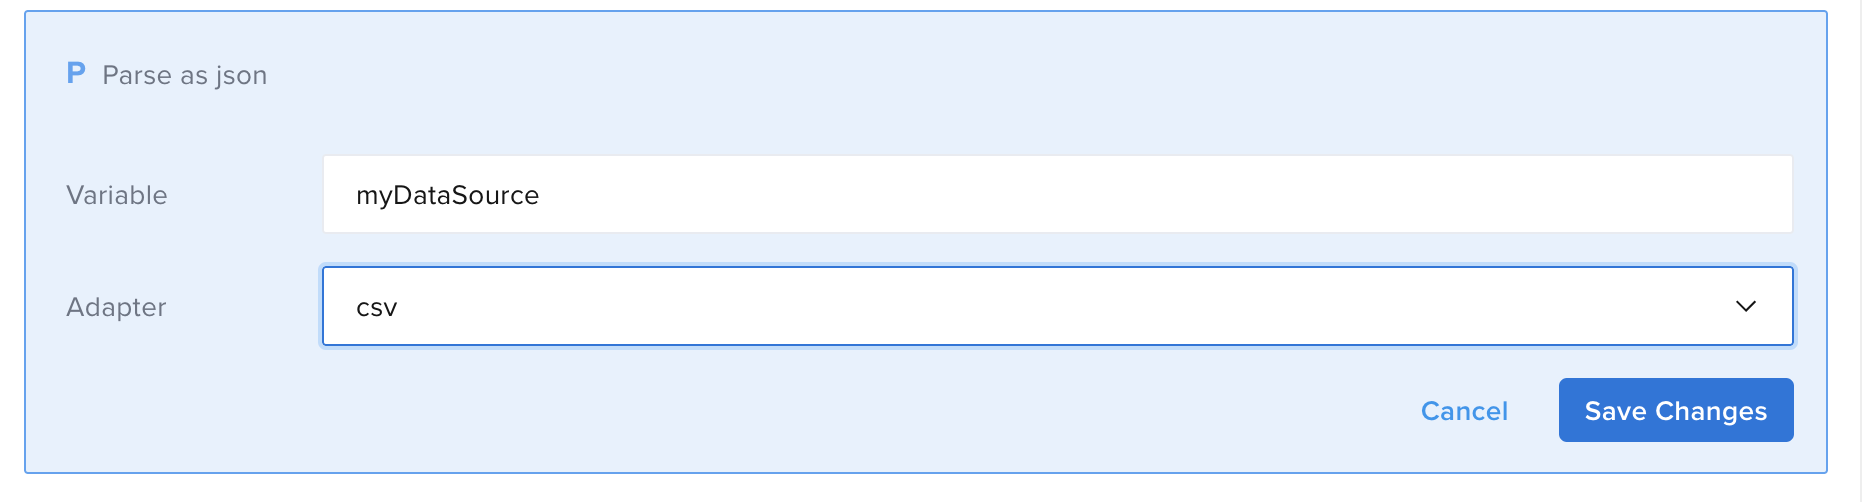
Add the Parse component:
- The Variable must match the name you entered as a Variable in the previous step.
- The Adapter must match the type of file you have uploaded. In our example, it's a .csv file.
Cycling the Array
Parsing the file produces an array of items. You can use the pick(n) functionality to create a random subset of the array.
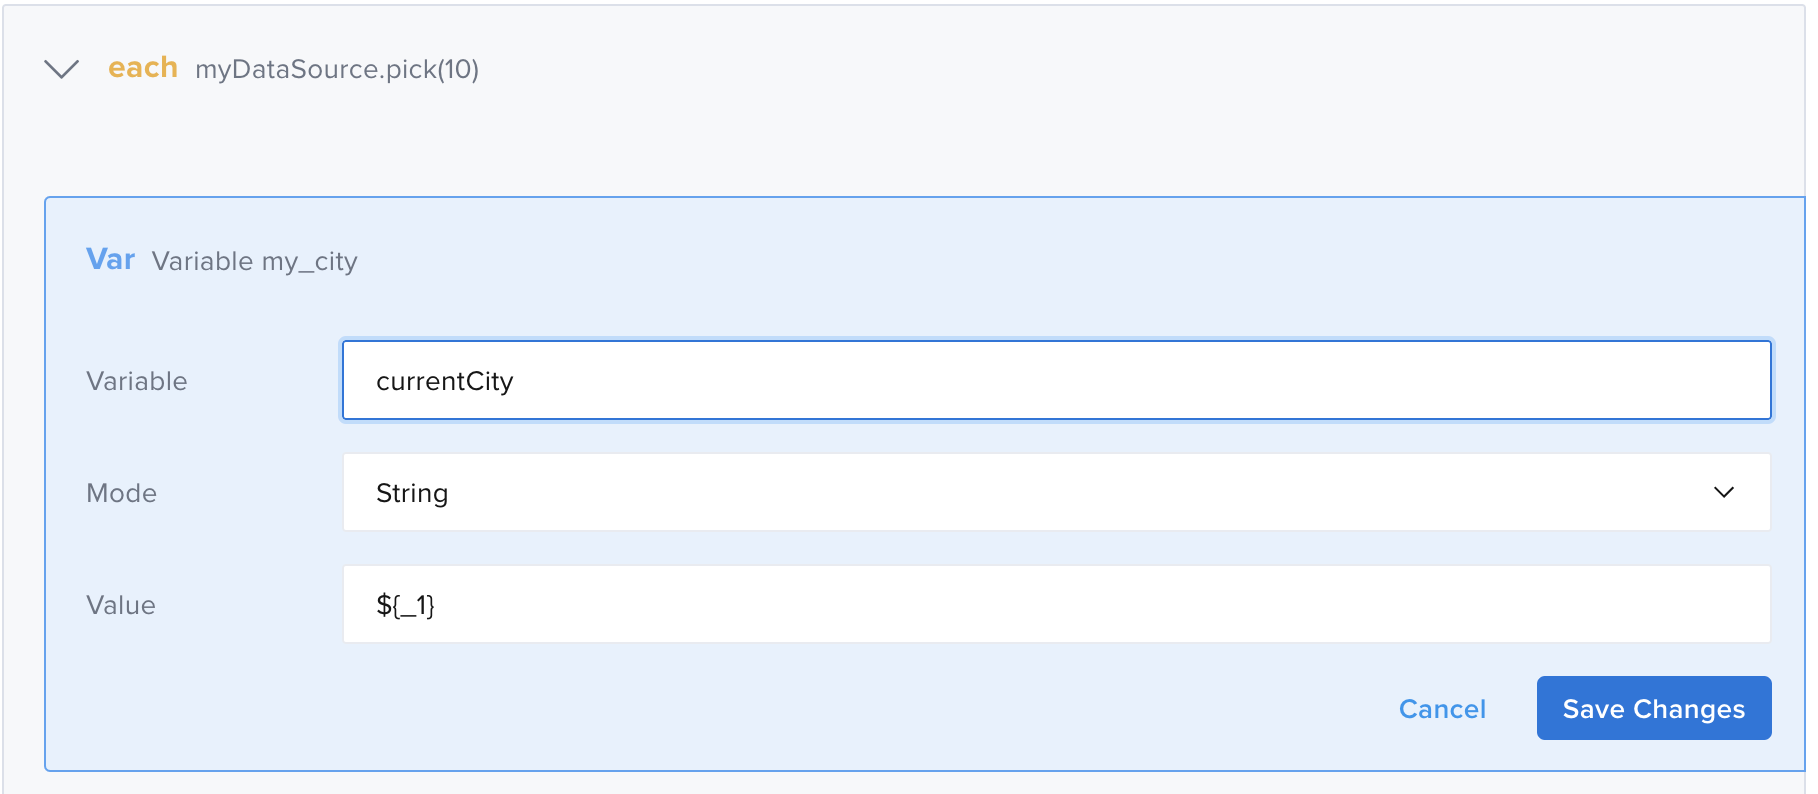
- Add the Each component.
- In Expression, enter
<variable_name>.pick(10).

Saving the Value in a Variable
Looping into the array will return one item at a time. Now, you have two options: the first one is saving that value in a variable so you can use that value every time you need it inside your test by calling the Variable Name, and the second one is using the value directly where you need it. For this example, we will save the value in a variable.
As a child component, add the Set(variable) component:
- Variable - for example
currentCity - Mode -
String - Value -
${_1}
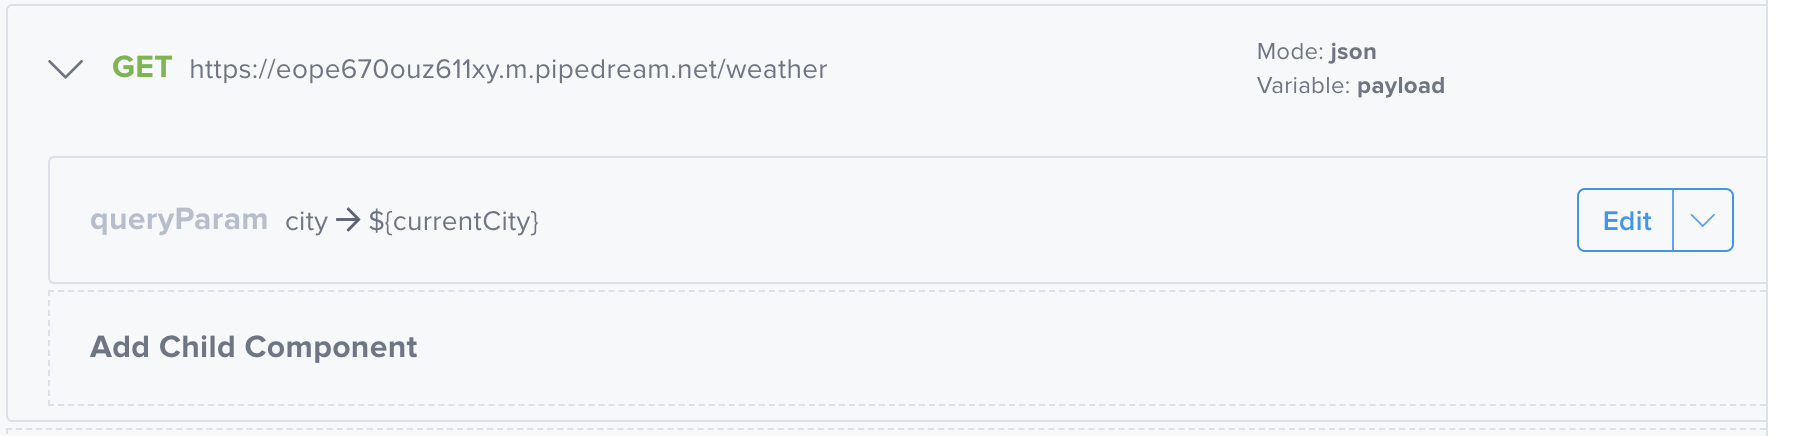
Adding the Request
Next, you can add the request to the weather endpoint by adding the variable as a query param.
- Add the GET component:
- URL - for example
https://eope670ouz611xy.m.pipedream.net/weather - Variable - for example
payload
- URL - for example
- Save Changes.
- Add a Query Param as child component:
- Name - for example
city - Value - for example
${currentCity}
- Name - for example
- Click Save Changes.
You can now proceed to test the response payload from that call.
In Code view, it looks like this:
- id: set
  var: myDataSource
  mode: object
  object: DS.loadTextFile('cities.csv')
- id: parse
  var: myDataSource
  adapter: csv
- id: each
  children:
    - id: set
      var: currentCity
      mode: string
      value: ${_1}
    - id: get
      children:
        - id: queryParam
          name: city
          value: ${currentCity}
      url: https://eope670ouz611xy.m.pipedream.net/weather
      var: payload
      mode: json
  expression: myDataSource.pick(10)
Using a File as a Request Body
In the above example, the .csv file contains only one column. Next, consider a scenario where the .csv file contains more columns and you have to use only some values from a row or you have to use all the values but not in bulk. A common scenario is when you use the file to generate the Body of your request.
Step 1: Uploading the File in Vault Drive
For this new example, consider a scenario where you have to create an account and you need to provide personal data as a request body. In a scenario like this, especially in a development phase, it is common to have a file with some data allowed by the system.
As with the previous example, the first step is uploading your file to the Vault Drive.
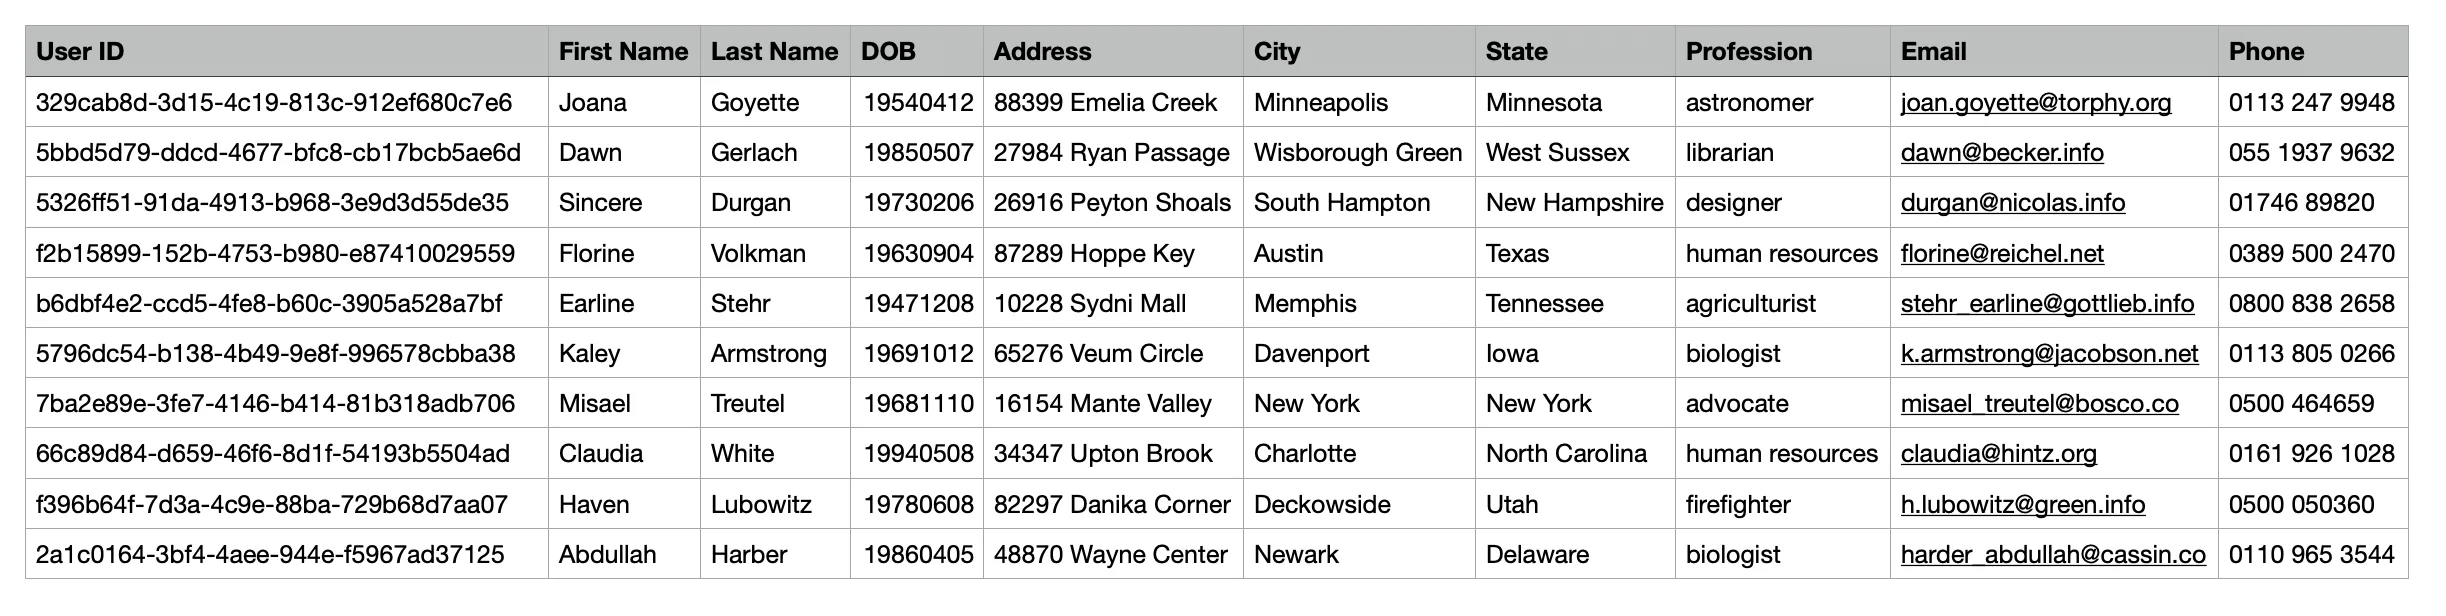
This time, we are using users.csv file that contains a list of user details as shown:
Step 2: Creating the Test
You can follow the same steps as in the previous example
Step 3: Writing the Test
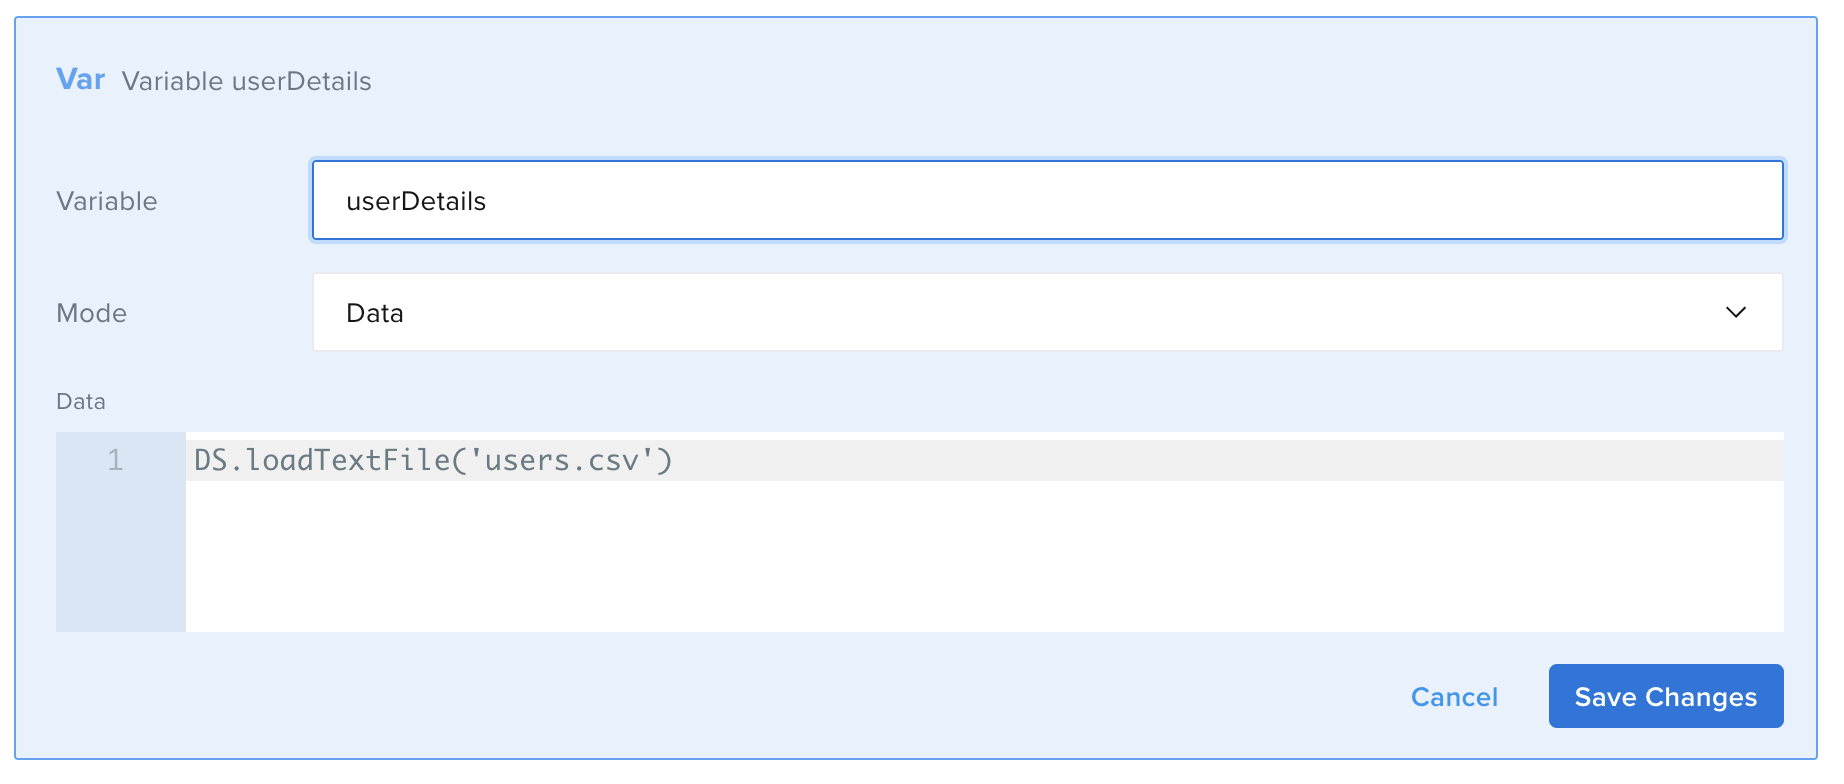
Retrieving the File From the Drive
- Add the File DataSource.
- Select the file you uploaded in the Drive.
- Enter the Variable, then Save Changes.
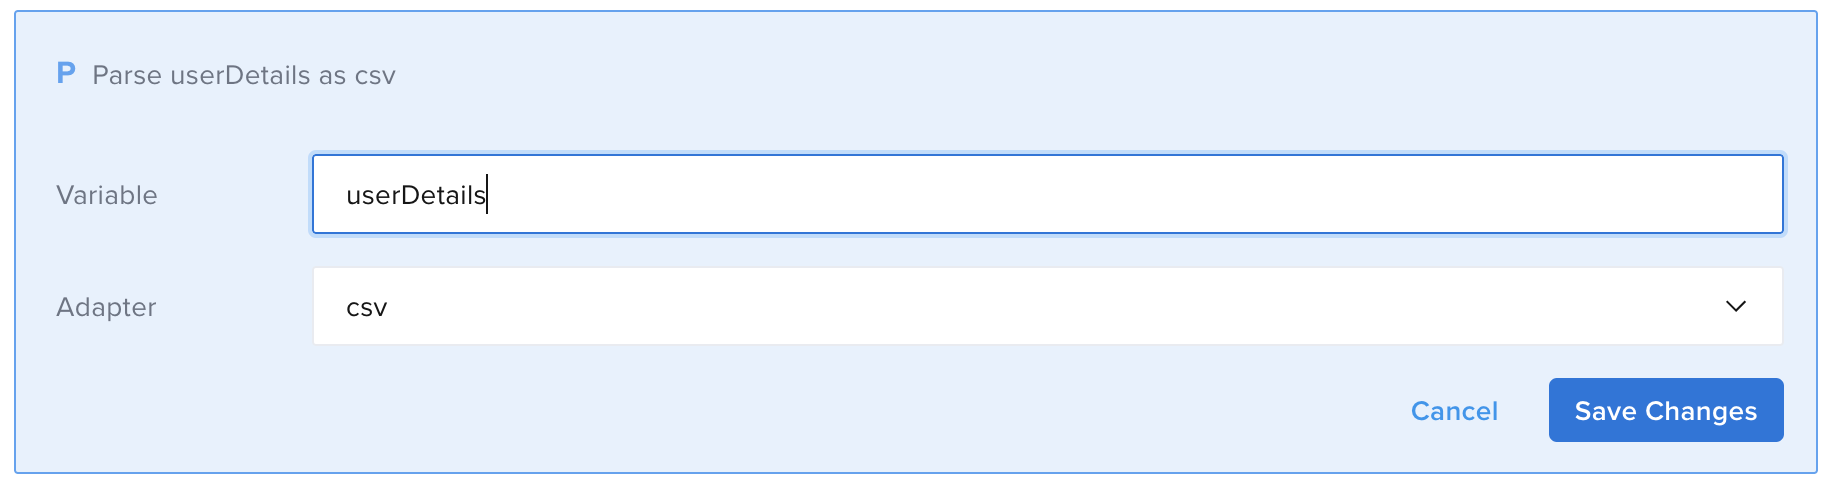
Parsing the File
The next step is parsing the file to let the system know the type of file you are working with.
Add the Parse component:
- The Variable must match the name you entered as a Variable in the previous step.
- The Adapter must match the type of file you have uploaded. In our example, it's a .csv file.
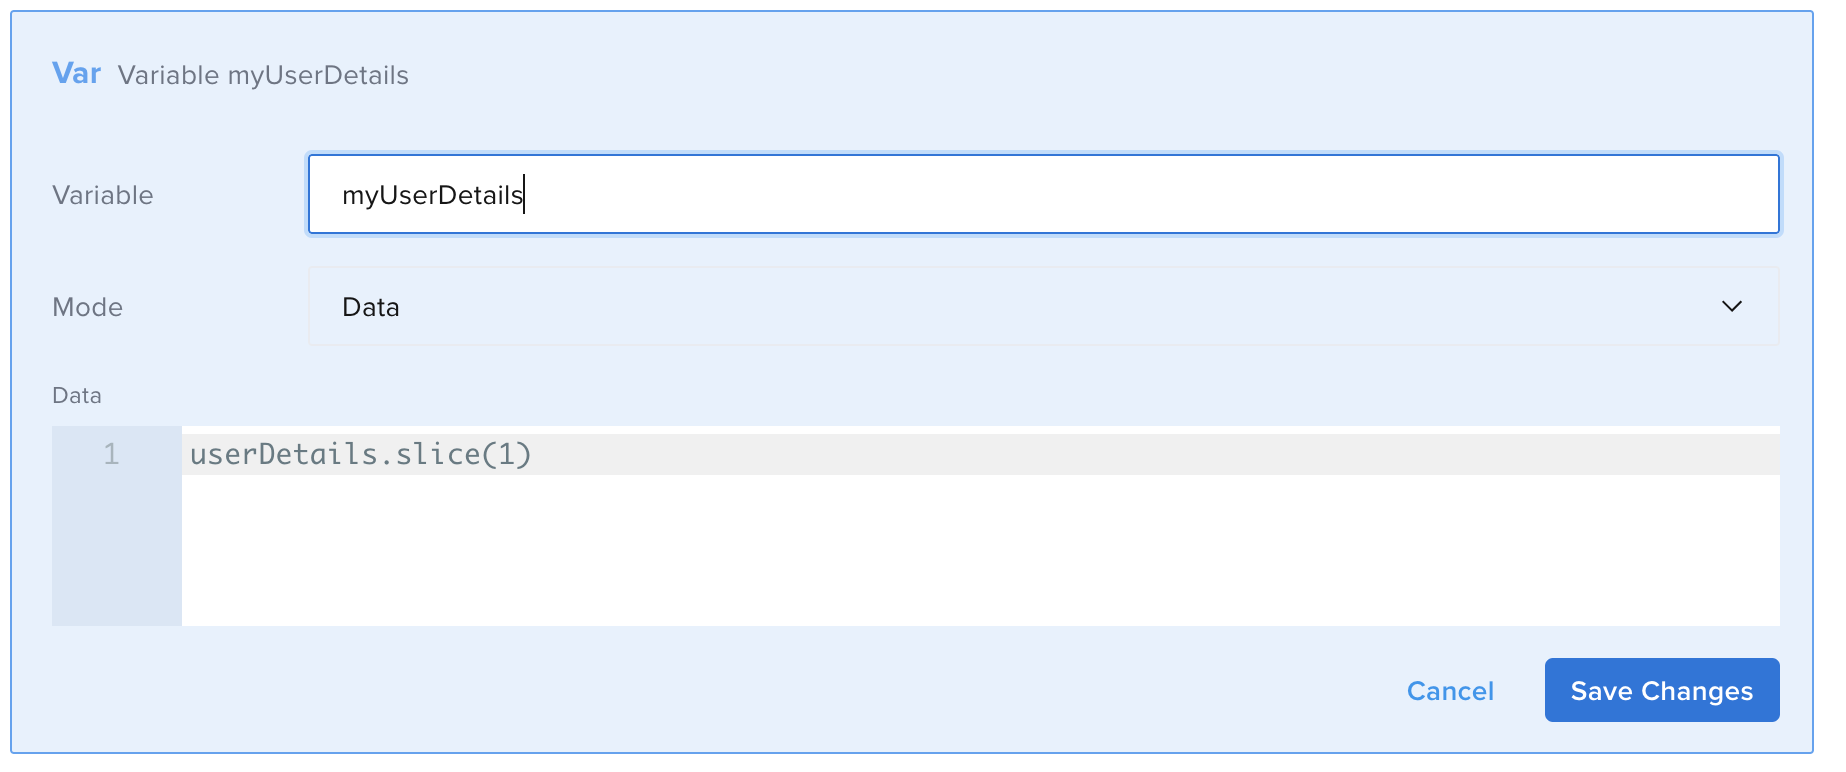
Removing the Header
The example file contains a header that you need to remove so that the test will contain only valid data. To remove the header:
Add the Set(variable) component:
- Variable - for example
myUserDetails - Mode - Data
- Data -
userDetails.slice(1)
userDetails is the Variable name you assign in the first Set(variable)
Cycling the Array
Parsing the file produces an array of items. You can use the pick(n) functionality to create a random subset of the array.
- Add the Each component.
- In the Expression field, enter
<variable_name>.

(Optional) Saving the Value in a Variable
Optionally, you can save each value in a variable, in this way, you can assign the variable name you prefer. For this step, you need to separate every key/value pair in the row so that you can later add them in the right position. To do so, you need to identify each column in the row by its index. The first column has an index value of 0, the second column has an index of 1, and so forth.
As a child component, add the Set(variable) component:
- Variable - for example
userId - Mode -
String - Value -
${_1[0]}
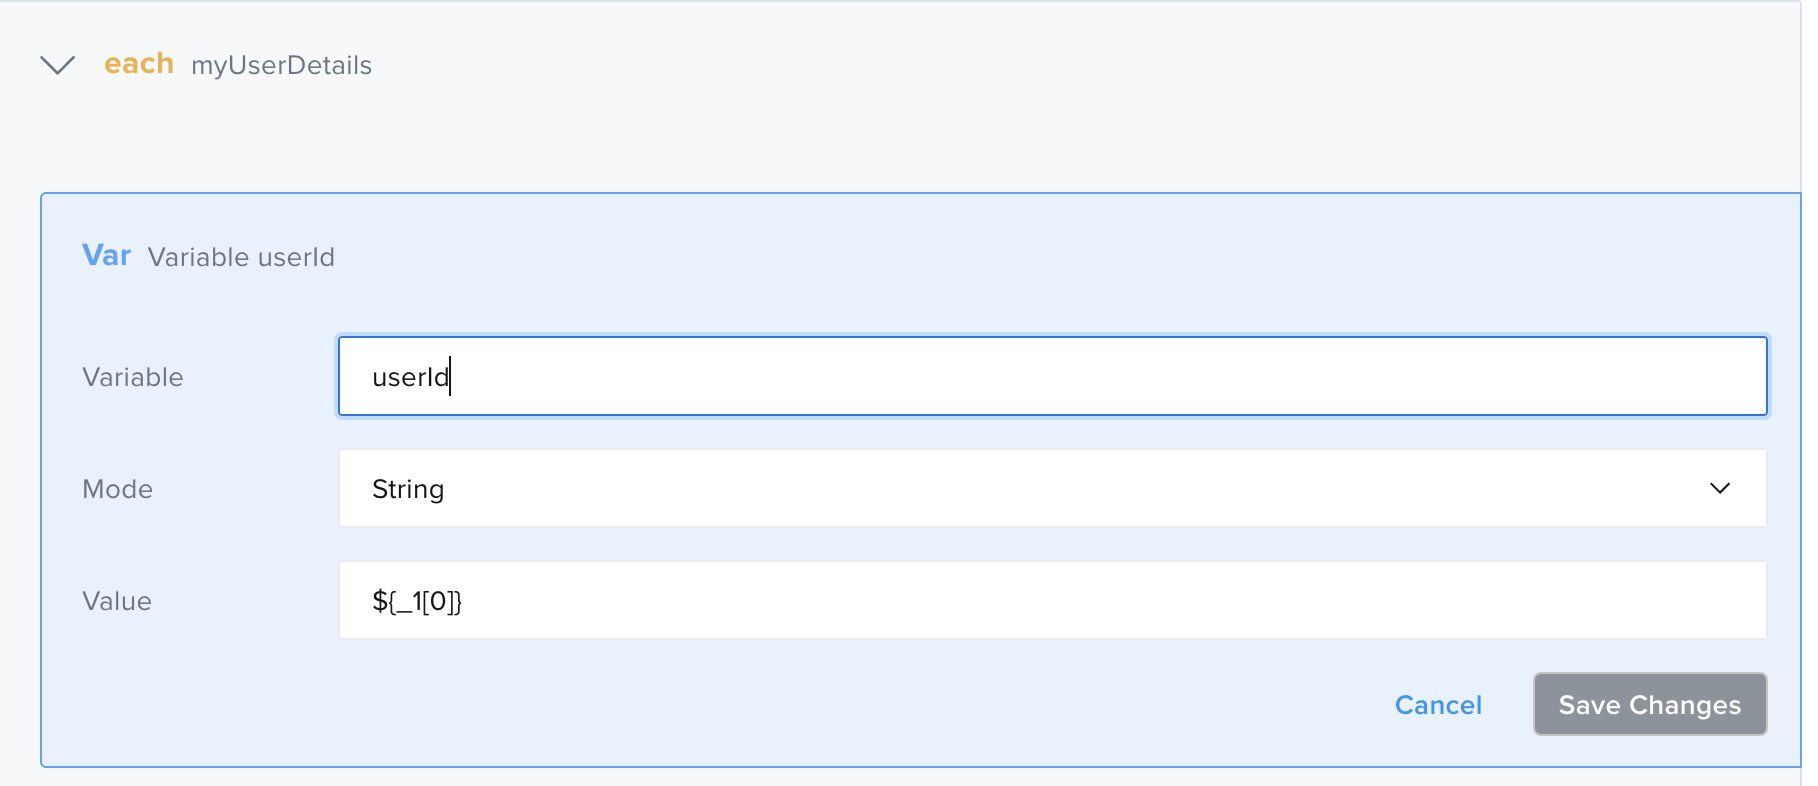
This example saves the userId. If you want to save every value in a variable, you need to repeat the step for all the columns.
Adding the Request
You can add the request to the account endpoint by adding all the values in the request body.
- Add the POST component:
- URL - for example
https://eovt6kylqex64iz.m.pipedream.net/account - Variable - for example
userDetailsPayload
- URL - for example
- Save Changes.
- Add a Request Body as child component:
- Content-Type -
application/json - Body -
The above Body is valid if you do not save the values as variables. If you have saved the values as variables you need to replace all the values with the corresponding Variable name you used (such as the{
"userID": "${_1[0]}",
"lastName": "${_1[1]}",
"DOB": "${_1[2]}",
"address": "${_1[3]}",
"city": "${_1[4]}",
"state": "${_1[5]}",
"country": "${_1[6]}",
"profession": "${_1[7]}",
"email": "${_1[8]}",
"phone": "${_1[9]}"
}userIdin this example). - Content-Type -
- Click Save Changes.

Now you can proceed to test the response payload from that call.
The following example illustrates the response payload in Code view:
- id: set
var: userDetails
mode: object
object: DS.loadTextFile('users.csv')
- id: parse
var: userDetails
adapter: csv
- id: set
var: myUserDetails
mode: object
object: userDetails.slice(1)
- id: each
children:
- id: post
children:
- id: body
contentType: application/json
content: |-
 {
   "userID": "${_1[0]}",
   "lastName": "${_1[1]}",
   "DOB": "${_1[2]}",
   "address": "${_1[3]}",
   "city": "${_1[4]}",
   "state": "${_1[5]}",
   "country": "${_1[6]}",
   "profession": "${_1[7]}",
   "email": "${_1[8]}",
   "phone": "${_1[9]}"
 }
url: https://eovt6kylqex64iz.m.pipedream.net/account
var: userDetailsPayload
mode: json
expression: myUserDetails
The following example saves the values in variables:
- id: set
  var: userDetails
  mode: object
  object: DS.loadTextFile('users.csv')
- id: parse
  var: userDetails
  adapter: csv
- id: set
  var: myUserDetails
  mode: object
  object: userDetails.slice(1)
- id: each
  children:
    - id: set
      var: userId
      mode: string
      value: ${_1[0]}
    - id: set
      var: firstName
      mode: string
      value: ${_1[1]}
    - id: set
      var: lastName
      mode: string
      value: ${_1[2]}
    - id: set
      var: DOB
      mode: string
      value: ${_1[3]}
    - id: set
      var: address
      mode: string
      value: ${_1[4]}
    - id: set
      var: city
      mode: string
      value: ${_1[5]}
    - id: set
      var: state
      mode: string
      value: ${_1[6]}
    - id: set
      var: profession
      mode: string
      value: ${_1[7]}
    - id: set
      var: email
      mode: string
      value: ${_1[8]}
    - id: set
      var: phone
      mode: string
      value: ${_1[9]}
    - id: post
      children:
        - id: body
          contentType: application/json
          content: |-
            {
                "userID": "${userId}",
                "lastName": "${firstName}",
                "DOB": "${lastName}",
                "address": "${address}",
                "city": "${city}",
                "state": "${state}",
                "country": "${country}",
                "profession": "${profession}",
                "email": "${email}
                "phone": "${phone}"
            }
      url: https://eovt6kylqex64iz.m.pipedream.net/account
      var: userDetailsPayload
      mode: json
  expression: myUserDetails
Comparing the Response to a File
For this last example, consider a case where you need to compare the response from a call to a "template" to verify that they are the same. You can save the template in the Vault Drive and compare it with the response.
Step 1: Uploading the File in Vault Drive
First, upload file in the Vault. You can follow the same steps as in the first example, but this time you will use the following payload, saved as user.json:
{
    "userID": "3618245e-8c91-4ffd-8309-ffeb68f45ff8",
    "firstName": "Barry",
    "lastName": "O'Connell",
    "DOB": "19780806",
    "address": "6831 Wilfrid Common",
    "city": "Waukee",
    "state": "Iowa",
    "country": "United States",
    "profession": "chemist",
    "email": "barry.oconnel@sauer.name",
    "phone": "016977 7695"
}
Step 2: Creating the Test
You can follow the same steps as in the previous example
Step 3: Writing the Test
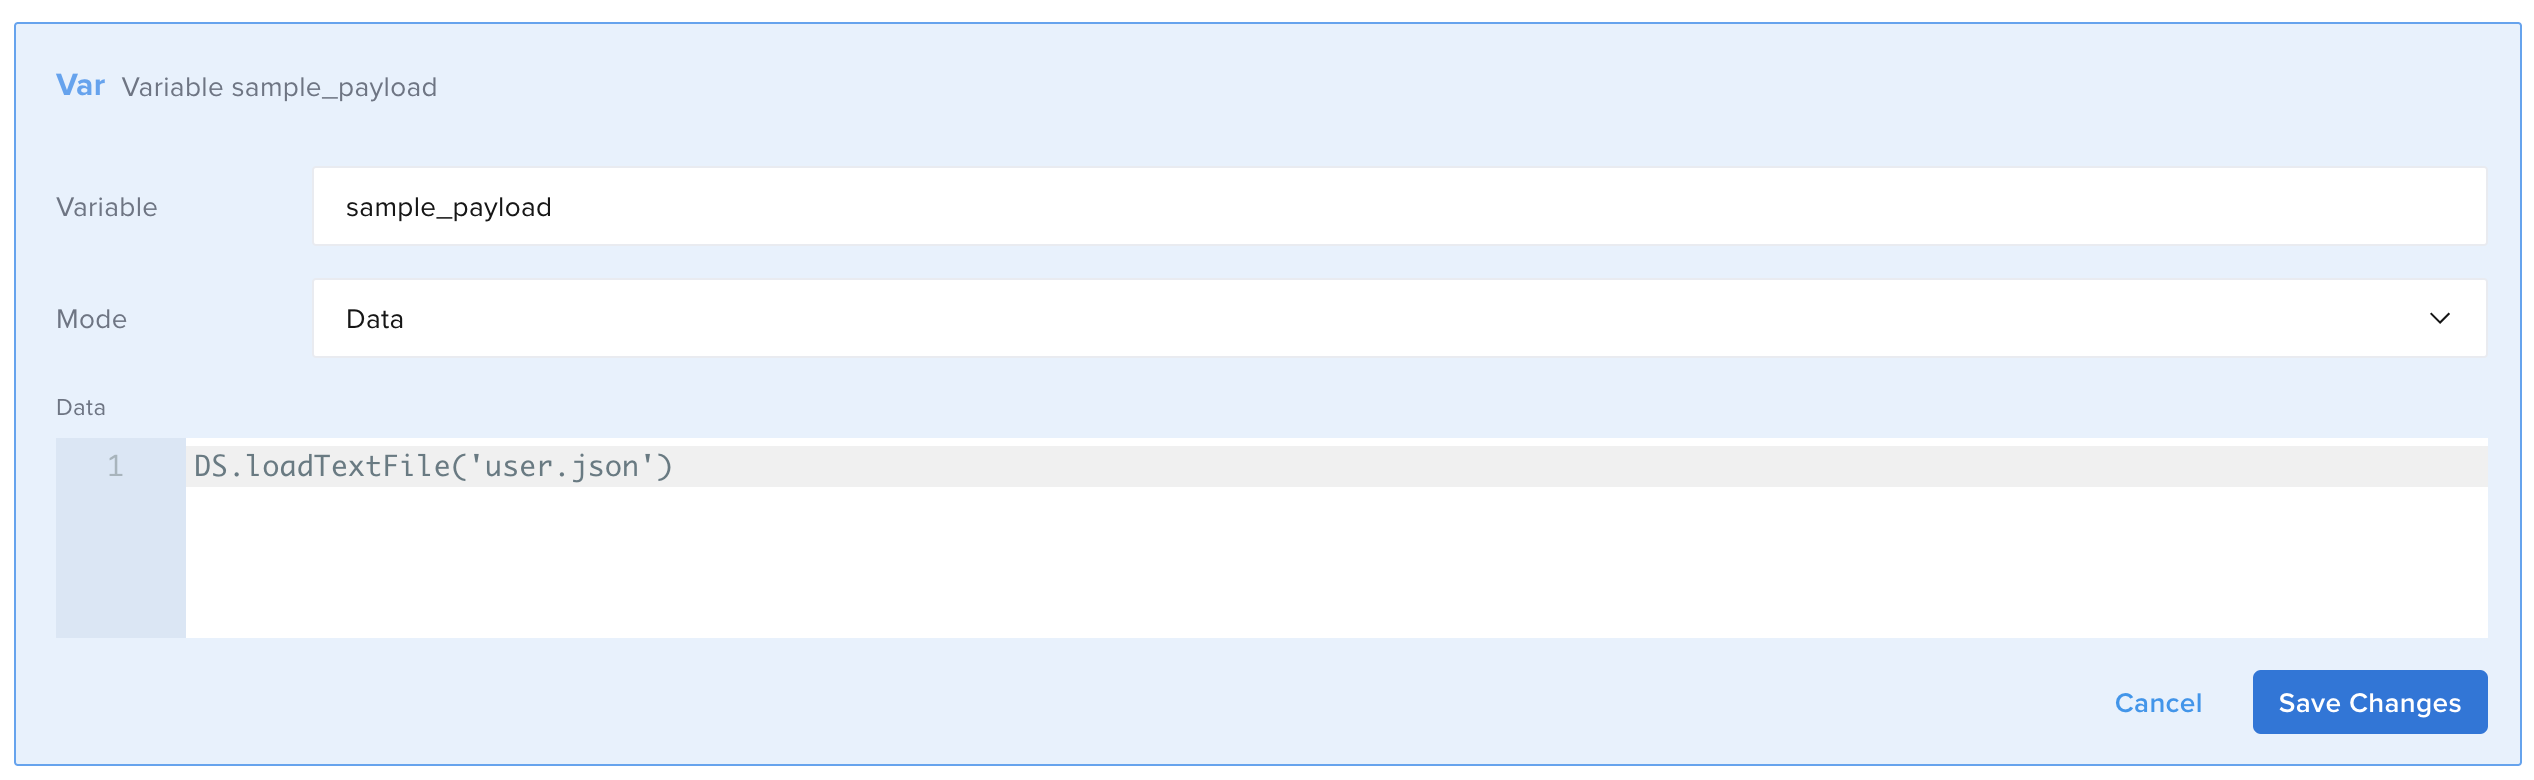
Retrieving the File From the Drive
- Add the File DataSource.
- Select the file you uploaded in the Drive.
- Enter the Variable, then Save Changes.
Parsing the File
The next step is parsing the file to let the system know the type of file you are working with.
Add the Parse component:
- The Variable must match the name you entered as a Variable in the previous step.
- The Adapter must match the type of file you have uploaded. In our example, it's a .json file.

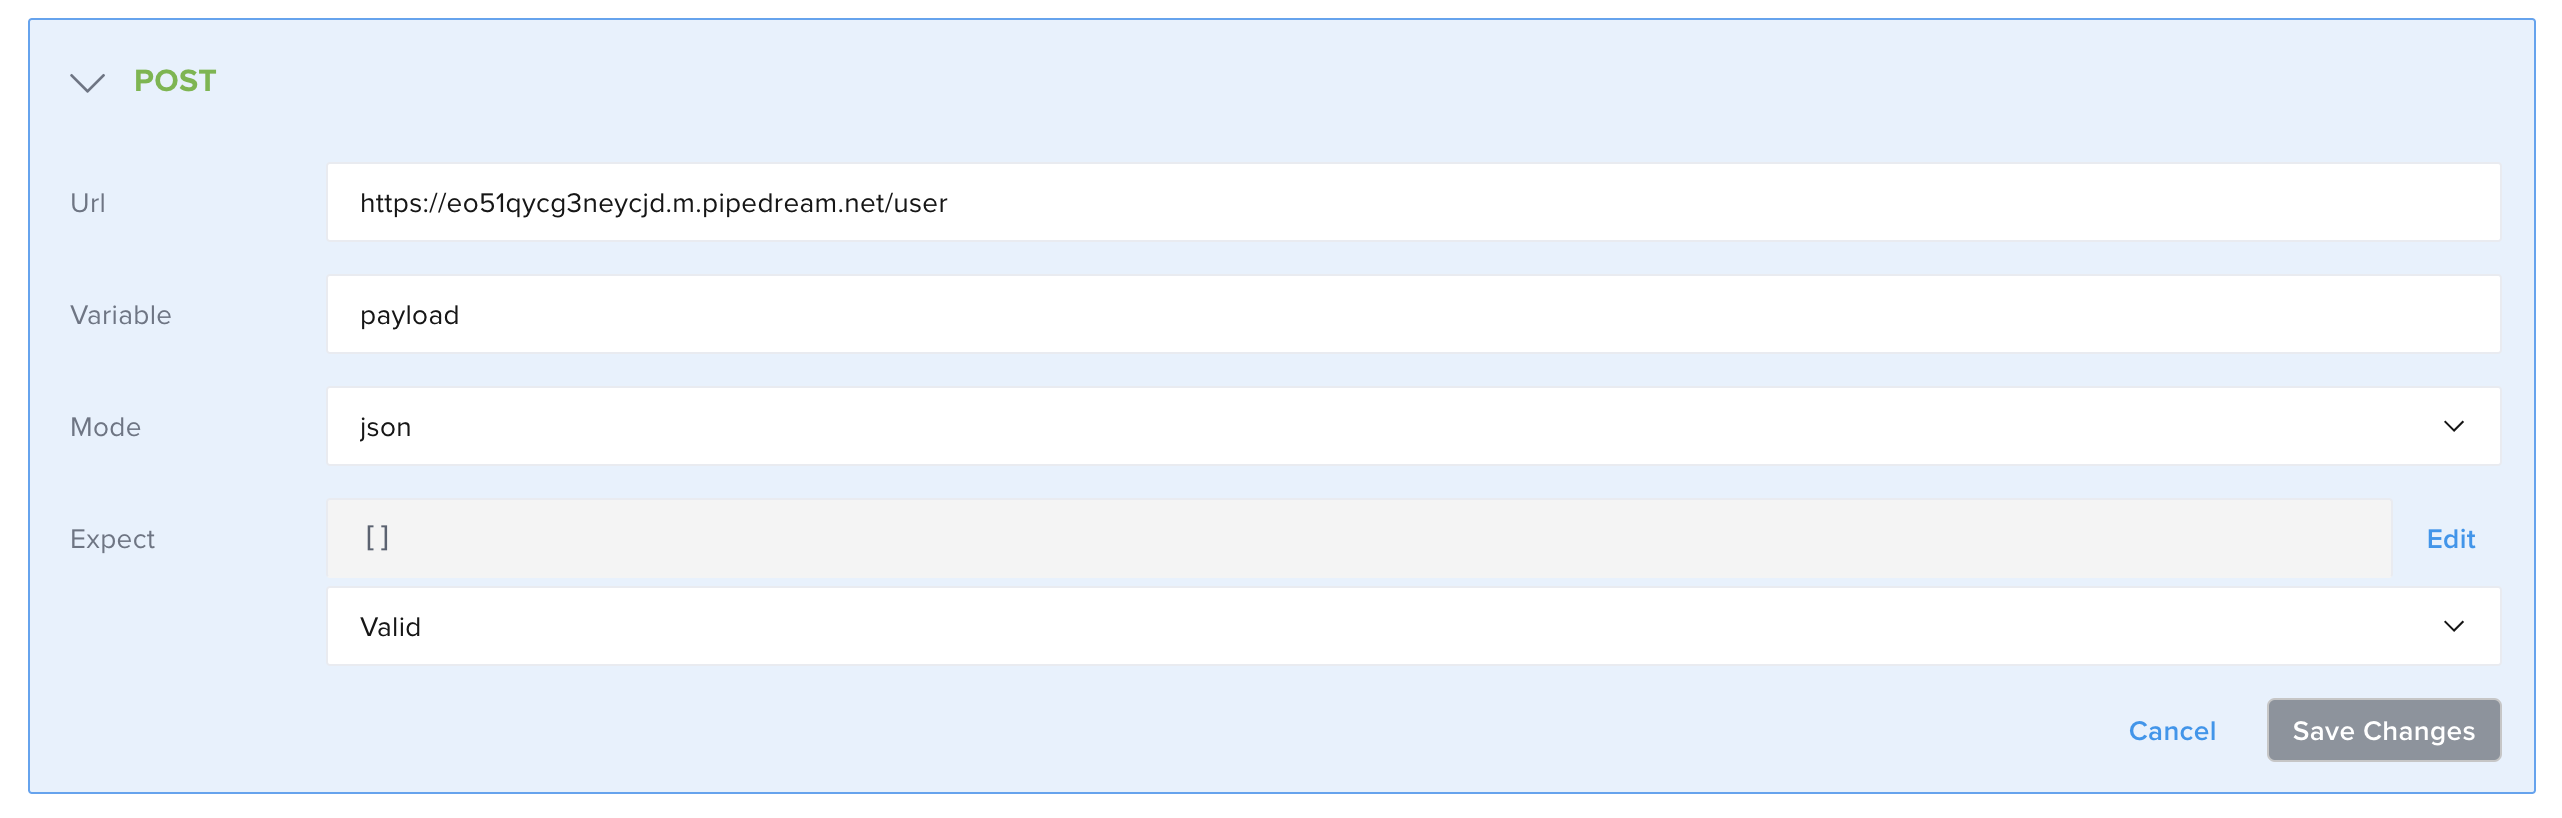
Adding the Request
Add the request to the endpoint you want to compare the file with.
- Add the POST component:
- URL - for example
https://eo51qycg3neycjd.m.pipedream.net/user - Variable - for example
payload - Mode - for example
json
- URL - for example
- Save Changes.
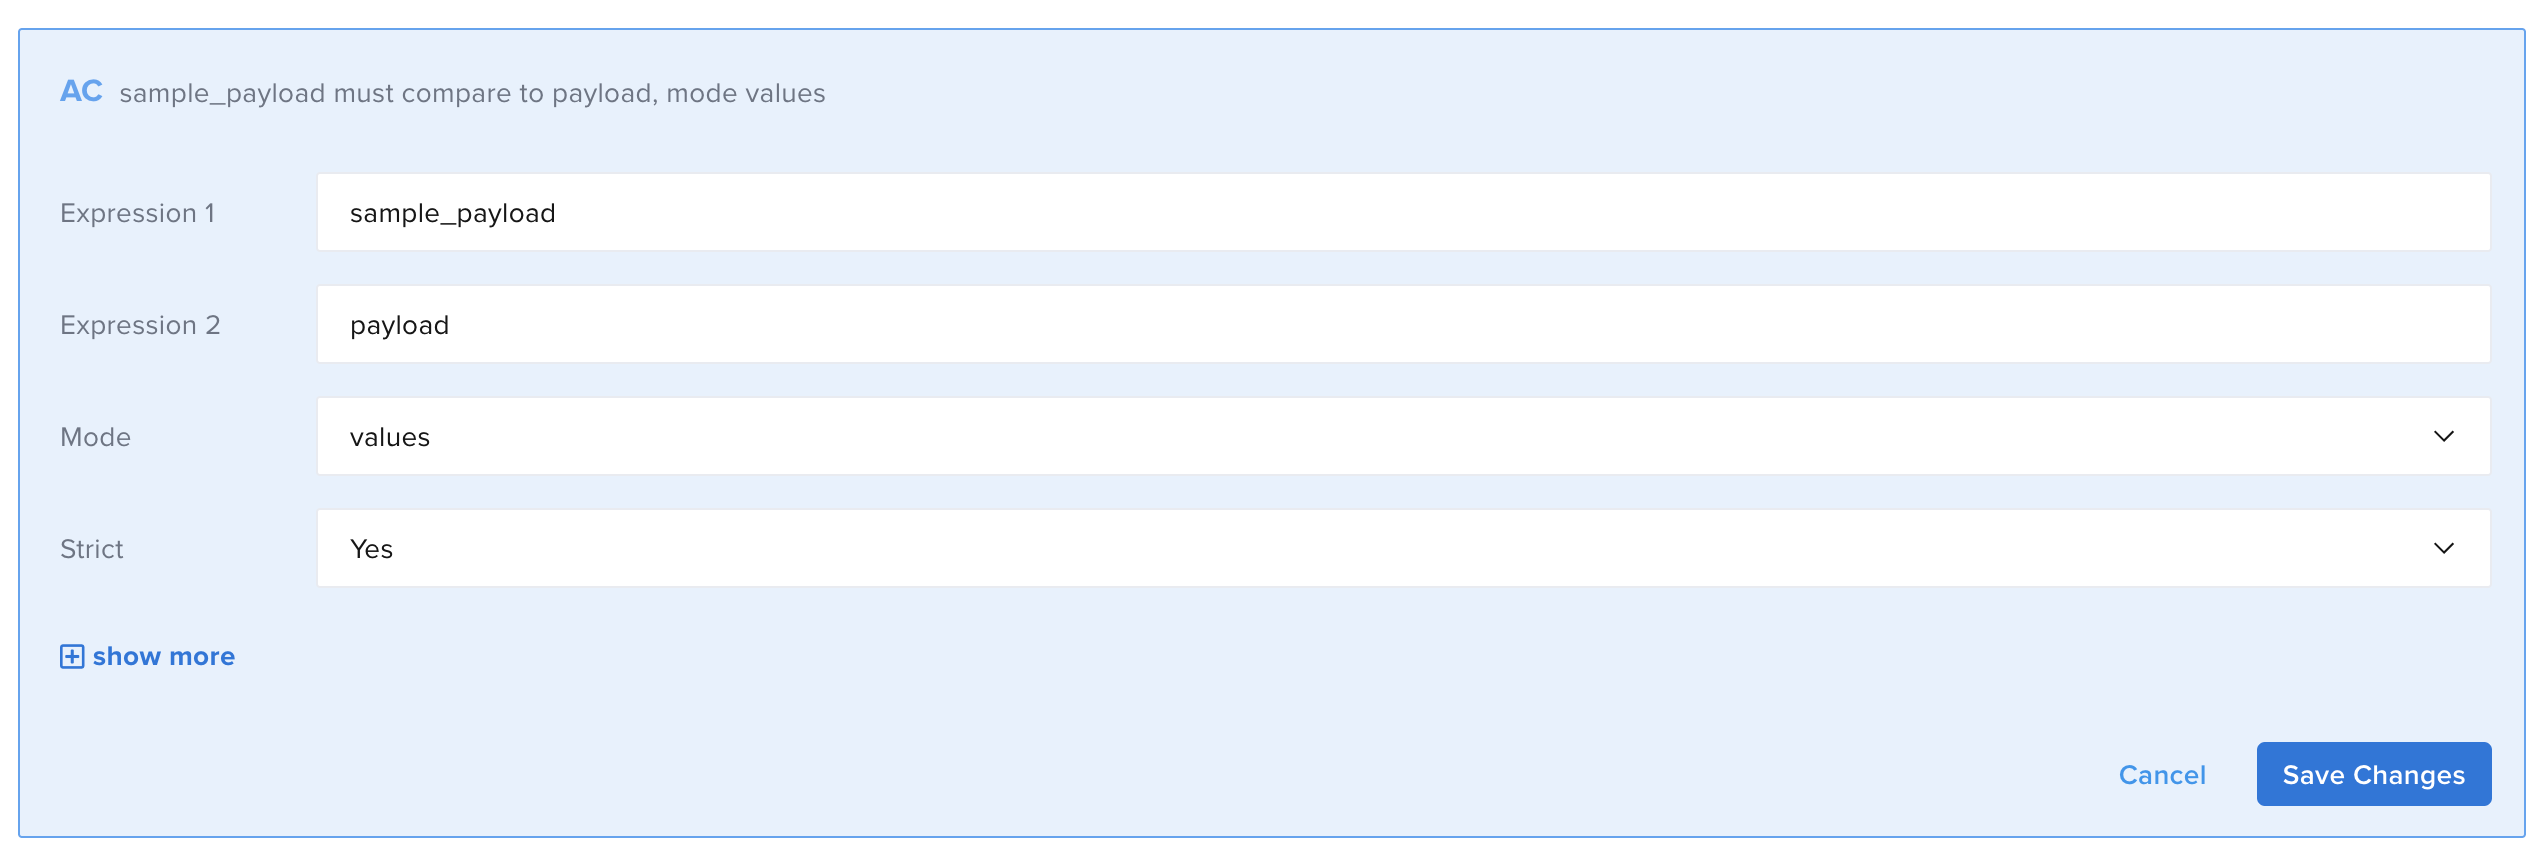
Comparing the File to the Response
Next, you can compare the file to the response using the Assert compares component.
-
Add the Assert Compares component.
- Expression 1 - for example
sample_payload - Expression 2 - for example
payload - Mode - for example
structure - Strict - for example
No
In Expression 1 and Expression 2, enter the variable names you have entered for the file and the call. Mode
structuremeans you will compare the JSON structure of the template and the response. Set strict toYesif you want to include data types in the comparison. - Expression 1 - for example
-
Add the Assert Compares component and set Mode to
valuesto compare the values in the file and the ones in the call.- Expression 1 - for example
sample_payload - Expression 2 - for example
payload - Mode - for example
value - Strict - for example
No
- Expression 1 - for example
Now you can proceed with your test.
The final result of the test looks like this:
- id: set
  var: sample_payload
  mode: object
  object: DS.loadTextFile('user.json')
- id: parse
  var: sample_payload
  adapter: json
- id: post
  children: []
  url: https://eo51qycg3neycjd.m.pipedream.net/user
  var: payload
  mode: json
- id: assert-compares
  expression1: payload
  expression2: sample_payload
  mode: structure
  strict: "true"
- id: assert-compares
  expression1: sample_payload
  expression2: payload
  mode: values
  strict: "true"
When you need to compare a string such as an Authorization token or an ID (not necessarily from a file), you choose text Mode.